Setting up the Agent for J2EE/JMX (SAP NetWeaver)
The following guide describes how to install an agent in an AE system in which authentication is not used. Additional installation steps are required before the agent can be started and used, if you intend to use one of the available authentication methods. More detailed information is provided in the document Advanced Security.
The agent creates an additional log file in SAP format. This file is automatically stored in the agent's subfolder "log" in the installation directory. It can easily be processed with SAP Tools.
Setting up the J2EE/JMX agent is only possible with a SAP NetWeaver Composition Environment 7.1 Application Server.
Supplied files
The files that belong to the J2EE/JMX agent are stored in the directory IMAGE:AGENTS\JMX.
Procedure

|
1. |
Setting up the JMX Agent |
- Host
- Copy the file ucxjjmx.sca to the input directory of the Java Support Package Manager (for example C:\usr\sap\trans\EPS\in).
- Start the Java Support Package Manager (JSPM) and log on to the JEE Engine.
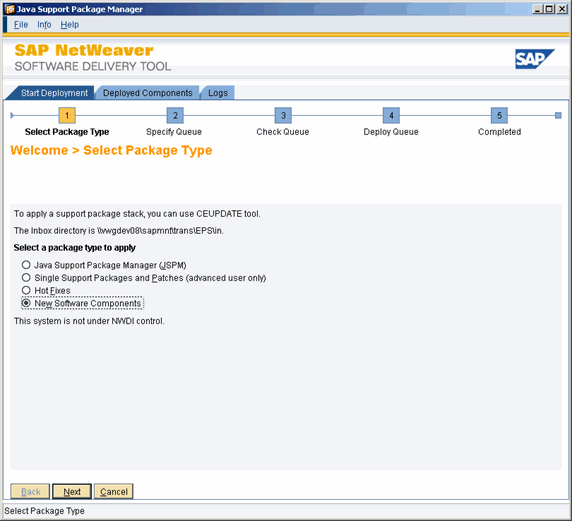
- JMX agent new installation: In step 1 of Start Deployment, select "New Software Components" under Select Package Type. Click Next.

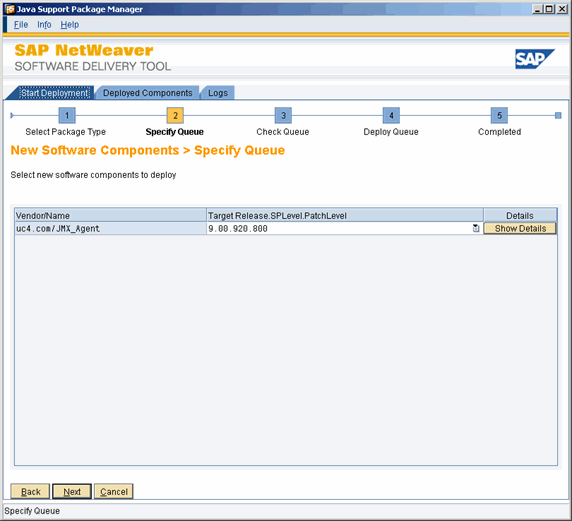
- The JMX agent is provided in the input folder and displayed as a new software component under Specify Queue. Select the agent and click Next.
- In the next step, ensure that the JMX agent is in the queue. If it is, click Start to initiate the setup procedure.
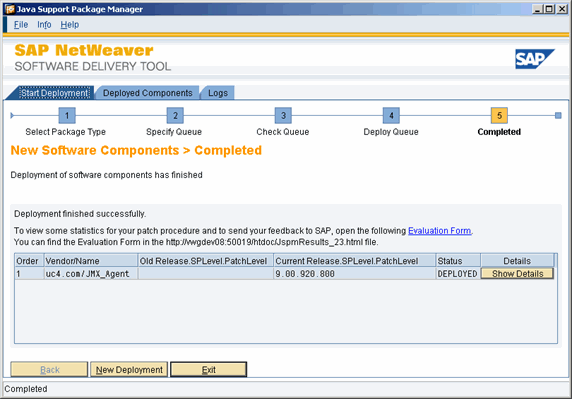
- When this process is complete, click Exit to end the JSPM.


|
2. |
Removing the JMX Agent
|
- Host
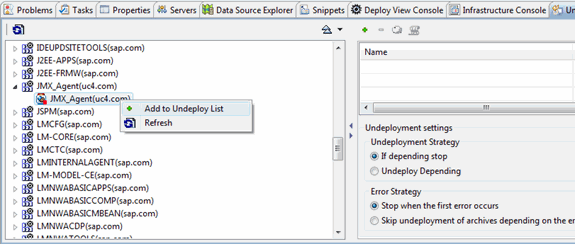
- Use the program Undeploy View in the SAP Netweaver Developer Studio to remove the JMX agent.
- Select the software component JMX_Agent (automic.com) from the list and click Add to Undeploy List in the menu that pops up.

- Now execute the Undeploy function in order to remove the agent.

|
3.
|
Using the Web interface |
- This interface can be used to adjust the JMX agent to your system environment. The following are particularly important:
- Agent name
- Name of the computer on which a communication process is available
- Port number of a communication process

|
4.
|
Important notes for creating jobs
|
- Host
- Select JNDI in the JMX tab of the Job object. Enter "jmx" as the object name.


