Loading the AE Database
The following steps will help you load the AE Database.
Notes:
-
PostgreSQL
-
To connect to the new database use the connect string format SQLDRIVERCONNECT=ODBCVAR=NNJNIORP,host=host01 port=5432 dbname=[database] user=[user name] password=[password] connect_timeout=10
The string after the comma is a standard PostgreSQL connection string.
-
When starting initial load, the utility shows a "DEADLOCK" error.
-
-
Once ILM has been activated, you cannot deactivate it. The ILM functionality can only be stopped. If ILM is stopped, no partition change or switch-out (MS SQL Server) is performed.
-
When using an Oracle database, make sure that there is only one Automation Engine schema within an Oracle instance used for ILM.
This page includes the following:
Installing the AE Database
-
Copy the files in order to load the database (Admin computer).
Windows
The files for the AE database are provided in IMAGE > DB folder. Copy the complete DB folder to the installation folder of the utilities. (in our case C:\AUTOMIC\UTILITIES\).
The DB directory must be stored at the location specified in the INI file parameter INPUT of the AE DB Load utility, which is set by default in the installation folder (in our case C:\AUTOMIC\UTILITIES\DB). For more information, see AE DB Load.
Example for Windows:
Utilities in C:\AUTOMIC\UTILITIES\BIN
Database files in C:\AUTOMIC\UTILITIES\DB
UNIX
The database files are included in the db.tar.gz archive located in the IMAGE > DB folder.
Use the following commands to unpack the archive:
gzip -d db.tar.gz or gunzip db.tar.gz
tar xvfo db.tar
(Linux: tar -zxvf db.tar.gz)
Copy the unpacked files to the defined directory.
-
Generate the database (Admin computer).
-
Run AE DB Load as administrator in order to load the database. Follow one of the three options below:
-
*G.EXE (
ucybdbldg.exe): regular utility start (G stands for GUI).cmd="javaw" -Djava.library.path=..\libraries -jar -cp .;.\UC4LAF.jar UCYBDBAr.jar
-
*.EXE: program to which start parameters can be assigned for batch calls. For more information, see Start Parameters - Utilities.
Note: To run the utilities using an *.EXE file, you must have installed a 32-bit Microsoft Visual C-Runtime Library.
-
*.BAT: batch file for the utility.
As opposed to upgrade installations, new installations of AE DB Load do not display a mask in which you can select the agent authentication method. For more information, see Agent Authentication.
Start the program in batch mode using the -T (authentication method) and -K (company key) parameters in order to specify the authentication method.
-
-
Select the <DB directory>\DB\GENERAL\12.3\UC_UPD.TXT file.
-
A database scheme is created in the database, and the INITIAL and DEFAULT data are loaded.
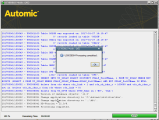
When you use *G.EXE, if the database has been generated successfully you will see the following:
When you use *.EXE or *.BAT, the program ends with a return code. You find detailed information to the return code in the log file.
-
-
Optionally, activate partitioning with ILM (admin computer). For more information, see ILM - Information Lifecycle Management.
Note: You can activate ILM either during a new installation, and upgrade or at any given point in time.
Potential Problems
-
MS SQL: The codepage is not converted correctly when the ODBC access is set up.
The database and the client use the same codepage. Therefore, you have to make sure that the code is NOT converted. To do so, do not select the checkbox Perform translation for character data when creating a new data source to the SQL Server.
-
DB Load may not be able to connect to the database if too many sessions are running simultaneously.
-
The DBLOAD GUI (*G.EXE) may not start if the cmd parameter in the INI file is not defined properly (
javaw.exelocation).
Related Files
The IMAGE:\DB\database\UC4 version directory includes several useful SQL script files for your database that can be also used.
-
DROP_ALL.SQL
Deletes all AE tables.
Use this SQL file when the installation could not complete successfully (for example, if there was not enough hard drive space). If not all tables could be created, this file deletes all tables that cause error messages. Check them or ignore them if no action is required.
-
UPD_STAT.SQL
Used for manual statistics updates.
Next step:
