Setting Up the Agent for J2EE/JMX (SAP NetWeaver)
The following document includes information about installing and configuring J2EE/JMX agents with a SAP NetWeaver ApplicationServer.
The agent creates an additional log file in SAP format. This file is automatically stored in the agent's sub-folder, named "log", in the installation directory. It can easily be processed with SAP Tools.
Setting up the J2EE/JMX agent is only possible with a SAP NetWeaver Composition Environment 7.1 Application Server.
Supplied Files
The files that belong to the J2EE/JMX agent are stored in the directory IMAGE:AGENTS\JMX.
Procedure
|
1. |
Setting up the JMX Agent |
- Host
- Copy the file ucxjjmx.sca to the input directory of the Java Support Package Manager (for example, C:\usr\sap\trans\EPS\in).
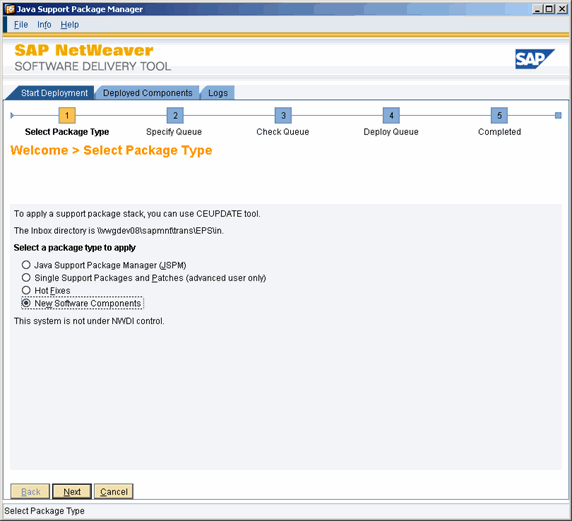
- Start the Java Support Package Manager (JSPM) and log on to the JEE Engine.
- JMX agent update installation: In step 1, "Select Package Type," select "Single Support Packages and Patches (advanced user only)."
Click Next.
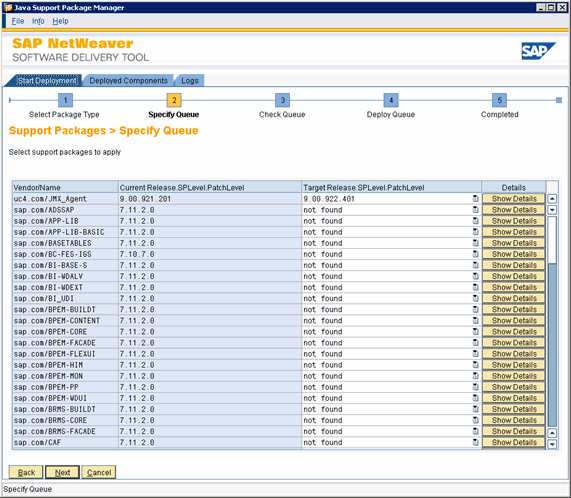
- In step 2, "Specify Queue", all available Support Packages are displayed. If a version number is displayed in the column "Target Release.SPLevel.PatchLevel", that indicates that a new component version is available in the input folder. "Not found" indicates that there is no new version in the directory.
Click Next.
- In the next step, you will verify that the JMX agent is in the queue. If it is, you can initiate the update procedure by clicking Start.
- When this process has been completed, click Exit to end the JSPM.
|
2.
|
Removing the JMX Agent
|
- Host
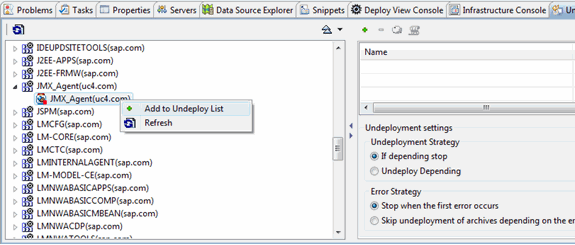
- Use the program "Undeploy View" from the SAP NetWeaver Developer Studio to remove the JMX agent.
- Select the software component JMX_agent (automic.com) from the list and click Add to Undeploy List in the context menu.
- Now execute the function Undeploy in order to remove the agent.
|
3.
|
Using the Web interface |
- This interface can be used to adjust the JMX agent to your system environment. The following are particularly important:
- Agent name
- Name of the computer on which a communication process is available
- Port number of a communication process
|
4.
|
Important notes for creating jobs
|
- Host
- Select "JNDI" in the JMX tab of the Job object. Enter the object name "jmx."