Setting Up the Agent for J2EE/JMX (IBM WebSphere) with SOAP Connector
This installation guide applies to WebSphere version 6.0 with activated administrative security.
The following guide describes how to install an agent in an AE system in which authentication is not used. Additional installation steps are required before the agent can be started and used if you intend to use one of the available authentication methods. More detailed information is provided in the document Advanced Security.

|
1. |
Setting up the JMX Agent
|
- Host
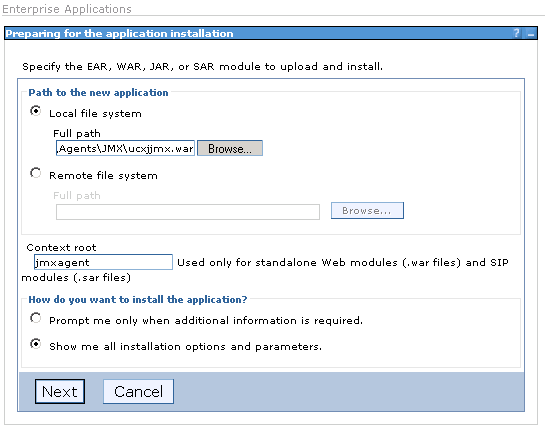
- Select the menu item Applications-> Install new application on the WebSphere interface.
- Enter the path to the file ucxjjmx.war in "Local file system." The "Context root" can be used to name the application.
- In the next window you can activate the option Generate standard connections or configure other settings.
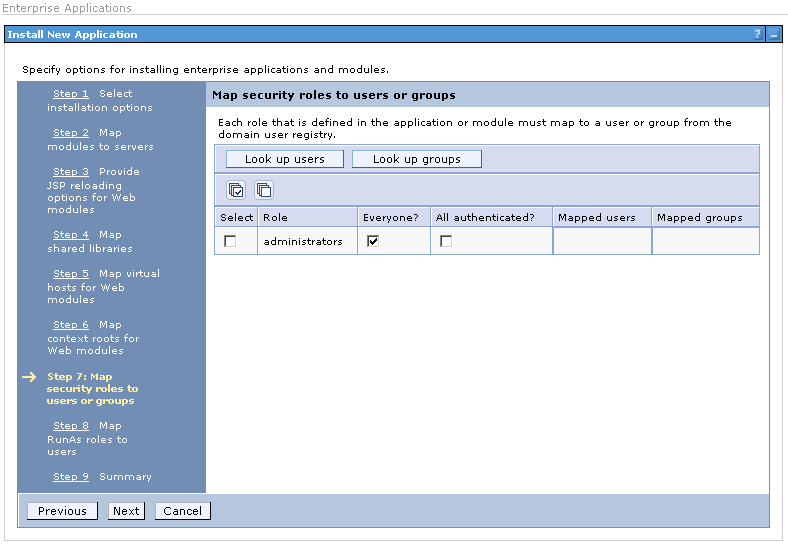
- Follow the installation procedure until the individual steps are displayed. Step 4 requires the selection of "Everyone?" in "administrators."
- When all six steps are completed, click Finish to complete the installation process. The log shows whether the installation was successful.
- Click Store in master , and then click Store.
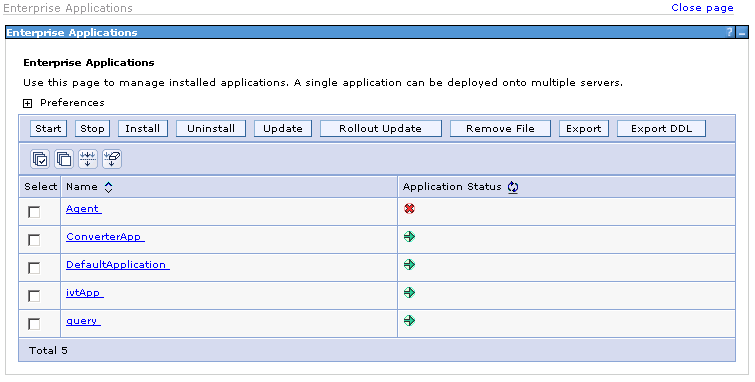
- Call the menu item Applications -> Enterprise applications. The list also includes the agent.

|
2.
|
Configuring the INI file
|
- Host
- Search for the file ucxjjmx.ini in the WebSphere folder.
- Open the INI file and append the new section [WEBSPHERE] with the following parameters:
[WEBSPHERE]
javax.net.ssl.trustStore=C:\DummyClientTrustFile.jks
javax.net.ssl.keyStore=C:\DummyClientKeyFile.jks
- Adjust the values for the javax.* properties according to your environment.
- Store and close the INI file.
This installation step is optional as of Websphere version 7 optional. Note when you skip this step that you must enter the value "webshere soap" in the Initial Context Factory field in the JMX tab of the Job object.

|
3.
|
Starting the Agent
|
- Host
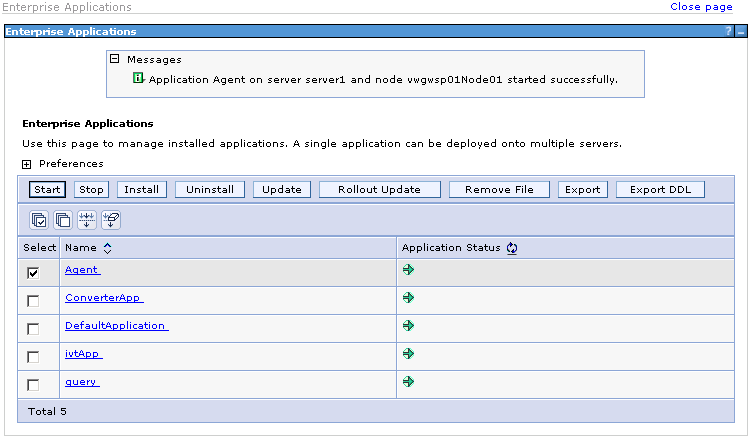
- Start the agent application via the WebSphere console.

|
4.
|
Using the Web configuration interface |
- Adjust the settings of the JMX agents to your system environment. The following are particularly important:
- Agent name
- Name of the computer on which a communication process is available
- Port number of a communication process
-
Note that the configuration file will be overwritten when you deploy the WAR file again. As a result you will have to redefine your configuration settings. Instead, you can also save a copy of your configuration file (INI file) before you start the deployment and copy it to the folder that includes the after the deployment has taken place.
- Start the agent.
- Click the link View log files and select the most current log file (it has the number "00"). The section [WEBSPHERE] must be included in the log file.

|
5.
|
Important notes for the creation of jobs |
- Host
- The agent now uses the SOAP Connector. Therefore, select "Remote Java VM" in the Job object's JMX tab.
- Enter the term "websphere" in the field Initial Context Factory:
-
 Retrieve the port number as follows: Click Servers -> Application server, and then click the name of your Server. Select transmittals -> Ports. Use the port number shown here in the URL. The default value of the SOAP port is 8880.
- Enter three passwords separated by commas in the job's Login object.
- The 1st is the user password.
- The 2nd password is the keystore password.
- The 3rd password is the truststore password.


 Retrieve the port number as follows: Click Servers -> Application server, and then click the name of your Server. Select transmittals -> Ports. Use the port number shown here in the URL. The default value of the SOAP port is 8880.