Inserting and Deleting Tasks
This topic describes the options you have to insert and to delete tasks in a workflow.
Using the Objects Pane
- Click
 on the toolbar to open the Objects pane.
 - Search for the object you want to insert.
-
Select the object and drag and drop it anywhere on the editor.
Once on the editor, the objects turn into task boxes that you can link to each other.

You can also select multiple objects and drag and drop them in bulk onto the editor.
Right-Clicking on the Editor
-
Right-click on any empty space on the editor.
The following context menu is displayed:
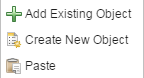
-
Select Insert existing object:

- Click the arrow next to the home icon to open a dropdown list that replicates your folder structure in the Process Assembly perspective.
- Select a folder; if it has subfolders, a new dropdown list displays them.
-
The objects contained in the subfolder are displayed in the hit list below.
Select the one or more objects.
-
Click the Insert as External Dependency checkbox if you want the task to be included as an external task.
For details on the implications of external dependencies in workflows click here.
- Click OK.


There are two ways to remove a task from the workflow:
- Select a task and hit the DEL button on your keyboard.
- Right-click the task and select Delete from the context menu.
When the tasks that should be deleted are linked to other tasks, the connecting lines will also be removed.
The objects are only removed from the workflow but not from the client.
The START and END object are always available and cannot be deleted.