Getting Data, Updating the Database with it and Sending a Report Once a Month
On the last day of every month an external system writes new data to the datawarehouse at your company. You need to retrieve this data to update a database with it. A specific string is always present in the data written by the external system, namely VVIEINTEGRATE02A.
Once the two tasks have executed successfully (get data and update database), an email should be sent to the FINANCE department providing specific details on the operation and containing attachments with the reports.
What Will You Learn?
How a Workflow orchestrates the processing and execution of a number of objects.
How to create a Calendar to select the last day of every month and apply it to a Workflow as condition for its execution.
How to add tasks (in our case, Job objects) to a Workflow.
How to create Filter objects to retrieve specific strings (if available) from the output files of Jobs.
How to send notifications depending on the absence of certain string in the Job output files (reports, logs, etc.).
How to define a Schedule to automate the execution of the Workflow at regular, predefined intervals.
Overview
To cover this scenario you need three Job objects orchestrated by a Workflow as well as a Filter object and a Notification object to automate the sending of the email with the appropriate content and attachments.
There are various methods to define the recurrence (once a month) of this process:
- Executing the Workflow recursively.
-
Via a Schedule object.
In this case, again, you have to:
- Define the periodicity via the Schedule's Period Duration.
- Assign a Calendar to the Workflow in the Schedule.
The following list provides an overview of the steps you must carry out:
- Define the three jobs
- Create the Notification object
- Create the FILTER.OUTPUT.DHW Filter object
- Assign the Filter object to the SEND_REPORTS_TO_FINANCE Job
- Create the Workflow and insert the Jobs
- Create a Calendar with an End of Month Calendar Event
-
Define the periodicity with which this process will take place
The following three jobs are involved in this use case:
- GET_DATA_FROM_DWH to retrieve the data from a given location in your datawarehouse.
- UPDATE_DWH to update the target database.
- SEND_REPORTS_TO_FINANCE to send an email with the reports.
This use case does not deal with the scripting that is necessary for these Jobs to execute properly but with the dependencies among the various objects that are involved in the whole process. The successful execution of the first two jobs depends on the scripts on their Process pages. We will not deal with them but we will take a closer look at the third one.
The SEND_REPORTS_TO_FINANCE Job object collects the results of the previous Jobs and sends the notification to the FINANCE department. For it to execute properly, you must create first:
- the Notification object
- a Filter object
Create the Notification object
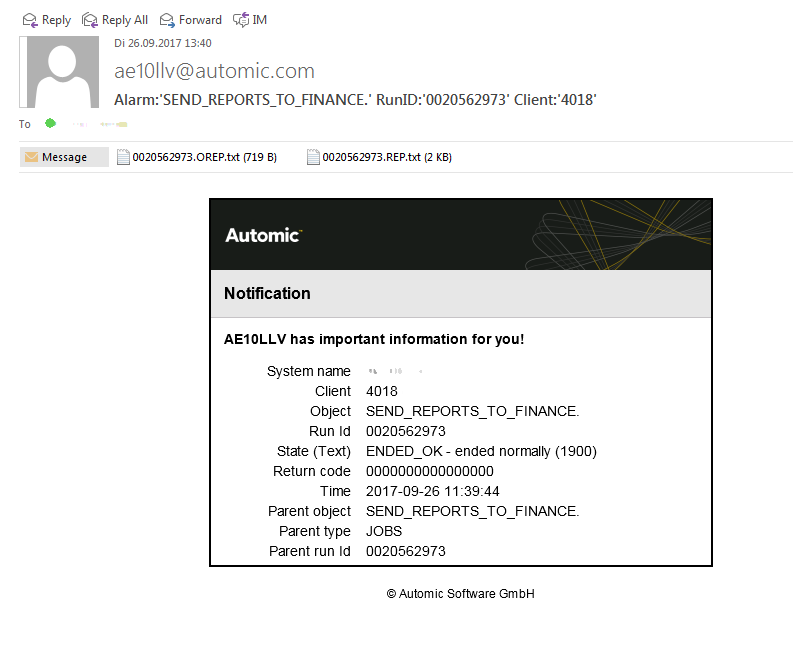
We want the Finance department to receive the email below every month after the records have been retrieved and the database has been updated.
The body of the email is determined by this Notification object. The attached files are a result of the Filter object assigned to the Job object.
- In the Process Assembly perspective navigate to the folder in which you want to create the Notification object, click Add Object and select Notification > MAIL Notification. Call it CALL.UC.MAIL.HTML.DWH.1.
-
Define the Recipients of the notifications.
- You can select a user or a user group from the Recipients dropdown list. Either type the name of the user or select it from the list. You can also enter an email address as recipient.
- We will ignore the Calendar option for this use case.
- Click Add to assign this combination of recipients and dates. You can add as many combinations as you need.
-
The Subject and body of the text in the Message section are predefined. However, you can change them.
- Type the Subject or click
 to insert a variable. If you leave it empty, an email subject is created automatically, which consists of Notification object name+RunID+Client. Type Workflow use case.
 -
Enter the body of the Message. You can use variables here as well. There is no limit as to the number of characters you can use.
Click here to see the code that results in the message shown above.
- Type the Subject or click
-
Again, depending on the selected template, the Settings of the notification are predefined, but you can also change them:
- The Priority serves for information purposes only. It is displayed in the emails and in the notification bar messages.
-
In Type select Email.
- In Attach Reports you enter the RunID of the task that triggered the notification to attach its reports to the email. We will use a variable here that retrieves the RunID of the task that triggers the execution of the Notification object, which in this case is the SEND_REPORTS_TO_FINANCE Job.
- Activate Source: Database; this is where the reports are retrieved from.
- Save the Notification object.
Create the FILTER.OUTPUT.DHW Filter object
Filter objects allow you to scan the content of Automation Engine output files such as log files, reports, etc. and search for specific strings. You can then apply those filters to Job objects and trigger actions depending on the contents of the output files.
The reports created by the UPDATE_DWH Job always contain the string VVIEINTEGRATE02A when they finish successfully. We can create a Filter object based on this to trigger the next action (sending the email).
- In the Process Assembly perspective navigate to the folder in which you want to create the Filter object, click Add Object and select Filter.
- In the Report section on the Filter page select Report (REP) from the Report Type list.
- Select the Contains operator.
-
Enter the search string. This field is not case-sensitive.
- Click Add.
A search filter statement appears under the input fields:
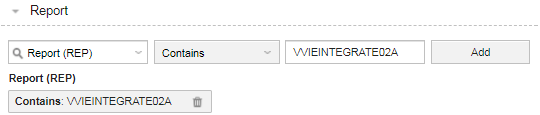
Only statements under the input fields are used in the final object, so make sure to click Add.
- Save the Filter object.
You must now assign this Filter to the Job that will trigger the sending of emails based on the presence of this string in the Reports created by the Update Job.
Assign the Filter object to the SEND_REPORTS_TO_FINANCE Job
You do this on the Output-Scan page. You also define here the values that it should return as well as a user-friendly translation of those values.
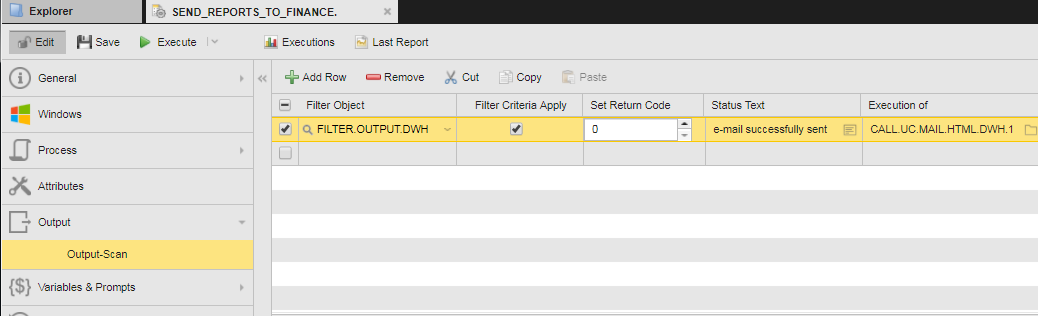
- Open the SEND_REPORTS_TO_FINANCE Job and expand the Output page to select Output-Scan.
- Click Add row and select FILTER.OUTPUT.DHW to assign it to the job.
- Click anywhere on the Filter Criteria Apply cell to activate it.
- The Set Return Code spinner is automatically activated. Leave 0 here.
- In Status Text you can enter any user-friendly text that helps users understand the return code. This text is then visible in the Status column of the Tasks list. We will leave it empty for this use case.
- In Execution of select the executable object that will be processed as a reaction of the search result provided by the Filter object. In this case, this is our Notification object, that is, CALL.UC.MAIL.HTML.DWH.1.
- Save the Job.
This is how it looks like:
Create the Workflow and insert the Jobs
The SEND_REPORTS_TO_FINANCE Job is now configured; we assume here that GET_DATA_FROM_DWH and JOBP.UC.UPDATE.DATA.1 are also finished and available.
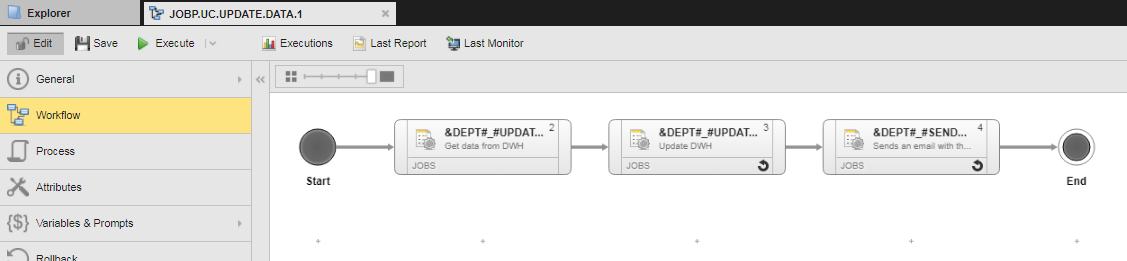
- In the Process Assembly perspective navigate to the folder in which you want to create the Workflow object, click Add Object, select Workflow > STANDARD and call the new Workflow JOBP.UC.UPDATE.DATA.1.
- On the Workflow page click the Objects button to open a pane on the right hand side where you can search for the Jobs you want to insert.
- Once you have found the GET_DATA_FROM_DWH Job object, drag and drop it onto the editor right after the Start node.
- Do the same for UPDATE_DWH. Drop it to the right of GET_DATA_FROM_DWH.
- Repeat the steps for SEND_REPORTS_TO_FINANCE and drop it to the right of GET_DATA_FROM_DWH.
-
Connect the three objects and the Start and End nodes as follows:

- Save the Workflow.
Create a Calendar with an End of Month Calendar Event
You will need a Calendar object for the next step (defining the periodicity of the Workflow execution). The Calendar should select each end of month.
- In the Process Assembly perspective navigate to the folder in which you want to create the Calendar object, click Add Object select Calendar; we will call it CALE_END_OF_MONTH.
-
On the Calendar page, the days of the year that lie in the past are grayed out. This is a mere visual help.
Click the
 button.
 -
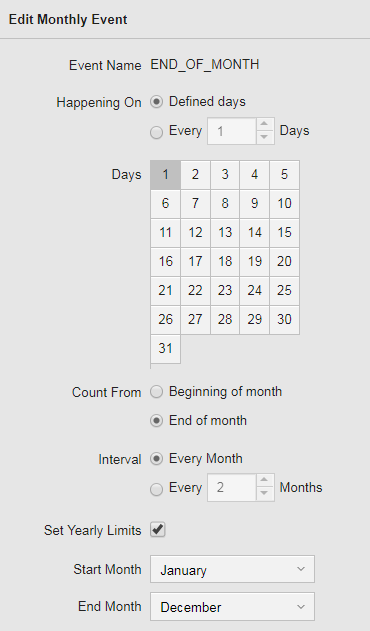
From the drop-down menu select Monthly. The Edit Monthly Event pane is displayed:
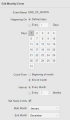
- In Happening On you specify the days of the month that will be selected by this event. Activate Defined Days.
- On Days select the first day of the month.
-
In Count From specify whether the event should calculate the dates starting at the beginning or at the end of the month.
We want the last day of the month to be selected, regardless of whether it is the 30th, the 31st or, in February, the 28th or 29th. For this purpose, activate End of month.
- Define the Interval in which this monthly event should be effective, in our case Every Month.
- Optionally, activate the Set Monthly Limits checkbox to restrict the dates to specific months. We will restrict it to the current year.
-
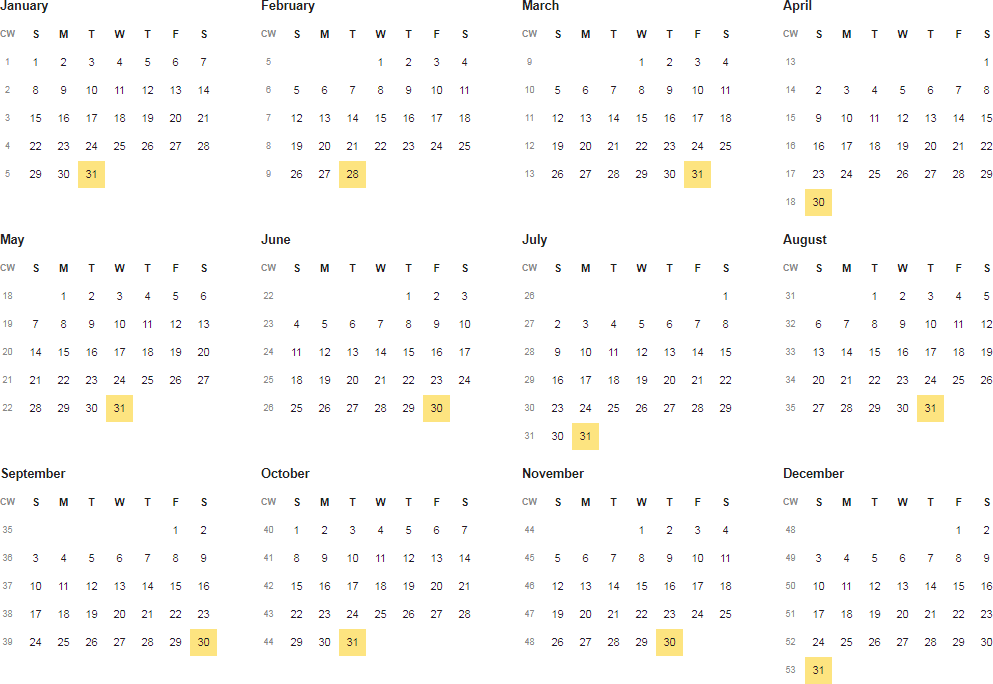
Click Apply & Close to preview the results, which now look like this:
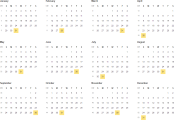
- Save the Calendar object.
Define the periodicity with which this process will take place
This Workflow should execute once at month's end every month. You have the following possibilities:
-
Via the Execute Recurring option:
-
Do one of the following:
- Open the Workflow. On the toolbar, expand the Execute button on the toolbar and select Execute Recurring.
- On the list of object in the Process Assembly perspective, right-click the Workflow and select Execute > Execute Recurring.
-
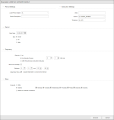
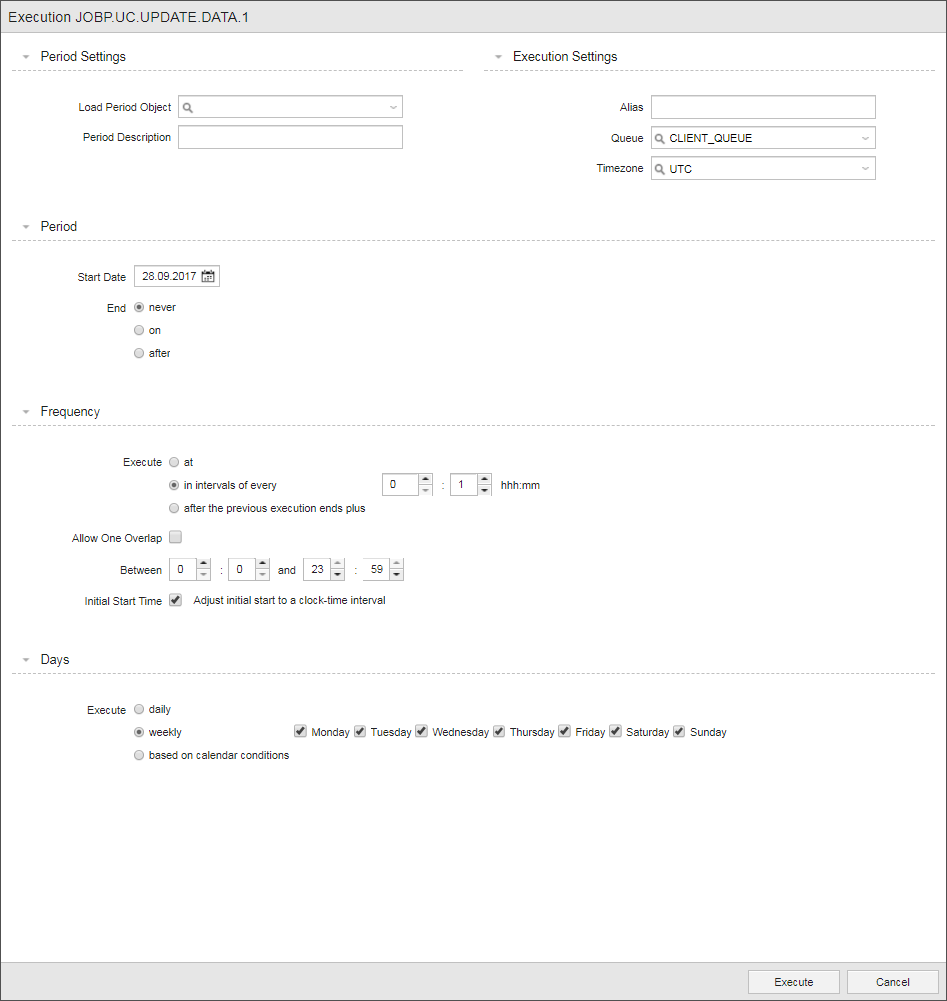
The Execution of JOBP.UC.UPDATE.DATA.1 dialog is displayed:
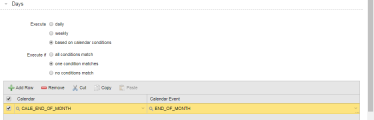
- In the Days section select the based on calendar conditions option to apply the time constraints you have just defined in the CALE_END_OF_MONTH Calendar.
- Activate the Execute if: all conditions match option.
-
On the table, select the CALE_END_OF_MONTH Calendar and END_OF_MONTH Calendar Event:
- Select the Execute button at the bottom of the dialog.
A popup message is displayed indicating that the task has been successfully scheduled.
-
-
Inserting it in a Schedule object and defining the Calendar Conditions accordingly
- In the Process Assembly perspective navigate to the folder in which you want to create the Schedule object, click Add Object on the toolbar (alternatively, right-click anywhere on the list and select Add Object) and select Schedule (JSCH).
- Call the Schedule JSCH.UC.UPDATE.DATA and click Add.
- The Schedule definition pages open and display the Schedule page.
- Click the folder icon on the first row to open the Select Object dialog.
- Search for and select the Workflow and click OK. It is inserted in the task list.
-
Apply it the Calendar conditions as follows:
- Select the Workflow on the list of tasks and click the Properties button on the toolbar. This opens a pane at the bottom half of the window that displays the task properties.
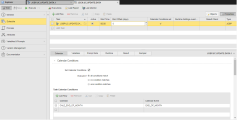
- On the Calendar tab activate the Set Calendar Conditions checkbox.
- Specify when you want the task to be executed taking the calendar definitions into account. In our case, this is Execute if all conditions match.
-
Add the Calendar.
- Activate the first row by clicking on it or click Add Row to add a new one.
-
Select the calendar from the list. Alternatively, start typing the name of the calendar to activate the "select as you type" function.
- Select a Calendar Event.
This is how it looks like:
- Save the Schedule object.


Useful Links
This use case contains references to a number of functions that you might want to know a bit more about.