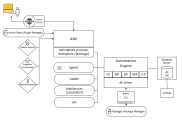
System Overview
Click the image to expand it.
To Create Clients and Users
-
(Admin computer) Create a new client.
-
Log on to system client 0000 with the supplied AE user (name: UC, department: UC, password: UC).
This user is supplied with all rights. It is therefore crucial to change the password immediately in order to avoid unauthorized logons to your AE system.
-
If necessary, create additional Time Zone objects. For more information, see Time Zone (TZ).
AE considers time zones in its processes. The system client already contains TimeZone objects. These objects can then also be used in other clients you create.
-
To create a Client, open the Explorer in the Process Assembly.
-
Click the Add Object button in the toolbar or right-click anywhere in the list and select Add Object to open the list of available object types.
-
Select Client (CLNT) and click the Add Object button.
-
Enter a number between 1 and 999 in the Client field.
-
Optionally, enter a Title. It should be short and descriptive to help you easily recognize the client.
-
Click the Add client button. The client is created and moved immediately to the corresponding environment. The Client page is displayed.
Notes:
-
As soon as you create the client it is moved to its environment. You can edit, start, stop it, or open its report or execution data from the Administration perspective.
-
After it is moved, the client can only be deleted using the utility AE DB Client Copy. For more information, see AE DB Client Copy.
-
-
If necessary, create additional clients. A user must be available in each client in order to log on to it.
-
-
(Admin computer) Create a new user. The first user of a newly created client must be created in the system client 0000.
-
To create a new User, open the Explorer in the Process Assembly.
-
Click the Add Object button in the toolbar or right-click anywhere in the list and select Add Object to open the list of available object types.
-
Select User (USER) and click the Add Object button.
-
Assign a name for the User object. This name also serves as the user's login name. The name of the User object is a combination of the user name and the user department, separated by a slash. A maximum of 200 characters is allowed for this combination (for example, SMITH/AE).
-
Open the User object and assign the appropriate rights and privileges. Then save and close the object.
-
Assign the new user to a client. Click Move User to Client... in the context menu. Enter the client number in the window that opens. The User object is moved to the client.
-
Additional users can be created in the client when the user is logged in and authorized.
Note: User objects in the system client may not start with an "X_" in their names, since that combination is reserved for internal system objects.
-
-
(Admin computer) Set up an authorization system.
AE provides a comprehensive authorization system that consists of several areas that can be adjusted to your system environment as required.
The authorization system is not based on folder authorizations but rather on object names. Use naming conventions for objects that your create in your AE system. You can assign limited rights for objects that have names that start with a particular string, for example. Assigning and limiting rights and privileges this way makes it easier to set up a clear authorization structure.
Read the chapter about the AE authorization system in order to become familiar with all possible settings.
