Adding the CDA Endpoint
After the plug-in has been installed, an endpoint must be configured to gain access to the CDA instance from CA Continuous Delivery Director.
To Add the CDA Endpoint
- Click the Administration tab and select Endpoints.
- Click Add Endpoint at the top-right corner. The ADD ENDPOINT dialog is displayed.
- Enter the following information:
Name of the endpoint
Example: Dev Instance
- Optionally, a description to better identify the endpoint.
- From the drop-down list, select one or more users you want to authorize for the endpoint.
- Select the ARA Endpoint plug-in.
- In the Input Parameters section:
Enter the URL of your CDA REST endpoint.
Important! The port used in the URL is for the CDA application and not for the Web UI of the CDA application. Typically, the application is installed on IIS, which uses port 80. The Web UI to which you connect to CDA using a browser uses the Tomcat port 8080.
Note: The URL can be specified as http or https.
Example:
- URL to connect to the CDA application: http://myCDAhost:80/cda
- URL to connect to the CDA Web UI: http://myCDAhost:8080/awi
- Enter the credentials of a CDA user (username in the following format: client/name/department and password) with sufficient rights to execute an Application deployment. For more information, see: Required Folder Authorizations
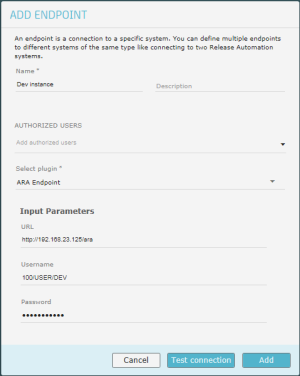
- Click Test connection to verify that you can connect to the CDA (ARA) endpoint.
- Click Add.
What to do next: