FOREACH Workflows
ForEach Workflows represent loops. They repeat one or more tasks several times depending on the defined loop conditions. You must specify the number of loop iterations that should take place and the tasks that should be repeated. These Workflows can contain any executable object except Schedules (JSCH). You can also embed other ForEach Workflows in them.
ForEach Workflows do not support bulk operations.
This page includes the following:
The Workflow page contains by default a predefined loop construction to which you can add tasks. The predefined construction comprises two nodes:
- START, where you define the loop
- END, which is processed when the loop has ended
You add tasks to the loop line, which is the line that goes from and to the START node. They are linked automatically to the adjacent tasks and arranged in sequential order. For more complex structures, you can embed other Workflows.
The tasks are processed when the loop condition has been evaluated. You define the condition on the START node, see Defining the Loop Condition.
Note: If you want the preconditions of the tasks to be evaluated in each loop iteration, they must be set to Repeat Processing in each task. For more information, see Building (Right) Pane.
If the loop definition does not result in a loop cycle, the END node is immediately processed. The tasks are skipped and their status in the Workflow is UNPROCESSED. No tasks are created.
The content of the Process page is processed exactly once, regardless of the number of loop iterations that you have defined.
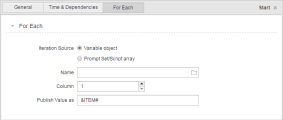
The tasks in a ForEach Workflow are processed after its loop conditions have been evaluated. The loop conditions are defined in a VARA object or in an array PromptSet or variable that you assign to the Workflow in its Start node.
To Define the Loop Conditions
-
Open the properties of the Start node. You have two options:
- Right-click on Start and select Properties.
- Select Start and click the Properties button on the toolbar.
The properties pane is displayed at the bottom half of your screen.
-
Open the ForEach tab.
-
Define the loop conditions, see ForEach Tab.
- Start adding tasks to the Workflow.
Adding Tasks
- Open the Objects pane and search for the object.
- Select the object and drag-and-drop it to the position in the ForEach Workflow box where you want to have it.
Tasks in ForEach Workflows cannot be linked manually. They are linked automatically to the tasks that are before and after the position where you drop it. You can change their position by moving them.
Right-click a task and select Remove. However, the connector lines in ForEach Workflows are predefined and cannot be deleted.
Moving Tasks
You can change the order in which the tasks are arranged in the loop line.
Modifying at Runtime Not Possible
The properties of ForEach Workflows cannot be modified. For this reason, the Modify is always disabled in the monitor toolbar. However, you can perform certain functions on the tasks in an IF Workflow. For example, set a breakpoint, cancel, restart, and so on. The status and the type of the tasks determine which functions are available.
For information about which functions are available see Available Functions Depending on the Task Status.
See also:
