Task Boxes in Workflows
When designing Workflows, you first add objects to it. Objects that have been added to the Workflow editor are called tasks. Selected tasks are encircled by a thick line and display start and end arrows. These arrows are the connector points from/to which you can link. Task boxes display the most important attributes of the object.
Examples of task boxes:
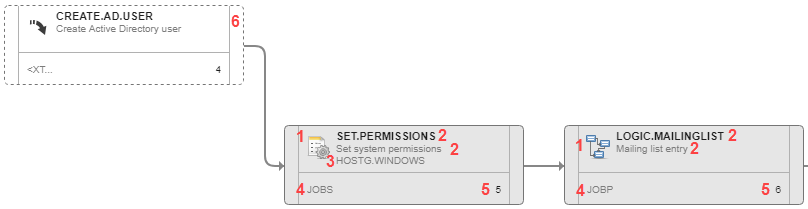
- Object icon, see Object Types.
-
Object name, title or alias. For more information, see Name, Title, and Alias.
The name is truncated if it is too long and the title of the task is also displayed. If the task has no title, or if it not displayed, the long name extends over the second line.
- Name of the Agent on which the object is executed.
- Short name of the object type. For example, JOBS for Jobs or JOBP for Workflows.
- Order of the object in the Workflow sequence, where the START node is always the first task.
- External dependency. For more information, see External Dependencies in Workflows.
Tooltips
Hover the mouse over a box to display a tooltip that contains additional information about the object properties:
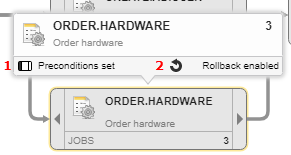
- Indicates whether conditions have been defined
- Indicates whether rollback has been enabled
The START and END nodes also have tooltips. They provide information about the status of the Workflow.
See also: