GetArtifact Action
As an Application Developer you use the GetArtifact Action to execute file transfer operations for Artifacts.
This page includes the following:
Introduction
The GetArtifact Action is included by default in all Component Workflows created with the option Create a blank Component Workflow (see: Adding Component Workflows) or with the Application wizard (see: Creating Applications Using the Wizard).
The Action is included in the PCK.AUTOMIC_BOND Pack and provides the necessary framework and steps for file transfer operations, including checksum verification and file renaming, filtering and unarchiving. Specific download Actions are provided with other Packs; for example: PCK.AUTOMIC_HTTP, PCK.AUTOMIC_FTP, PCK.AUTOMIC_SMB and PCK.AUTOMIC_NEXUS.
The action is only executed if an Artifact is assigned to the Component in the Deployment Package, otherwise it will be skipped.
File transfer mechanism
Files are transferred from external sources to the Deployment Target by combining properties of the Artifact and the Artifact Source. The Artifact and Artifact Source properties are available in the Deployment Descriptor and can be accessed from the Action using EXT:@artifact_source and EXT:@artifact. For example: EXT:@artifact_source/custom/host.
These properties are mapped directly to the promptset of the file inside the transfer Actions.
Click the image to expand it.
![]()
Files are transferred to the Artifact Base Dir (&UC4RB_ARTIFACT_DIR#) which is set to {@target/custom/staging_base_directory}/artifacts.
If the files are A supported archive format (ZIP, TAR, TAR.GZ) they are unarchived. Afterward files are transferred to the Target Dir (&UC4RB_COPY_TARGET_DIR#) which is set to the dynamic property target/target_files_dirs of the Component.
This Target Dir location is commonly shared by other Actions, for example: The Tomcat Deploy Action and JDBC Execute Script Action take by default the package/script files from this location.
Click the image to expand it.
![]()
Note: /target/target_files_dirs is set to {@target/custom/staging_base_directory}/{@application/system/name}/{/system/name}/{@deployment_package/system/name} by default. If @target/custom/staging_base_directory (property of the Deployment Target) is not set, a temp directory within the agent directory location will be used instead. For example: C:\Automic\Agents\WIN01\temp\
Working with Multiple Files
Downloading multiple files is supported for SMB and FTP protocols. In both cases, you can use wildcards in the Source Path field. For example: Set Artifact Custom Property Source Path to shared\jpetstore\jpetstore\*
All files are downloaded and transferred to the directory location defined in the dynamic property {/target/target_files_dirs} of the Component.
Downloaded file names, relative paths and checksums are stored in the VARA file PCK.AUTOMIC_BOND.PRV.VARA.TEMP.ARTIFACT.<Artifact Source ID>.<Artifact ID>. Fo example: PCK.AUTOMIC_BOND.PRV.VARA.TEMP.ARTIFACT.1747467.1545759.
Finally. the GetArtifact Action transfers the files to the Target Dir.
The table below displays the GetArtifact Action variables that contain important information and can be used for further processing.
| Variable name | Description | Example |
|---|---|---|
| &UC4RB_ARTIFACT_DIR# | Path to directory storing the artifact files (Artifact Base Dir). | C:\Automic\Agents\WIN01\bin\..\temp\ara\2018\artifacts\artifact-162797 |
| &UC4RB_ARTIFACT_EXTRACTED_DIR# | Name of the subdirectory to which the archive Artifact will be unzipped. | artifact_extracted_content |
| &UC4RB_ARTIFACT_ID# | ID of the Artifact | 162797 |
| &UC4RB_ARTIFACT_VARA_NAME# | Name of the VARA which stores all artifact files before applying thefilter. Name format: PCK.AUTOMIC_BOND.PRV.VARA.TEMP.ARTIFACT.<Artifact Source ID>.<Artifact ID> | PCK.AUTOMIC_BOND.PRV.VARA.TEMP.ARTIFACT.3713758.162797 |
| &UC4RB_COPY_TARGET_DIR# | Path to the target directory which stores the output files of the GetArtifact Action (Target Dir). | C:\temp/myapp/web/1.0.0 |
You can use Postconditions to map the variables above to the Workflow variables and utilize them in subsequent Actions/Workflows.
From here you can define what to do with those files. The following options are available:
- Using an Action that supports multiple files, for example JDBC, execute the Script Action.
- Create a Custom Action and write a script to process files in the Target Dir folder.
- Create a Custom Action and write a script to read VARA and process each file.
Example
Print out full path to all downloaded artifact files
-
Map the GetArtifact variables to workflow variables using Postconditions.
Click the image to expand it.

-
Create a custom Action and loop it through all rows in VARA as follows:
:SET &HND#=PREP_PROCESS_VAR(&ARTIFACT_VARA_NAME#)
:PROCESS &HND#
: SET &VK# = GET_PROCESS_LINE(&HND#,1)
: SET &VALUE# = GET_PROCESS_LINE(&HND#,2)
: PRINT "&VK# &VALUE#"
: SET &DIR_PATH# = STR_CAT(&TARGET_DIR#, "/")
: SET &FULL_PATH# = STR_CAT(&DIR_PATH#, &VK#)
echo &FULL_PATH#
:ENDPROCESS

Filtering files from Artifact Base Dir to Target Dir
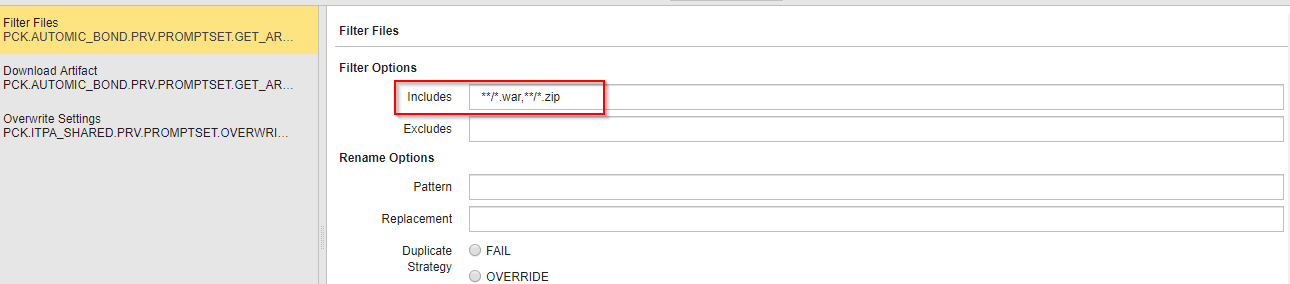
After files are downloaded and extracted to the Artifact Base Dir, they will be copied to the Target Dir through a filter. This allows you to select a subset of files suitable to subsequent deployments. The filter allows you to include or exclude a set of matching files.
The syntax of the include/exclude filter follow the ANT matching rule. Multiple rules can be specified separated by a comma.
For example: Includes filter: **/*.war,**/*.zip copy all WAR and ZIP files from the Artifact Base Dir to the Target Dir recursively.
Click image to expand it.
Renaming Files
After applying filters, while transferring the files from the Artifact Base Dir to Target Dir, the files can be renamed for ease of sub sequences processing. The renaming is carried out by the follwoing parameters: Pattern, Replacement and Duplicate Strategy.
Example:
The Artifact file is a ZIP file that contains two files: webui+build.12157.war and webui+build.12158.war.
Entering the following input will copy and rename the file webui+build.12157.war to webui.war in the Target Dir folder.
- Pattern (Java regex style): (.*)+build(\d+).(.*)
-
Replacement: $1.$3
Note: $1 matches webui, $3 matches .war
- Duplicate Strategy: Skip
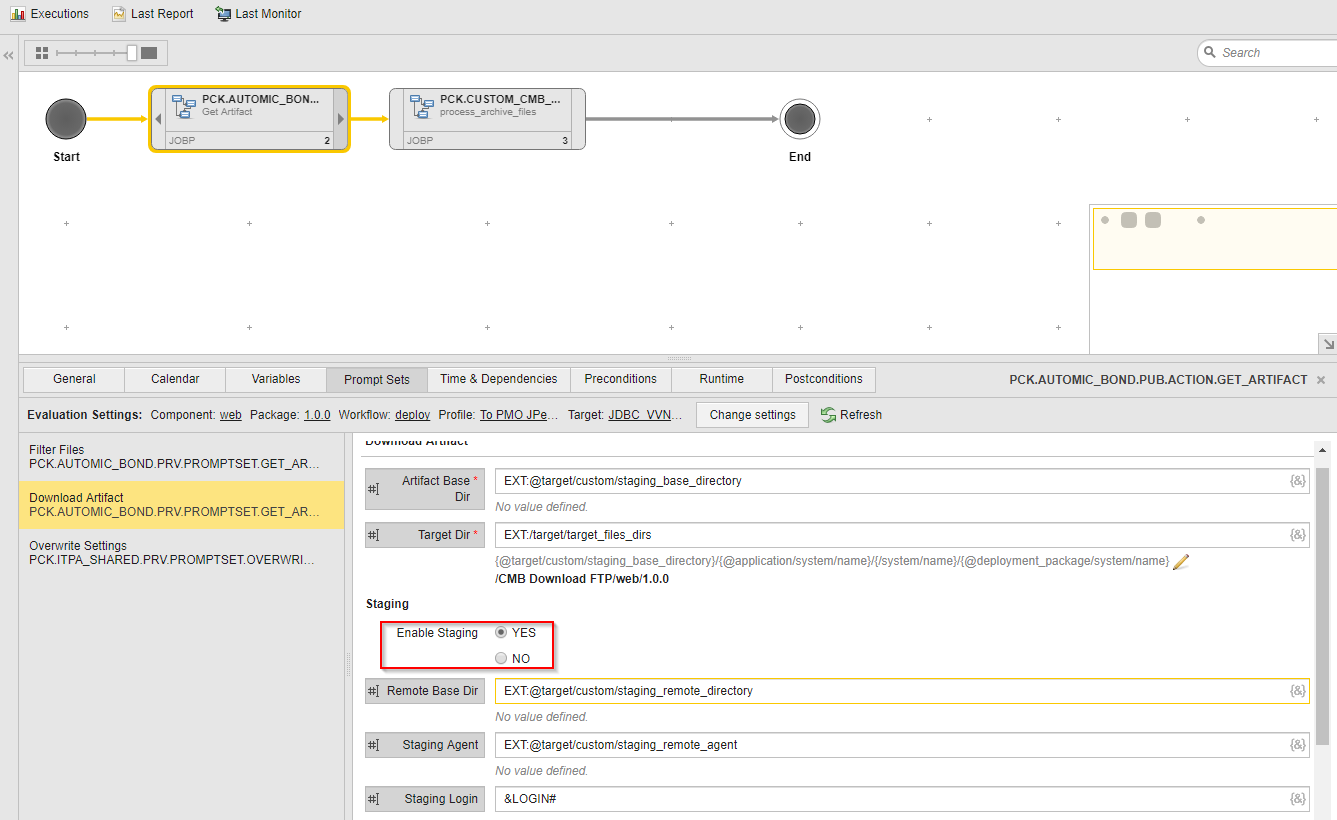
Remote staging
Once the Remote Staging agent is set on the Deployment Target under the Remote Staging custom property group, Artifact files are downloaded to that agent.
Note: Remote staging can be turned off completely by setting Enable Staging to NO in the GetArtifact action promptset.
Click the image to expand it.
Checksum
The GetArtifact action supports checksum check for compliance comparison purposes. The file checksum must be stored in a separated text file with the same file name (including extension) but with an extra suffix; either .sha1 or .md5. For example: file1.zip.sha1.
After a file is downloaded, the checksum is calculated and compared with the value defined in the checksum file.You can select one of the following values from the Checksum options drop-down:
- SKIP_IF_NOT_EXIST: if the checksum file is not found, skip the checksum check without raising any error.
- REQUIRE: if a file of the checksum file is not found, the workflow execution will fail.
- IGNORE: no checksum check.
The examples below show how Artifact Path and Checksum Path can be combined to provide comprehensive checksum check functionality.
Examples
| External Source | Requirement | Artifact Properties | Comment |
|---|---|---|---|
|
ftp://myapp/component/content/ contains the following files:
|
Download all files with checksum check. |
Source path: ftp://myapp/component/content/*.* Checksum path: |
Checksum files are downloaded together with normal file. The checksum path is not needed. |
|
ftp://myapp/component/content/ contains the following files:
|
Download SQL files with checksum check: |
Source path: ftp://myapp/component/content/*.sql Checksum path: ftp://myapp/component/content/*.sql.sha1 |
|
|
File: http://myserver/myapp/component/1/file1.zip Checksum: http://myserver2/myapp/component/1/file1.zip.sha1 |
Download file1.zip with checksum check |
Source path: http://myserver/myapp/component/1/file1.zip Checksum path: http://myserver2/myapp/component/1/file1.zip.sha1 |