Installing the Backend
To install the Analytics Backend, follow the steps below.
To install the Backend
- Unzip the content of the deployment package (Analytics.On.Premise_Analytics.Backend_ .zip) into the folder where you want to run the Backend (for example: C:\Automic\AnalyticsBackend\).
Package content:
analytics-backend.jar
application.properties.sample
logging.xml
README.txt
THIRD-PARTY-LICENSES.txt
UC.msl
UCXedda.ini - Create a jdbc folder, for example: <automic>/analytics/backend/jdbc.
- Copy the correct JDBC driver to the jdbc folder, this will enable you to connect to an AE source database:
./jdbc/sqljdbc4.jar (mssql)
./jdbc/ojdbc7.jar (oracle)
./jdbc/db2jcc-4.jar (DB2) - Rename the application.properties.sample file to application.properties.
Note: Open the application.propertiesconfiguration file and adopt the settings for the Analytics Datastore.
Important! The Analytics Datastore username and password are case sensitive, therefore lower case values should always be used. - Add the Datastore connection (last lines from executing the setup.psql script).
- Set the database connection to the AE database as described ( CDA is not required).
A read-only user for Oracle the schema must be specified. Create a text file in the analytics Backend directory.
Example:
Automation Engine schema.sql with the following content: ALTER SESSION SET CURRENT_SCHEMA=automic. This will set the schema to automic while still using the configured db username and password. Enable the following setting in the application.properties: datasource.AE.schema=file:AE_schema.sql
Important! Some versions of Oracle the user name and password are case sensitive.
Use a read-only user for DB2 the schema must be specified. Create a text file in the analytics Backend directory, name it AE_schema.sql for example. Ensure that you add the exact content in the text file: SET SCHEMA=automic. This will set the schema to "automic" while retaining the previously configured db username and password. Enable the following setting in the application.properties file: datasource.AE.schema=file:AE_schema.sql
Configuring the Security Mechanism for a DB2 Datasource
- The security mechanism can be set by using the additional_properties configuration of the datasource.
Specify additional datasource properties using the following syntax:<datasource>.additional_properties[<property>]=<value>
Example for enabling encrypted user and password:
datasource.AE.additional_properties[securityMechanism]=9
datasource.AE.additional_properties[encryptionAlgorithm]=2
securityMechanism 9 is ENCRYPTED_USER_AND_PASSWORD_SECURITY
encryptionAlgorithm 2 is AES
More information: https://www.ibm.com/support/knowledgecenter/SSEPGG_10.5.0/com.ibm.db2.luw.apdv.java.doc/src/tpc/imjcc_cjvjcsec.html
Note: To load additional security libraries, place them in the <automic>/analytics/backend/jdbc directory. - Configure a server port on the host that is dedicated for the Backend and the Datastore.
See, Example Configuration:
Note: To encrypt a Postgresql-DB password use the UCYBCRYP.EXE program. See Encoding Passwords. - Configure the System (AE installation system name) and CP (system IP and port) parameter in the ucxedda.ini file.
SYSTEM=AUTOMIC
cp=localhost:2217 - The analytics-backend.jar has to be passed to a Java process. Assuming Java 1.8 is installed and executable via the "java" command, the following line executed in a command shell (both Windows and Linux) will start the Backend:
java -Xmx2g -Xms512m -XX:+UseG1GC -jar analytics-backend.jar
Note: This command only works when executed in the bin directory of the analytics-backend. - Verify that the Analytics Backend is running. Connect to configured port (server.port) from the host where AWI is installed.
Note: You can use a Web browser to open the Backend (use curl or wget to execute a request in Linux)
Request:
GET http://my-analytics-backend-url:8090/analytics/api/v1
Response:
HTTP Status 401 is expected as no API key was provided with the request.
More information: Analytics REST API - General Info
For a single-box installation, you can use localhost instead of my-analytics-backend-url.
GET http://localhost:8090/analytics/api/v1
Note: If a timeout, aborted, or a Status 500 is displayed, consult the analytics-backend.log in the temp folder. - To ensure that the Analytics Backend is running even after a reboot, configure the Service Manager to start the Analytics Backend.
Note: You must have Service Manager installed as part of your installation. If you do not have Service Manager installed, see the following links: ServiceManager, Start Parameters - ServiceManager. - Add the Backend to the Service Manager SMD file
If you have installed Service Manager open the uc4.smd file found here :
<automic>/Automation.Platform/ServiceManager/bin/uc4.smd.
Using your defined directory path, add a DEFINE ANALYTICS-BACKEND line as shown in the example below:
DEFINE ANALYTICS-BACKEND;/opt/automic/External.Resources/JRE/jre1.8.0_101/bin/java -jar analytics-backend.jar;/opt/automic/Automation.Platform/Analytics/backend - Adding the Backend to the Service Manager SMC file
Open the uc4.smc file found here:
<automic>/Automation.Platform/ServiceManager/bin/uc4.smc
Insert the following two lines (in bold) and close and restart the service manager:
WAIT 10
CREATE RULE-ENGINE
WAIT 3
CREATE ANALYTICS-DATASTORE
WAIT 14
CREATE ANALYTICS-BACKEND
Note: If you would like to secure the Backend, see: Securing the Backend
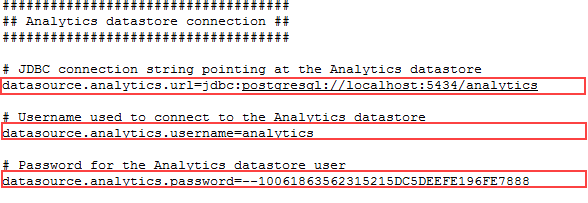
| Parameter | Value (Example) | Remark |
|---|---|---|
| datasource.analytics.url | jdbc:postgresql://localhost:5432/analytics?tcpKeepAlive=true | The value must be the JDBC connection string to your Analytics Datastore database |
| datasource.analytics.username | analytics |
The value must be the user name to connect to the Analytics Datastore database Note: You have created the user during the installation of the Analytics Datastore. |
| datasource.analytics.password | analyticsPW | The password for the user configured in spring.datasource.username |
| server.port (listening) | 8090 | Set the HTTP server port for the Analytics Backend Tomcat webserver |