Creating and Fine-Tuning the Workflows
This topic describes how to fine-tune and arrange Workflows and Tasks (Actions) to perform a canary deployment.
To set up the Workflow infrastructure three main actions must be carried out:
- Create the Application Workflow and Component Workflows needed to move the Package from one state to the next (Mark_Stable, Switch, and so on).
- Arrange the Actions in the Component Workflows (Database, CREATE_IMAGE, DEPLOY_IMAGE, General).
- Arrange the Component Workflows in the Application Workflows (Deploy, Switch, Trigger_Deployment, Trigger_Undeploy, Mark_Stable)
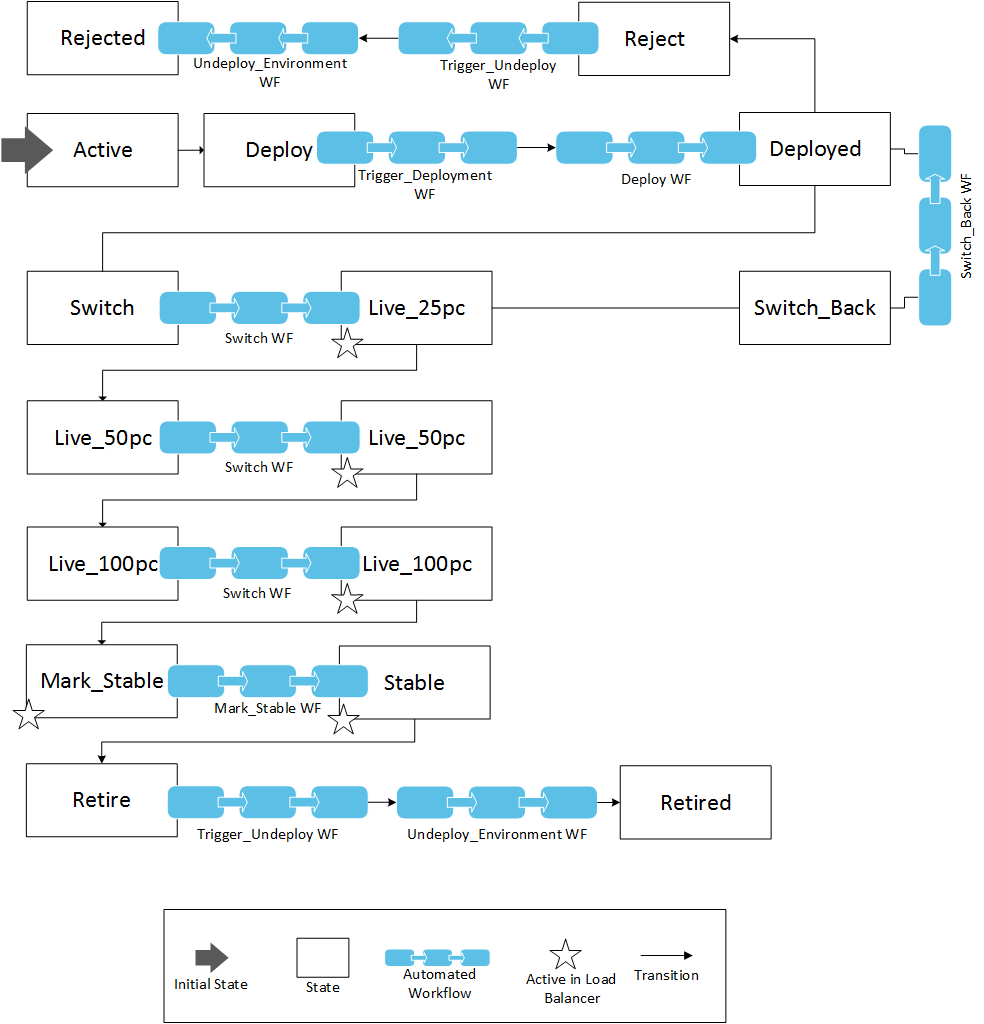
Workflow Overview
To Create the Workflows
The first Application Workflow "Trigger_Deployment" has been already created via the Application Wizard. This Workflow will be used to determine which endpoint is available at the time of deployment based on the Profile (green or blue). Let us now create the other Application Workflows:
- Open the BLUE_GREEN_APP Application.
- Go to Workflows > All Workflows.
- Click the Create icon in the toolbar.
- Name the Workflow "Deploy". This Workflow will be used to deploy the Application on a set of Targets.
- Select the Install type.
- Select the BLUE_GREEN_APP Application.
- Store the Workflow in the same folder where the "Trigger_Deployment" Workflow is located. For example: CANARY.
- Click Create.
- Repeat steps 3-7 to create more Workflows:
Name Type Folder Description Switch Install CANARY Switches the routed traffic to the new installation. Switch_Back Install CANARY Switches the routed traffic back to the previous installation. Mark_Stable Install CANARY Marks the Package as stable in the production version. Trigger_Undeploy Install CANARY Triggers the "Undeploy_environment" Workflow based on current Package Profile (green or blue). Undeploy_Environment Install CANARY Undeploys the Application from the current set of Targets. These Workflows will be used to move the Package to the next state in the stateflow.
-
Let us now create the Subworkflows which will make up the tasks of the previously defined Workflows. Follow the steps above to create the following Component Workflows:
- Component Workflows needed for the "Deploy" Application Workflow:
Name Type Folder Description Database Install CANARY Makes changes to the database. Docker_Image Install CANARY The Docker image Component Packages the necessary infrastructure. Application Install CANARY Spins up the Docker image. General Install CANARY Changes the Package state and sets the variables in the Environment. - Component Workflows needed for the "Trigger_Deployment" Application Workflow:
Name Type Folder Description General1 Install CANARY Used to determine which Profile can be used to deploy the Application. - Component Workflows needed for the "Switch" Application Workflow:
Name Type Folder Description Load_Balancer Install CANARY Switches the load balancer from "green" to "blue" (and vice versa). - Component Workflows needed for the "Switch_Back" Application Workflow:
Name Type Folder Description Load_Balancer Install CANARY Switches the load balancer from "green" to "blue" (and vice versa). - Component Workflows needed for the "Mark_Stable" Application Workflow:
Name Type Folder Description General1 Install CANARY Marks the installed version as "stable". Traffic is routed. As of now, changes will be deployed to the Targets assigned to the other Profile. - Component Workflows needed for the "Trigger_Undeploy" Application Workflow:
Name Type Folder Description General1 Install CANARY Used to determine which Profile can be used to undeploy the Application. - Component Workflows needed for the "Undeploy_environment" Application Workflow:
Name Type Folder Description Application Install CANARY Removes the Docker container from the Environment.
- Component Workflows needed for the "Deploy" Application Workflow:
To Arrange Workflows and Actions
After creating the Workflows, add specific Actions to the Component Workflows and arrange both Actions and Component Workflows in a logical order.
-
First, add and arrange the appropriate Actions within each Component Workflow:
-
Deploy Application Workflow (determines which endpoint is available at the time of deployment based on the Profile - green or blue).
-
Database Component Workflow.
-
Drag-and-drop the following Actions to the editor:
Name Title Description PCK.AUTOMIC_MSSQL.PUB.ACTION.CREATE_DB Create Database Creates a specific database. PCK.AUTOMIC_TEXT.PUB.ACTION.REPLACE_TEXT Text replace text Replaces a selected text. PCK.AUTOMIC_JDBC:PUB.ACTION.EXECUTE_SQL_SCRIPT DB Execute Script Executes a SQL script located on the agent host. PCK.AUTOMIC_JDBC:PUB.ACTION.EXECUTE_SQL_SCRIPT DB Execute Script Executes a SQL script located on the agent host. PCK.AUTOMIC_JDBC:PUB.ACTION.EXECUTE_SQL_SCRIPT DB Execute Script Executes a SQL script located on the agent host. -
Arrange the Actions in the editor to resemble the screenshot below:
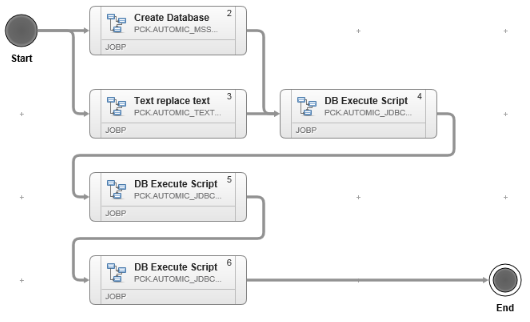
The first component that the Workflow deploys is the Application MSSQL Database. This process is straight forward. First, a new database is created with the MSSQL Action Pack. While the database is being created, an update to one of the SQL scripts runs in parallel. After this, the scripts are executed in the correct order.
The second component to be deployed is a Docker container to host the Application. Deploying this component is a two-step process. The first step is creating the image. The second one is deploying it.
-
-
Docker_Image Component Workflow (used to make the "Docker image" Component Package the necessary infrastructure):
-
Drag-and-drop the following Actions to the editor and name them as follows:
Name Title Description PCK.AUTOMIC_DOCKER.PUB.ACTION.CREATE_IMAGE Pull an image from public docker repository This action is used to create an image by pulling it from the docker public repository. By default the Image tag value is 'latest'. PCK.AUTOMIC_FILESYSTEM.PUB.ACTION.CREATE_DIR CREATE_PERSISTENT_DIR Creates a persistent directory. PCK.AUTOMIC_FILESYSTEM.PUB.ACTION.CREATE_DIR CREATE_BUILD_DIRECTORY Creates a new build directory. PCK.AUTOMIC_DOCKER.PUB.ACTION.CREATE_CONTAINER Create container from existing image Creates a container in docker system from an existing image. PCK.AUTOMIC_AGENT_2_AGENT.PUB.ACTION.TRANSFER TRANSFER_NEW_VERSION_FILES Transfers one or more files from one host to another host using the agent-to-agent file transfer mechanism. PCK.AUTOMIC_DOCKER.PUB.ACTION.START_CONTAINER START_CONTAINER Starts an existing container as per the specified container id. PCK.AUTOMIC_DOCKER.PUB.ACTION.CHANGE_CONTAINER_STATE STOP_CONTAINER_AFTER_WAR_FILE_EXPLODED Changes the state of an existing container to stop. PCK.AUTOMIC_FILESYSTEM.PUB.ACTION.COPY COPY_CONFIG_FILE Copies the configuration file. PCK.AUTOMIC_FILESYSTEM.PUB.ACTION.COPY COPY_DRIVER Copies the driver. PCK.AUTOMIC_FILESYSTEM.PUB.ACTION.COPY COPY_APPLICATION_TAR_TO_BUILD_DIRECTORY Copies the Application tar to the build directory. PCK.AUTOMIC_TEXT.PUB.ACTION.REPLACE_TEXT EDIT_DATABASE_CONNECTION_SETTINGS Replaces the values in database connection settings. PCK.AUTOMIC_TEXT.PUB.ACTION.REPLACE_TEXT Text replace text Replaces the text in the image index file. PCK.AUTOMIC_FILESYSTEM.PUB.ACTION.PACK TAR_APPLICATION Archives the tar Application file with all subitems. PCK.AUTOMIC_FILESYSTEM.PUB.ACTION.PACK TAR_DOCKERFILE_AND_APPLICATION Archives the docker and Application file with all subitems. PCK.AUTOMIC_DOCKER.PUB.ACTION.BUILD_IMAGE Build image from Dockerfile Creates a Docker Image from the Docker file PCK.AUTOMIC_FILESYSTEM.PUB.ACTION.DELETE File Delete Deletes the file. -
Arrange the Actions in the editor to resemble the screenshot below:
Select the image to expand it.
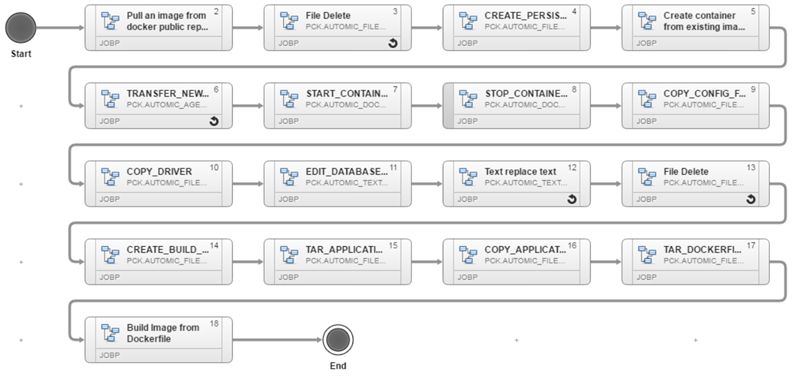
First, the Workflow pulls a Docker image from a public Docker repository. Then, the Workflow runs a file delete on the previous image directory. Usually this directory is located under
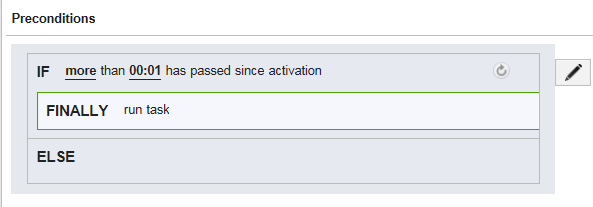
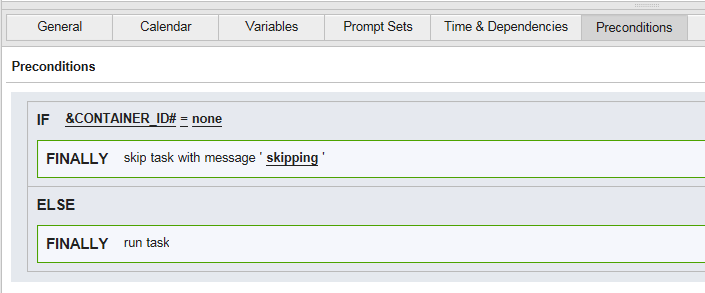
/data/ARA/imageon the container. When this action is completed, a persistent directory is created under the same path.After the image is ready, the Docker Action Pack is used to create a container from the existing pulled image and copy over the war file, driver and connection string from the database to the Tomcat container. Once the files are placed correctly, the container is started up, so that the copied war file explodes. After one minute, the container is stopped. This clause is triggered with a precondition:
As a next step, the Workflow edits the database connection string so that it is possible to connect to the correct database in the BLUE_GREEN Application. After the connection string has been fixed, the
index.htmlfile welcome message is changed.Finally, the Workflow "TARs up" the Application and Docker file after cleaning up the directories one last time.
-
-
Application Component Workflow (used to spin up the Docker image):
-
Drag-and-drop the following Actions to the editor and name them as follows:
Name Title Description PCK.AUTOMIC_FILESYSTEM.PUB.ACTION.COPY COPY_TEMPLATE_AS_TEMPORARY Copies the template. PCK.AUTOMIC_FILESYSTEM.PUB.ACTION.REPLACE_TEXT SET_IMAGE_NAME Sets the name of the image. PCK.AUTOMIC_TEXT.PUB.ACTION.REPLACE_TEXT SET_PORT_ON_HOST Opens the port needed to connect. PCK.AUTOMIC_DOCKER.PUB.ACTION.CREATE_CONTAINER Create container from existing image Creates a new container. PCK.AUTOMIC_FILESYSTEM.PUB.ACTION.DELETE DELETE_TEMPLATE_TEMPORARY Deletes the temporary template. PCK.AUTOMIC_DOCKER.PUB.ACTION.START_CONTAINER Start existing container Starts an existing container as per the specified container id. PCK.AUTOMIC_DM.PUB.ACTION.SET_DYNAMIC_PROPERTY DM Set Dynamic Property Sets the value of a given Dynamic Property in ARA. -
Arrange the Actions in the editor to resemble the screenshot below:
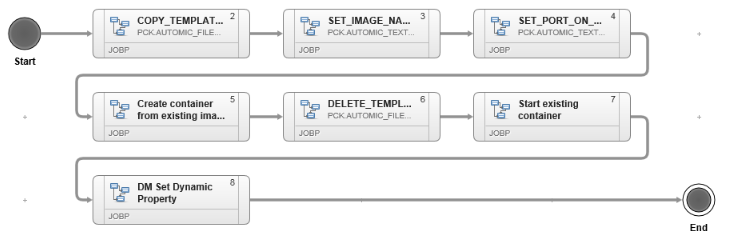
The first Action copies over the
docker_template_tomcatfile. After that, the second Action sets the name for the image. The third job will then open the port needed to connect. Once this is done, the container is created. The temporary template is deleted and the new container is booted. Finally, some dynamic properties are set on the Environment to define the current booted container ID on it.
-
-
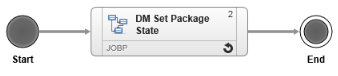
General Component Workflow. (This Workflow is used to change the Package state):
-
Drag-and-drop the following Action to the editor and name it as follows:
Name Title Description PCK.AUTOMIC_DM.PUB.ACTION.PackagesTATE_SET DM Set Package State Changes the Package State and sets Variables in the Environment. -
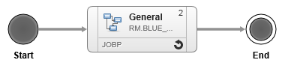
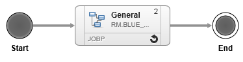
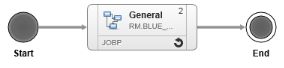
Arrange the Subworkflow in the editor to resemble the screenshot below:
-
-
-
Trigger_Deployment Application Workflow (deploys the Application on a set of Targets). This Workflow starts once the Package has been moved from the "Active" to the "Deploy" state. A DM job is used to trigger the Deploy Workflow once the Package states have been updated.
-
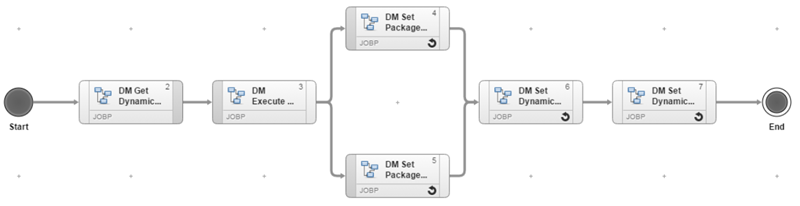
Open the General Workflow, drag-and-drop the following Actions to the editor and name them as follows:
Name Title Description PCK.AUTOMIC_DM.PUB.ACTION.GET_DYNAMIC_PROPERTY DM Get Dynamic Property Retrieves the value of a specified Dynamic Property in CDA (blue/green). PCK.AUTOMIC_DM.PUB.ACTION.SET_DYNAMIC_PROPERTY DM Set Dynamic Property Sets the value of a given Dynamic Property in CDA (blue/green) PCK.AUTOMIC_DM.PUB.ACTION.SET_DYNAMIC_PROPERTY DM Set Dynamic Property Sets the value of a given Dynamic Property in CDA (blue/green) PCK.AUTOMIC_DM.PUB.ACTION.SET_DYNAMIC_PROPERTY DM Set Dynamic Property Sets the value of a given Dynamic Property in CDA (blue/green) PCK.AUTOMIC_DM.PUB.ACTION.EXECUTE_APPLICATION_WORKFLOW DM Execute Application Workflow Executes the deploy Application Workflow. -
Arrange the actions in the editor to resemble the screenshot below.

-
-
Switch Application Workflow (switches the load balancer from the "green" Profile to the "blue" one and vice versa).
-
Open the Load Balancer Workflow, drag-and-drop the following Actions to the editor and name them as follows:
Name Title Description PCK.AUTOMIC_FILESYSTEM.PUB.ACTION.COPY File Copy Replaces the green text to blue and vice versa (jpetstore file). JOBS.UNIX.RELOAD_NGINX JOBS.UNIX.RELOAD_NGINX Job used to reload Nginx, the web server software used for this scenario as load balancer. PCK.AUTOMIC_DM.PUB.ACTION.SET_DYNAMIC_PROPERTY DB Set Dynamic Property Updates the Dynamic Property. PCK.AUTOMIC_DM.PUB.ACTION.PackagesTATE_SET DB Set Package State Set the state of the Package by using its ID. Arrange the Actions in the editor to resemble the screenshot below:

This Workflow changes the jpetstore file in
/etc/nginx/sites-available/jpetstoreusing a text replace action. After this nginx is reloaded using a custom Unix action. Then the dynamic properties and Package state are updated to reflect the change that the Package has gone through.
-
-
Switch_Back Application Workflow (switches the routed traffic back to the previous installation). The Switch_Back Workflow works in the same way as the Switch Workflow. However, its used at a different Package state.
Once the Package has successfully gone live to the first Target using the above Switch Workflow it can be switched back to the previous Target.
-
Open the Load Balancer Workflow, drag-and-drop the following Actions and Jobs to the editor and name them as follows:
Name Title Description PCK.AUTOMIC_FILESYSTEM.PUB.ACTION.COPY File Copy Replaces the green text to blue and vice versa (jpetstore file). JOBS.UNIX.RELOAD_NGINX JOBS.UNIX.RELOAD_NGINX Job used to reload Nginx, the web server software used for this scenario as load balancer. PCK.AUTOMIC_DM.PUB.ACTION.SET_DYNAMIC_PROPERTY DB Set Dynamic Property Updates the Dynamic Property. PCK.AUTOMIC_DM.PUB.ACTION.PackagesTATE_SET DB Set Package State Set the state of the Package by using its ID. Arrange the Actions in the editor to resemble the screenshot below:
-
-
Mark_Stable Workflow (marks the Package as "stable" in the production version).
-
Open the General Workflow, drag-and-drop the following Actions to the editor and name them as follows:
Name Title Description PCK.AUTOMIC_DM.PUB.ACTION.PackagesTATE_SET DM Set Package State Sets the state of a specified Package using its ID. PCK.AUTOMIC_DM.PUB.ACTION.PackagesTATE_SET DM Set Package State Sets the state of a specified Package using its ID. PCK.AUTOMIC_DM.PUB.ACTION.SET_DYNAMIC_PROPERTY DM Set Dynamic Property Sets the value of a given Dynamic Property in ARA. PCK.AUTOMIC_DM.PUB.ACTION.SET_DYNAMIC_PROPERTY DM Set Dynamic Property Sets the value of a given Dynamic Property in ARA. PCK.AUTOMIC_DM.PUB.ACTION.SET_DYNAMIC_PROPERTY DM Set Dynamic Property Sets the value of a given Dynamic Property in ARA. Arrange the Actions in the editor to resemble the screenshot below:

-
-
Trigger_Undeploy Workflow. Triggers the "Undeploy_environment" Workflow based on the current Package Profile (green or blue).
-
General Component Workflow.
Drag-and-drop the following Actions to the editor and name them as follows:
Name Title Description PCK.AUTOMIC_DM.PUB.ACTION.GET_DYNAMIC_PROPERTY DM Get Dynamic Property Retrieves the value of a specified Dynamic Property in CDA (blue/green). PCK.AUTOMIC_DM.PUB.ACTION.EXECUTE_APPLICATION_WORKFLOW DM Execute Application Workflow Executes the deploy Application Workflow. PCK.AUTOMIC_DM.PUB.ACTION.PackagesTATE_SET DM Set Package State Sets the state of a specified Package using its ID. PCK.AUTOMIC_DM.PUB.ACTION.PackagesTATE_SET DM Set Package State Sets the state of a specified Package using its ID. PCK.AUTOMIC_DM.PUB.ACTION.SET_DYNAMIC_PROPERTY DM Set Dynamic Property Sets the value of a given Dynamic Property in ARA. PCK.AUTOMIC_DM.PUB.ACTION.SET_DYNAMIC_PROPERTY DM Set Dynamic Property Sets the value of a given Dynamic Property in ARA. -
Arrange the Actions in the editor to resemble the screenshot below:
-
-
Undeploy_environment Workflow (undeploys the Application from the current set of Targets).
-
Application Component Workflow.
Drag-and-drop the following Actions to the editor and name them as follows:
Name Title Description PCK.AUTOMIC_DOCKER.PUB.ACTION.REMOVE_CONTAINER Remove an existing container Removes the container from the Environment. PCK.AUTOMIC_DM.PUB.ACTION.SET_DYNAMIC_PROPERTY DM Set Dynamic Property Sets the value of a given Dynamic Property in ARA. -
Arrange the Actions in the editor to resemble the screenshot below:

Note: The Remove an existing container task contains a precondition that states that if the Package has no Id it can be skipped. This prevents the Workflow from removing incorrect containers.
-
You are almost there! The last step will be to arrange the Component Workflows within the Application Workflows.
-
-
Second, add and arrange the Component Workflows in the Application Workflows.
-
Deploy Workflow: this Workflow is designed to deploy the Application into an Environment. It consists of four different Subworkflows. Arrange them as follows:

- Database: makes changes to the database.
- CREATE_IMAGE: creates a Docker image.
- DEPLOY_IMAGE: deploys the Docker image.
- General: sets the Package state.
-
Trigger_Deployment Workflow: this Workflow will be used to determine which endpoint is available at the time of deployment based on the Profile (green or blue). It triggers the deploy Workflow and consists of only one Component Workflow (General1):
- Switch Workflow: this Workflow will be used to switch the load balancer and make the Blue or Green Endpoints live and available.
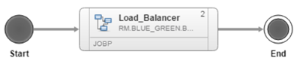
- Load Balancer: switches the load balancer from "green" to "blue" (and vice versa).
-
Switch_Back Workflow: switches the routed traffic back to the previous installation. It consists of one Component Workflow: "Load_Balancer"
- Load Balancer: switches the load balancer from "green" to "blue" (and vice versa).
-
Mark_Stable Workflow: marks the Package as stable in the production version. It consists of one Component Workflow: (General1).
- General1: marks the installed version as "stable". Traffic is routed. As of now, changes will be deployed to the Targets assigned to the other Profile.
-
Trigger_Undeploy Workflow: triggers the "Undeploy_environment" Workflow based on current Package Profile (green or blue). It consists of one Component Workflow (General1).
-
Undeploy_Environment Workflow. It consists of one Component Workflow (Application):
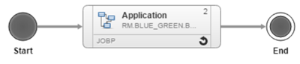
- Application Workflow: removes the Docker container from the Environment.
-
Next steps:
Previous steps: