Example: Defining Authorizations at User Level
This topic describes a very basic way to define authorizations, namely, granting or denying access rights and privileges to objects directly to users.
In this example, an administrator creates two Users, JOHN and PETE, and assigns them rights and privileges in Client 100 (DEVELOPMENT). This is the Client in which the developers in the company design PromptSets, create Jobs, build Workflows, etc. The objects available in this Client are stored in folders.
JOHN and PETE have different responsibilities. They will be able to open and read all objects but, apart from that, they will have completely different rights.
Rights can be granted at object and at folder level. At object level means that administrators add objects one by one to the User Authorizations list and activate the corresponding CRUD rights. At folder level means that administrators can assign Users rights to all objects saved to a specific folder without having to add each end every object to the list.
How to create User objects.
How to grant different Users different CRUD rights to the objects available in the Client.
How to deny rights to specific folders and objects.
How granting/denying rights to folders affects what users can see and do.
How to grant Users privileges to perspectives and functions.
- Client 100 is available and active
-
It contains the following folders:
- DATAWAREHOUSE
- MAINTENANCE
- HR - neither user should have access to this folder and its contents.
-
The DATAWAREHOUSE folder contains the following Workflows:
- #1DWH.UPDATE_DATAWAREHOUSE
- #2DWH.SEND_REPORTS_TO_MANAGEMENT
-
The MAINTENANCE folder contains the following Workflows:
- JOBP.AGENT.ONBOARDING
- JOBP.REQUEST.LOGFILE.BACKUP
JOHN will have full rights to DATAWAREHOUSE and its contents and restricted rights to MAINTENANCE and its contents. He will have no rights to HR.
- Log in to Client 100 using your administrator credentials.
- On the menu bar at the top of your screen click
 at the right hand side of the Home button.
-
A dropdown menu opens that displays all the perspectives:
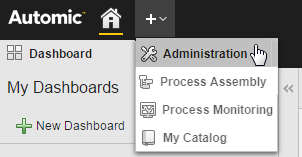
- Select Administration to open the Administration Perspective.
- On the Administration pane on the left hand side, click User Management to expand it.
- Click Users to display the list.
- Right-click anywhere on the list and select Add User from the context-menu or click the Add User button on the toolbar.
-
On the Create User dialog enter JOHN and, optionally, the Department of the user (in our case, DEVELOPMENT) and click OK.
The user is now saved to the Automation Engine database.
- The object definition pages open, displaying the User-specific page. This is where you add the JOHN's personal, credentials and other useful settings. Populating these fields is optional. We will leave them empty for this example.
-
Expand the Automation Engine section on the left pane and select Authorizations.
This is where you specify the folders, object types and (optionally) objects to which JOHN will have access as well as the CRUD rights you assign him.
 Click here to see a description of the columns and the options available for selection:
| Field/Control |
Description |
| Grp. |
This grants or denies access rights.
The Automation Engine provides 9 authorization groups that you can use to combine multiple sets of access rights. Access rights of the same group are connected via a logical OR. Access rights of different groups are connected via a logical AND.
NOT stands for access denial. It does not depend on an authorization group and applies in all cases.
|
| Type |
This specifies the object type (short name) to which this set of access rights applies.
The '*' wildcard character means that they apply to all object types.
|
| Name |
This specifies the object and/or the folder to which the access rights apply. It can contain up to 200 characters.
You have several possibilities here:
-
Leave this field empty.
In this case, the access rights apply to ALL objects of the type selected in the previous column (for example, to all Workflows, to all PromptSets, etc.).
-
Enter the name of just one object.
The access rights apply to just this object.
-
Enter the name of multiple objects.
The names of the objects must be separated by commas. The access rights apply to only these objects.
You can use the wildcard characters ("*" for any number of characters and "?" for exactly one character).
Folder and subfolder paths must always start with a "\".
Example: "\PRODUCTION\MATERIAL.HANDLING"
When you create an object, the name of the object and/or folder you define here is compared with the name of the template object. If the names do not correspond, you are not able to create the object.
|
| Agent* |
Filters for Agent names (this might be relevant for Job execution, File Transfer sources, etc.).
Maximum: 200 characters You can use the following wildcard characters here: - "*" stands for any number of characters
- "?" stands for exactly one character
This field can also include more than one filter. In this case, they must be separated by commas. |
| Login* |
Filter for names of Login objects (job execution, file transfer source, registered job output files). Maximum: 200 characters You can use the following wildcard characters here: - "*" stands for any number of characters
- "?" stands for exactly one character
This field can also include more than one filter. In this case, they must be separated by commas.
|
| File Name (S)* |
Filter for file names (file transfer source, registered job output files).
Maximum: 255 characters
You can use the following wildcard characters here:
- "*" stands for any number of characters
- "?" stands for exactly one character
This field can also include more than one filter. In this case, they must be separated by commas.
|
| Agent (D)* |
Filter for agent names (
file transfer destination).
Maximum: 200 characters You can use the following wildcard characters here: - "*" stands for any number of characters
- "?" stands for exactly one character
This field can also include more than one filter. In this case, they must be separated by commas. |
| Login (D)* |
Filter for names of Login objects (
file transfer destination).
Maximum: 200 characters The wildcard characters "*" and "?" can be used. This field can also include more than one filter. Several filters must be separated by commas. |
| File Name (D)* |
Filter for file names (
file transfer destination).
Maximum: 255 characters You can use the following wildcard characters here: - "*" stands for any number of characters
- "?" stands for exactly one character
This field can also include more than one filter. In this case, they must be separated by commas. |
| R |
Grants Read rights.
Opening objects and folders is possible. See also Read rights to folders for additional information |
| W |
Grants Write rights.
Modifying objects is possible. This right granted for folders has the effect that a user can create objects in it. |
| X |
Grants Execute rights.
Executing objects is possible. |
| D |
Grants Delete rights.
Deleting objects and folders is possible. Links are not objects. If a user intends to delete a link, s/he requires write access to the folder in which this link is stored. No deletion right is required. |
| C |
Grants Cancel rights.
Canceling active objects is possible. |
| S |
Grants access to execution data |
| P |
Grants access to reports |
| M |
Grants Modify to Runtime rights
This allows the setting of trace options on Automation Engines
or agents and the ending of RemoteTaskManager and Event objects. |
* These columns are not displayed by default. To see them, click  on the header row to open the list of available columns. The visible ones are marked with a tick, the hidden ones are grayed out. Select the one you need to make it visible; click it again to hide it.
-
Grant JOHN full rights to the DATAWAREHOUSE folder and its contents.
You have two possibilities:
-
Grant JOHN restricted rights to the objects contained in the MAINTENANCE folder.
He should be able to open and see the Workflows, their reports and their execution data but should not be able to modify anything. You have the following possibilities:
-
Deny JOHN access to the HR folder:
- Save your changes.
JOHN's Authorizations look either like this:
or like this:
Of course, you can also combine both ways to grant rights and use the folder and the object methods in one User definition.
PETE will have full rights to MAINTENANCE and its contents and restricted rights to DATAWAREHOUSE and its contents. He will have no rights to HR. In this example, we will use the folder method for him:
- Grant PETE full rights to the MANTENANCE folder and its contents.
- Grant PETE restricted rights to the objects contained in the DATAWAREHOUSE folder.
- Deny PETE access to the HR folder.
- Save your changes.
PETE's Authorizations look like this:
After assigning the access rights to folders and objects, you must make sure that users have the necessary rights to the perspective with which they will work and to the functions they will perform.
-
Select Privileges on the left pane.
Click here to see a description of all the available Privileges:
|
Activate this checkbox ...
|
... to allow the user to
|
| Access to Explorer Folders |
|
Access to <No Folder>
|
Open the <No Folder> folder.
Restored and transported objects are available here. Having the right to <No Folder> gives users access to those objects.
|
|
Access to recycle bin
|
Access the Recycle Bin.
Deleted objects are available here. Having this right allows users to restore deleted objects. Restored objects are then available in the <No Folder> folder.
|
|
Access to transport case
|
Access to the Transport case.
Users with this privilege can open objects that should be transported to a different client or system. They can also delete objects from the Transport Case.
|
|
Access to Version Management
|
Access the Version Management folder and open (in read-only mode), restore and delete saved object versions. Execution data and reports are also available in this folder.
|
| Administration |
|
Change system status (STOP/GO)
|
Change the status of the system and interrupt automatic processing.
|
|
Create diagnostic information
|
Set the trace options and display the Quarantine page and its contents in the Administration perspective.
|
| Execute system upgrades |
Perform system upgrades. |
| FileEvents: Start without Login object specified |
Start FileSystem Events without using a Login object, that is, without entering specific user credentials.
Granting or refusing this privilege affects the execution of FileSystem Events where the definition of a Login object is optional.
|
|
FileTransfer: Start without Login object specified
|
Start file transfers without using a Login object, that is, without entering specific user credentials. The Agent uses the credentials of the user who started it.
Whether the Agent is allowed to process file transfers without Login object is specified in the UC_HOSTCHAR_DEFAULT variable, key ANONYMOUS_FT, see UC_HOSTCHAR_DEFAULT - Host Characteristics.
|
| ILM actions |
Access to the ILM pages (Partitions and History)and rights to configure ILM.
|
| Manage favorites on user group level |
Configure the User Catalog. The user can configure User Groups and add them to the User Catalog folder in the Process Assembly perspective.
This way, the users included in a User Group will have rights to the objects to which the User Group gives access. These objects are the available in their My Catalog dashboard. See Configuring the User Catalog.
|
|
SAP Criteria Manager
|
Access to the SAP Criteria Manager via the Form page of SAP jobs.
|
| AWI Access Control |
| Access to Administration |
Access to the Administration Perspective. |
| Access to Analytics |
Access to Analytics. |
| Access to Analytics for all clients |
Access to Analytics for all clients. |
| Access to Dashboards |
Access the Dashboard. |
| Access to Messages |
Access to messages. |
| Access to Process Assembly |
Access to the Process Assembly perspective. |
| Access to Process Monitoring |
Access to the Process Monitoring perspective. |
| Access to My Catalog |
Access to the My Catalog. |
| Advanced Editing |
| Create and modify Backend variables |
Create and edit BACKEND Variables .
Users who do not have this privilege can open these variables only in read-only mode.
|
|
Create and modify SQL-Internal variables
|
Create and modify SQL variables, both Secure and Internal (see SEC_SQL Variables and SEC_SQLI Variables)
The value in SQLVAR_INTERNAL must be YES (see UC_SYSTEM_SETTINGS - System-Wide Settings .
If this privilege is not available, the variable type SQLI is not available for selection when creating variables. Internal SQL variables always open in read-only mode.
|
|
Object properties: allow manually reset of 'Edit Hint'
|
If a user opens an object for editing, the object is marked. If a program interruption occurs during the editing process, the object keeps this tag even if the Automic Web Interface is restarted. Privileged users can remove this tag.
|
| View Messages |
| Dump memory trace |
See the Force memory trace dump button on the Messages and Request pane. |
|
View all messages from accorded client
|
See all messages that are addressed to the client in which the user is defined.
|
|
View messages from own user group
|
See all messages that are addressed to the User Group of which the user is a member.
|
|
View messages to administrators
|
See messages that are addressed to administrators. They are not assigned to any specific user or client and inform about system-wide actions (such as a Server start).
|
|
View security messages
|
See security messages. These messages are not assigned to a specific user. They are created through the access check of the Authorization System.
|
| Access Control |
|
Access to Auto Forecast
|
Access to the Auto Forecast function (automatic calculation of forecast data for tasks that will run within a specified period of time). See AutoForecast.
|
|
Access to deactivated tasks
|
Filter for deactivated tasks.
|
|
Access to Administration
|
Open the Administration Perspective, which provides access to system and security information and functions.
|
|
Deal with authorizations at object level
|
Specify or change exclusive access rights to objects.
This right should be combined with write access (W) to the object. This is define at object level, see Managing Authorizations at Object Level.
|
| Logon via CallAPI |
Access the Automation Engine system via the Call Interface. This allows users to start tasks from within their own programs or via the utility. |
|
Modify the status of a task manually
|
Change the status of tasks.
The system does not check if the new status is a logical status. If status >= 1800 is set, the task ends.
|
|
Take Over Task
|
Tasks run under the user who has started them. For a different user than the owner user to be able to assume a task, he/she must have this privilege. The corresponding command is then displayed in the context menu. See Taking Over the Ownership of a Task.
|
|
View server usage of all clients
|
View the server process workload in the individual clients.
|
-
Typically, developer users could have the privileges listed below, but of course this depends on your company's policy:
Access to Explorer Folders
- Access to Recycle Bin
- Access to Version Management folder
AWI Access Control
- Access to Dashboards
- Access to Messages
- Access to My Catalog
- Access to Process Assembly
- Access to Process Monitoring
View Messages
- View all messages from accorded client
No matter in which client you create a User, it will automatically be available in Client 0 as well. Thus, Client 0 provides an overview of all the Users in your Automation Engine system. This means that you can create User either on their target Clients or on Client 0 and then move them to their Clients (see Moving Users (only available in client 0)).
See also:


