A secure communication between the components that integrate an Automation Engine system relies on encryption and on authentication. For an overview of the Automation Engine security concept see Secure the Automation Engine.
This topic provides information on the following:
Encryption secures the data flow between the components in an Automation Engine system, ensuring that data cannot be read or modified during transfer.
However, encryption alone is not enough.
It is also essential to make sure that the communication takes place between the right partners. For this purpose, authentication methods uniquely identify the components in an Automation Engine system.
You define whether the communication is encrypted or not in the ENCRYPTION key available in the UC_AS_SETTINGS variable that is provided in system client 0000. The following values are allowed:
-
ENCRYPTION = NO
The communication between the components in an Automation Engine system is not encrypted.
-
ENCRYPTION = AES-128
Communication encrypted with a 128-bit key length.
-
ENCRYPTION = AES-192
Communication encrypted with a 192-bit key length.
-
ENCRYPTION = AES-256
Communication encrypted with a 256-bit key length.
The encryption strength you select here has no negative effects whatsoever on the performance of your system.
Encryption is enabled by default.
See also UC_AS_SETTINGS - Advanced Security
- Log in to system client 0000.
-
Enter UC_AS_SETTINGS in the Global Search field:
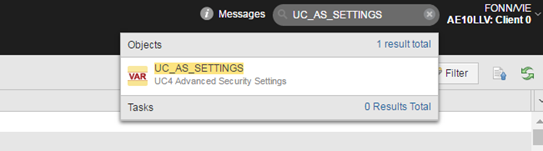
-
A dropdown list with a link to the variable opens up. Click it.
The UC_AS_SETTINGS variable is displayed:
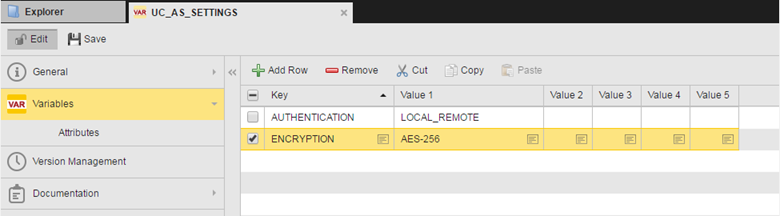
- Select the ENCRYPTION key to activate it.
- Click the file icon in the Value 1 column to open the Cell Editor, where you can enter the encryption strength.
- Save your changes.
This encryption strength will be used for the following components:
- Password storage within the Automic database repository
- Database Password Reference within the Automation Engine Configuration File
- Communication between the Automation Engines and the agents
- User interfaces
- API Calls
Additional Information
Although data encryption provides security, additional protective mechanisms such as access rights to sensitive data and physical access protection for the Servers is required in order to ensure the greatest possible security level.
The connection to the AE database is protected by the database vendor's database client.
Passwords are stored in the database in encrypted form.
Now you must make sure that the Automation Engine communicates with the right agent, for example, and not with a hacker. For this purpose, the communication partners must be authenticated.
During the authentication process, two keys play an important role:
-
This is the Automation Engine system's private key. It applies to the entire system and is defined once during the installation.
The Authentication Key is used to encrypt the Transfer Keys in the KeyStores. It can be loaded via the DB Load utility.
In case of Authentication Method NO, this key is derived from the system name. Otherwise, the system administrator must specify it (see below).
Do not change or delete the Authentication Key! If you do so, all other keys become invalid.
-
This is the key that is shared by two communication partners within an Automation Engine system. It is generated either before or during the first connection between the Automation Engine and an agent. It is valid for just one connection.
The Transfer Key is used to authenticate the communication partners and to generate the session key.
-
Session key
This key is valid for just one connection. It is used for encrypting the data during transfer.
Basically, these are the steps to carry out in order to set up the authentication method:
-
Specify the authentication method to be used in your system.
In case of a manual installation (not via the ONE Installer), you can determine the authentication method to be used in your system using the AE DB Load utility.
You specify it using the -T start parameter.
The AE DB Load utility automatically adds the selected option to the AUTHENTICATION key in the UC_AS_SETTINGS variable.
-
Generate the Authentication Key to be used.
As happens with the authentication method, you define how to generate the Authentication Key also in the AE DB Load utility. Use the -K start parameter for this purpose.
- Authenticate the agents according to the selected method.
For example, entering UCYBDBld -B -TLOCAL_REMOTE –Kmy_secrect_key in the AE DB Load utility means that your system will apply the LOCAL_REMOTE authentication method using my_secret_key as Authentication Key .
For details see Start Parameters - Authentication.
Of course, you can change the Authentication method later on via the Automic Web Interface. See Changing the Authentication Method.
Updating an AE system from version 8.00A or later: When loading the file UC_UPD.TXT, the utility AE.DB Load shows an input mask (similar to the one in the ONE Installer). Use it to select the authentication method.
Available Authentication Methods
Three authentication methods are available:
|
Authentication method |
Description |
|---|---|
|
NO |
Agents that start for the first time can log on to the Automation Engine system immediately. The Authentication Key is derived automatically from the system name. A Transfer Key is generated automatically per agent when the agent is started for the first time. Afterward, agents can only log in to the Automation Engine system with the Authentication Key (which is common for all) and with the Transfer Key (which is specific per agent). |
|
LOCAL (Server) |
The system administrator defines the Authentication Key manually during the Automation Engine installation. The Authentication Key can be exported to a file that must be used during agent installation. On first start, the agent loads it to its KeyStore file. The agent logs on to the Automation Engine system using the Authentication Key when they start for the first time, however, it cannot be used yet. The administrator must authenticate it manually in the Administration Perspective of client 0000. As soon as it has been authenticated, both the agent and the Automation Engine generate the Transfer Key. A Transfer Key is exclusive to one agent and is valid for one connection only. If for whatever reason you must reconnect a agent, a new Transfer Key must be generated. The agent also stores the Transfer Key in its KeyStore file. Now the agent is authenticated and ready to use. Afterward, agents can only log in to the Automation Engine system with the Authentication Key (which is common for all) and with the Transfer Key (which is specific per agent). |
|
LOCAL_REMOTE (Server and Agent)
|
This is the recommended method, as it provides the highest security level. An Agent object must be created in system client 0000 for each agent that will communicate with the Automation Engine. The Installation Package contains the system's Authentication Key as well as the Transfer Key of the particular agent. The agent is ready to use as soon as this is done. On first start, the agent loads the keys from the Package and stores them in its KeyStore file. Afterward, agents can only log in to the Automation Engine system with the Authentication Keyand with the Transfer Key. To guarantee a secure installation, Automic recommends transferring the Installation Package to the agent either manually or via a secure line. This ensures that potential hackers never get access to it via the network. |
To Set the Authentication Method using the Automic Web Interface
- Log in to system client 0000.
-
Enter UC_AS_SETTINGS in the Global Search field at the top right hand corner of your screen:
- A dropdown list with a link to the variable opens up. Click it.
-
The UC_AS_SETTINGS variable is displayed:
- Select the AUTHENTICATION key to activate it.
- Click the file icon in the Value 1 column to open the Cell Editor, where you can enter the method.
- Save your changes.
The Authentication Key is exchanged during the first connection of the agent. Of course, you can also revert the agent authentication. In this case, the agent can no longer be used until it has been re-authenticated.
The authentication method you select affects the commands available for authentication in the list of Agents in the Administration Perspective.
Next steps
- Authenticate the agents, see Authenticating the Agents
- Change the authentication method, see Changing the Authentication Method
- Agents (HOST)
See also