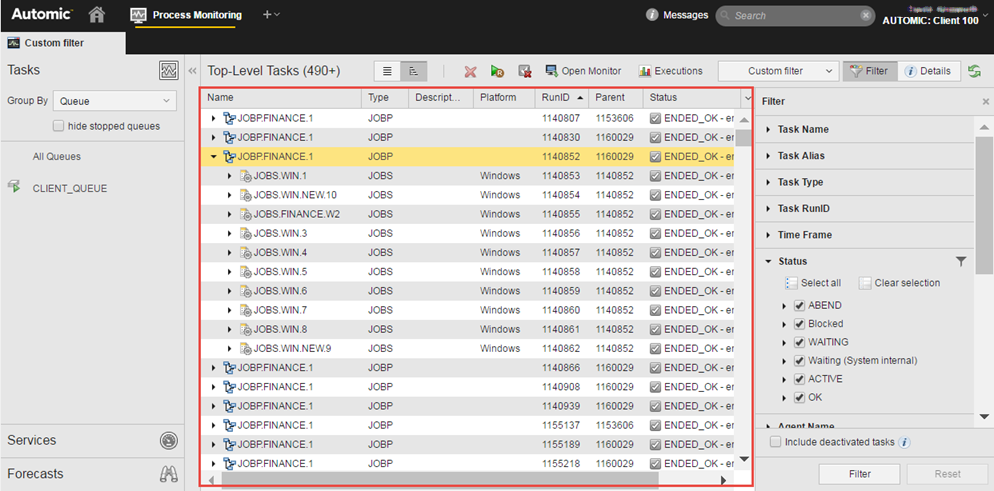
Throughout your system, tables present lists of data. There are two types: main page tables and editable tables on pages. For both you can resize and rearrange their columns, sort their rows, copy the content of the cells to paste it elsewhere, etc. This topic describes both types of columns.
This topic provides information on the following:
When you modify a table, the last changes are saved after you log out so that you need not define its settings anew.
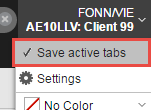
You can customize main page tables as described in this topic. If you want your changes to be permanent, make sure that Save active tabs is turned on in the login and session information menu. You find it on the upper right corner of the application:
This table provides descriptions of all options available for such tables throughout the application:
| To ... | Do the following: |
|---|---|
|
Sort Rows in a Table
|
You can sort the rows in a table by the values in any column, in either ascending or descending order. When the table is sorted, you see a small arrow in the sort column header, pointing up for an ascending and down for descending sort.
|
| Change the Column Order |
In most lists you can change the order of the columns by dragging and dropping them to a new place.
|
| Change the Column Width |
|
| Show/Hide Columns |
Due to space restrictions most tables display only some of the columns that are available.
|
| Copy and Paste the Content of Cells |
|
 ).
). ).
).

 button on the upper right corner of the table header to open the list of all available columns.
Many pages contain tables that allow you to add, edit, sort, etc., data that you want to include in objects or tasks, for example when you are designing Schedules, Workflows, Sync objects, etc. For example, when defining objects and defining attributes you will often find tables similar to this one:

Depending on the object or task you are working with, some of the buttons on the table toolbar may not be available because they are not necessary. This table provides descriptions of all options available for such tables throughout the application:
| To ... | Do the following: |
|---|---|
|
Add a Row to the Table |
|
| Enable a Row for Editing |
To edit the content of a row, for example to select or enter a value, activate the checkbox on the first column. Now you can start editing the values in the row. In the example above, you can start activating the checkbox for DEVELOPERS: |
| Enable ALL Rows for Editing |
To enable all rows for editing, activate the first checkbox on the table header.
Now you can start editing them. For example, if you select Cut now, all rows will be removed from the tables and pasted to the clipboard. |
| Edit a Cell |
First you must enable it for editing. Depending on the nature of the cell, you will have to simply type a value, select it from a dropdown list, choose it from a spin button, activate/deactivate a checkbox, etc. For example, in the illustration below, the cell combines a dropdown list in which you select an operator with a spin button that sets the value:
|
| Remove One or More Rows |
You can select only one or more than one rows to remove them from the table in bulk. Activate them and click |
| Cut and Paste Rows |
|
| Copy and Paste Rows |
|
| Moving Rows Up/Down |
|
| Copy and Paste the Content of Cells |
|
| Select All/Clear Selection |
Activate a row on the table to enable it for editing it and click Select All to activate all checkboxes available on that row. Click Clear selection to deactivate them. This option is available on
For example:
|
 on the toolbar.


 .
. . The selected row(s) are removed from the table and copied to the Clipboard.
 . They are inserted at the bottom of the table.
 . The selected row(s) are duplicated and copied to the Clipboard.
 or
or  . The selected row(s) are moved one position up/down.