The following guide describes how to install an agent in an AE system in which authentication is not used. Additional installation steps are required before the agent can be started and used, if you intend to use one of the available authentication methods. More detailed information is provided in the document Advanced Security.
The agent creates an additional log file in SAP format. This file is automatically stored in the agent's subfolder "log" in the installation directory. It can easily be processed with SAP Tools.
To Set Up the Agent for Java EE/JMX (SAP NetWeaver)
-
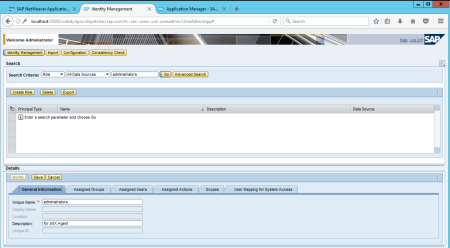
Create a role for the JMX agent in the SAP Identity Management.
- In the General Information tab of the Details section, assign the unique name administrators (as defined in the supplied web.xml file) and a description.
- Click Save.
-
In the Assigned Actions tab, type in "jmx" in the Get: section and click Go.
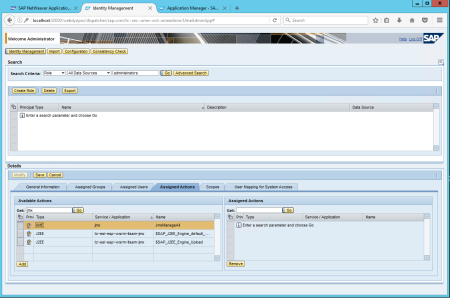
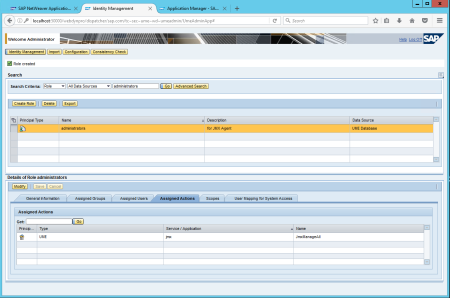
- Select the line that shows the Name "JmxManageAll" and click Add and Save. The result is shown in the screenshot below:
-
Set up the JMX agent
- Copy the file ucxjjmc.sca to the computer where SAP NetWeaver is installed
-
Deploy the JMX agent
- Login to the SAP NetWeaver host with the operating system user <sid>adm.
For more information, see also: https://help.sap.com/saphelp_hanaplatform/helpdata/en/be/98c998bb5710149e8cace9b0c08908/content.htm
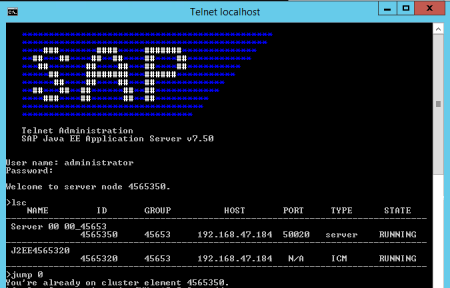
- Open a telnet to localhost port 50008 if your generated instance is 00, or localhost port 50108 if your instance is 01, and log in as administrator (type: Isc, jump 0)
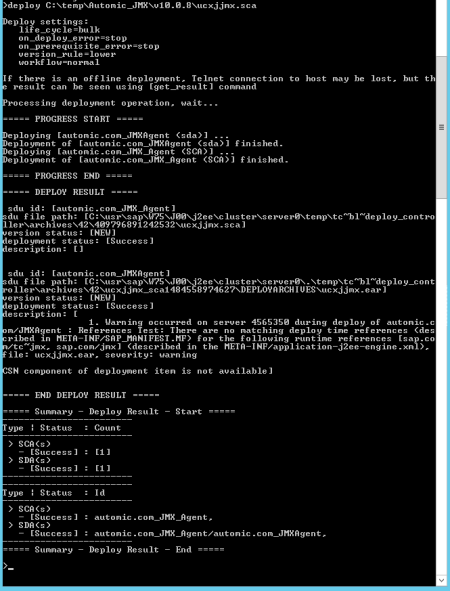
- Deploy c:\Automic_JMX\ucxjjmx.sca
- Login to the SAP NetWeaver host with the operating system user <sid>adm.
-
Undeploy the JMX agent
- Open a telnet to localhost port 50008 or localhost port 50108, and log in as administrator (type undeploy name=JMXAgent vendor=automic.com)
-
Configure the JMX agent.
-
Open the browser http://<sap-host>:50000/uc4jmx (instance 00), or http://<sap-host>:50100/uc4jmx (instance 01), and fill in the relevant configuration data.
The following information is particularly important:
- Agent name
- Name of the computer on which a communication process is available
- Port number of a communication process
-
-
Important notes the creating jobs:
- Select JNDI in the JMX tab of the Job object. Enter "jmx" as the object name.


