
|
Creating an Object |

Getting Started Guide |
Statistics and Reports |

|
Aim:
- Manually executing the job
The previous lesson explained how to create a Job object. This job should now be executed. Executed objects are also referred to as tasks. Hence the processing of objects is described whenever the Automation Engine Documentation refers to tasks.
 toolbar button.
 When the job ends, the task is by default removed from the Activity Window. The Attributes tab of the Job object, however, can be used to change this setting.
  The Activity Window contains many columns which provide information about tasks such as object name, start time and RunID. The RunID is a run number which is used in executions.
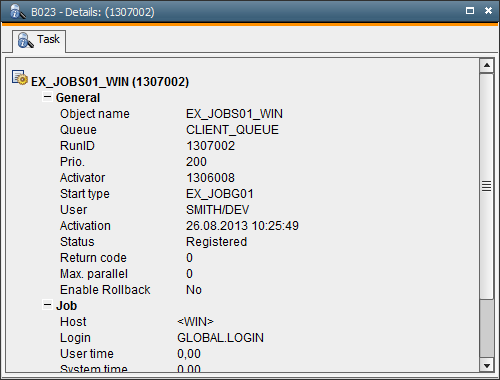
Execute the Job object without having a Login object specified in the Notification tab Refer to the text that is supplied in the Message Window. Correct this error by selecting the right Login object and restarting the object. Now the Message Window displays that the job has ended normally.