
|
Using Groups |

Getting Started Guide |
Navigation in the UserInterface |

|
Aim:
- Using the Auto Forecast
- Using the regular forecast
You already know how to create, schedule and execute objects. As your tasks are mainly organized via Schedules, it is important to have the time and duration of task executions displayed centrally. The Auto Forecast provides this functionality.
Supported by the Auto Forecast, we will retrieve the next execution time of the file transfer that has been included in the Schedule.
 button in the tool bar.
 Note that the result of the Auto Forecast only includes tasks of active schedules and objects of type event.
  button in the toolbar.
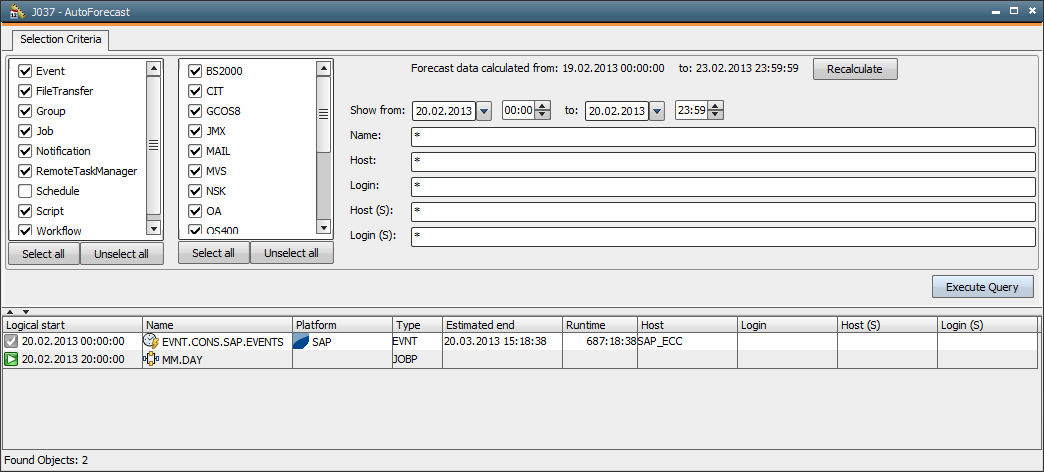 Your calculation period can deviate from the illustration shown above as it depends on the settings made by your administrator.
 In addition to the Auto Forecast, you can also query an individual forecast for a particular object. It provides information about the average duration of this object's execution.
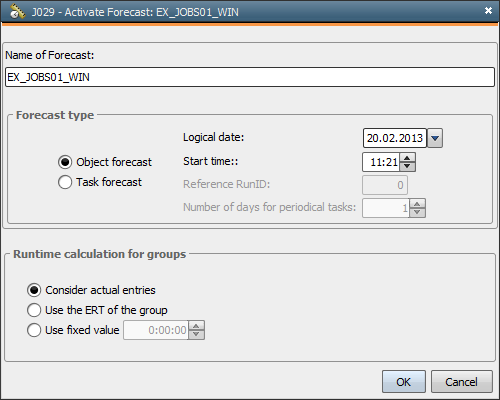
 Auto Forecast calculations also create individual forecasts (see above).
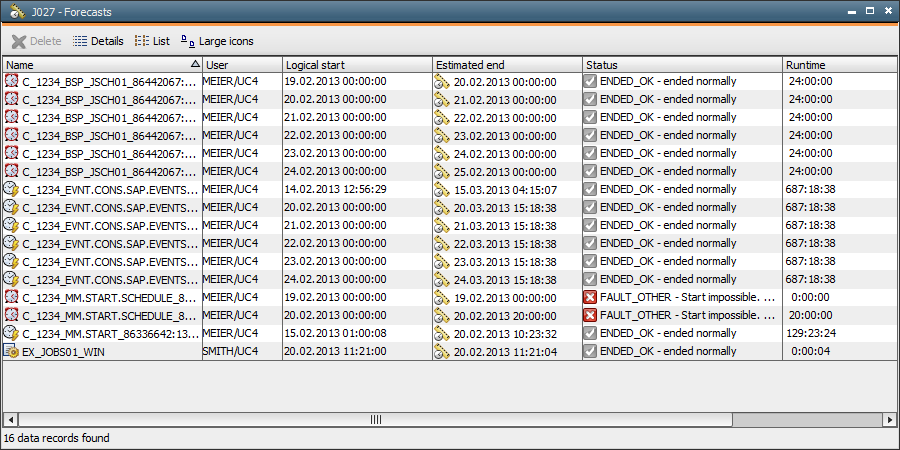
Include the workflow in the Schedule object. Now start the Schedule. The Auto Forecast now also includes the workflow and its objects.