
|
Statistics and Reports |

Getting Started Guide |
Automation via Schedules |

|
Aim:
- Creating a file transfer
- Creating a wildcard file transfer
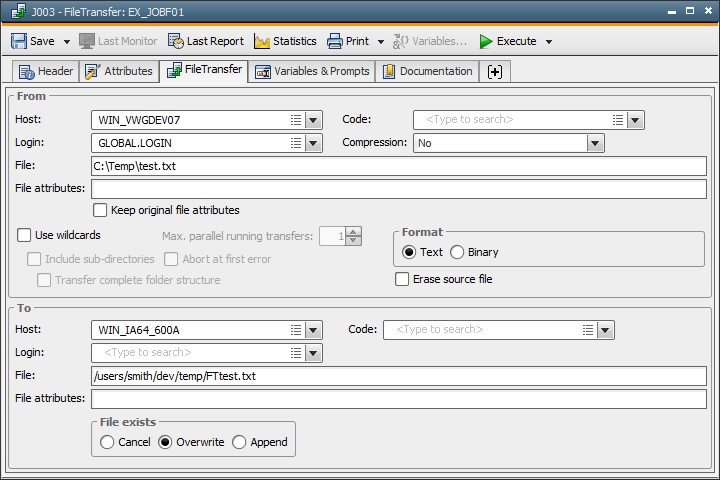
An integral part of processing is the transfer of files. The Automation Engine therefore provides an extra object type for this activity. A statistics overview is available for file transfers (as for Job objects) so that the individual executions can be traced.
We are now going to create a file transfer. Prepare several files that can be transferred to a different computer.
 It is of no importance where your objects are stored. Nevertheless, Automic recommends establishing a folder structure that makes your administrative work as easy as possible, as objects that use each other do not necessarily have to be stored in the same folder.
 button in the toolbar.
Let's now take a look at the content of the FileTransfer object. You already know many tabs from the Job object. It applies for file transfers as well as all other object types that the predefined default values are suitable. We are now going to define the file that should be transferred and the location to which it should be sent.
 button in the toolbar.
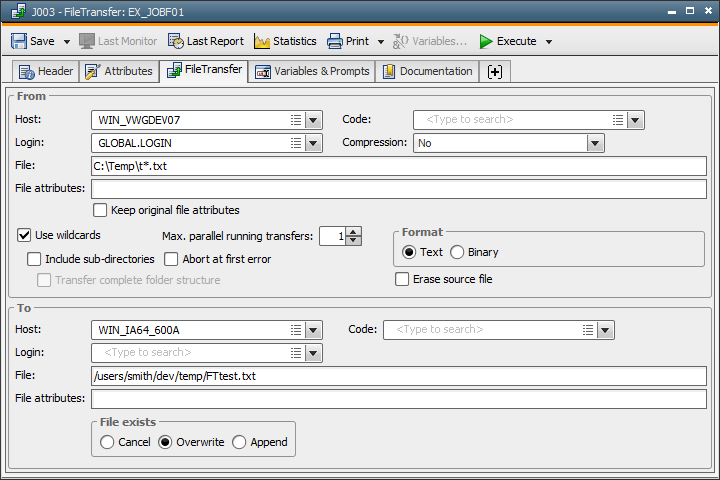
The file transfer we created transfers one file. If you want to transfer several files with one FileTransfer object, you can use wildcards. In doing so, files sharing the same start characters can be transferred. Let's create such a file transfer:
 button in the toolbar and close the FileTransfer object.
 button in the toolbar.
Execute the two FileTransfer objects individually. The first file transfer is displayed in the Activity Window as an individual task. As the second FileTransfer object transfers several files, each file is displayed individually and you can view multiple tasks. Read the statistics and the reports of both FileTransfer objects after the file transfer.