Examples of Calendar Objects
You want to create a basic calendar that you can reuse afterwards for defining more complex ones. In our example, we'll call it Basic. It contains two weekly Calendar Events:
 To Define a Basic Calendar
-
In the Process Assembly perspective, click Add Object and select Calendar.
Define the general settings as described here: Defining Objects
In this example, the Calendar is called Basic. Its title reads "Weekdays and Weekends".
Click OK.
-
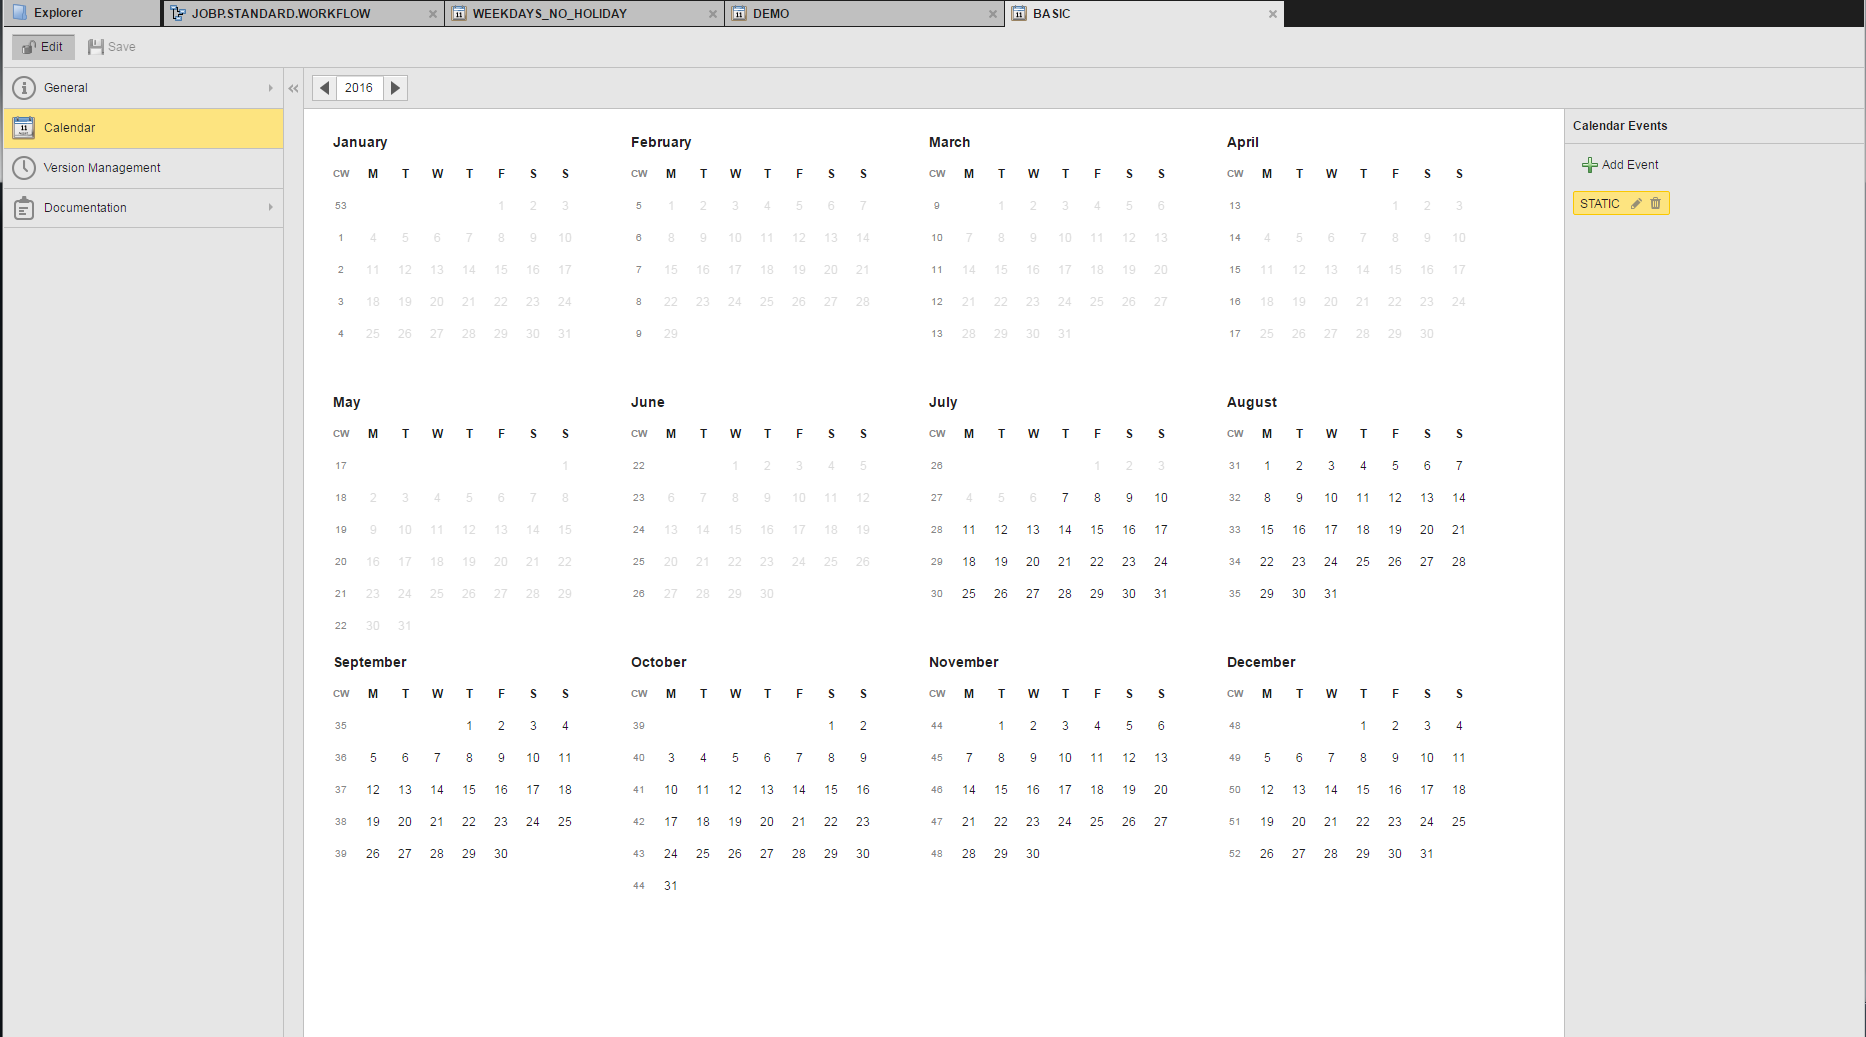
The Calendar page is displayed. The days of the year that lie in the past are grayed out. This is a mere visual help; any Calendar event that you define here will also affect past dates:
-
Create the first Calendar event, namely, one that selects all the weekends.
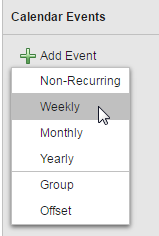
- Click the
 button.
-
From the drop-down menu, select the type of event you want to create. In this case, Weekly.
-
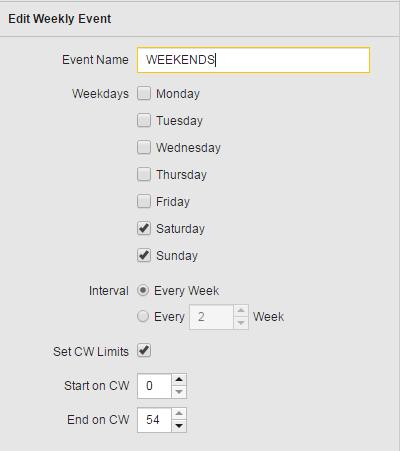
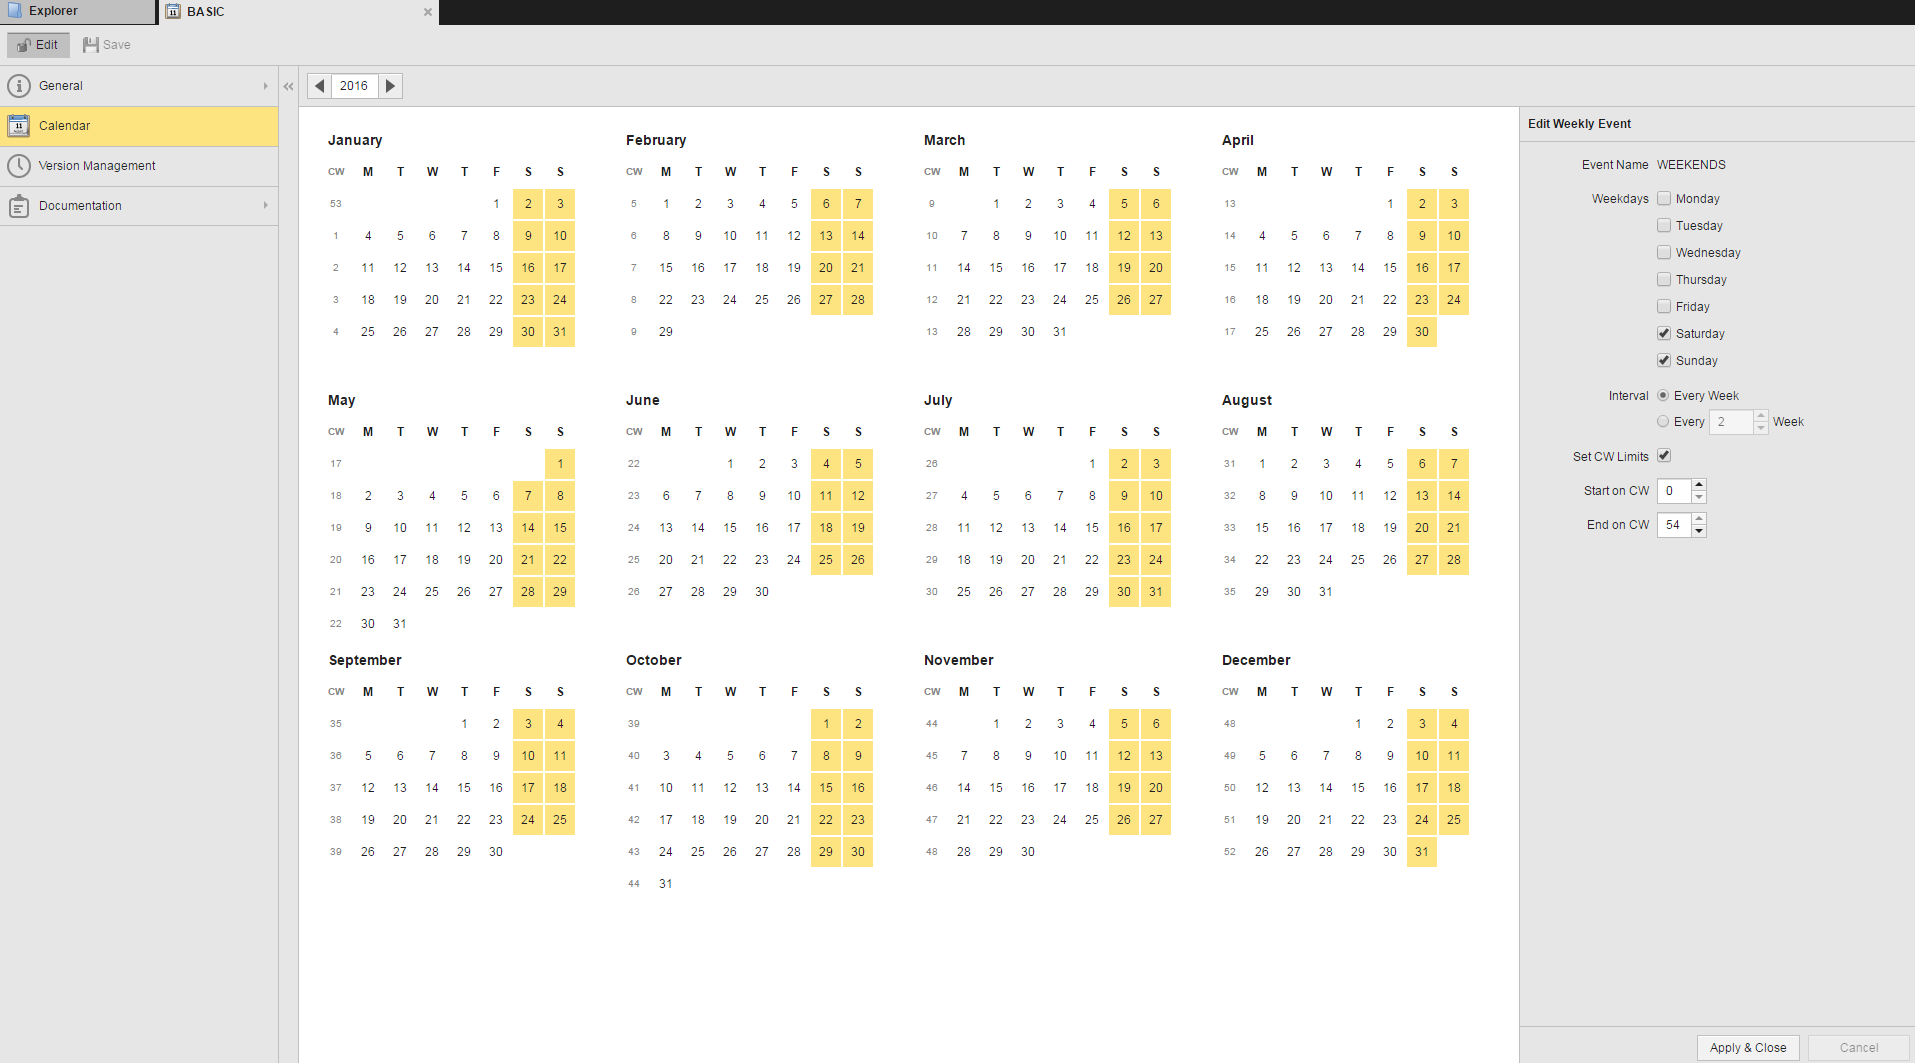
The Edit Weekly Event pane is displayed:
The following options are available:
| Option |
Description |
| Event Name |
Name of the event, which must be unique.
Make sure that you use names that you can easily recognize, as you'll probably want to use them later on with other calendars.
For this example, the event is called WEEKENDS.
|
| Weekdays |
Select the days of the week that this event will select.
For this example, Saturday and Sunday.
|
| Interval |
You can define the interval in which this weekly event should be effective.
For this example, as the goal is selecting all weekends in the year, we accept the default Every Week.
|
| Set CW Limits |
This allows you to set calendar week limits to the event. This can be useful if, for example, your financial year does not start on the 1st of January and you want this event to consider this.
We ignore this setting for this example.
|
-
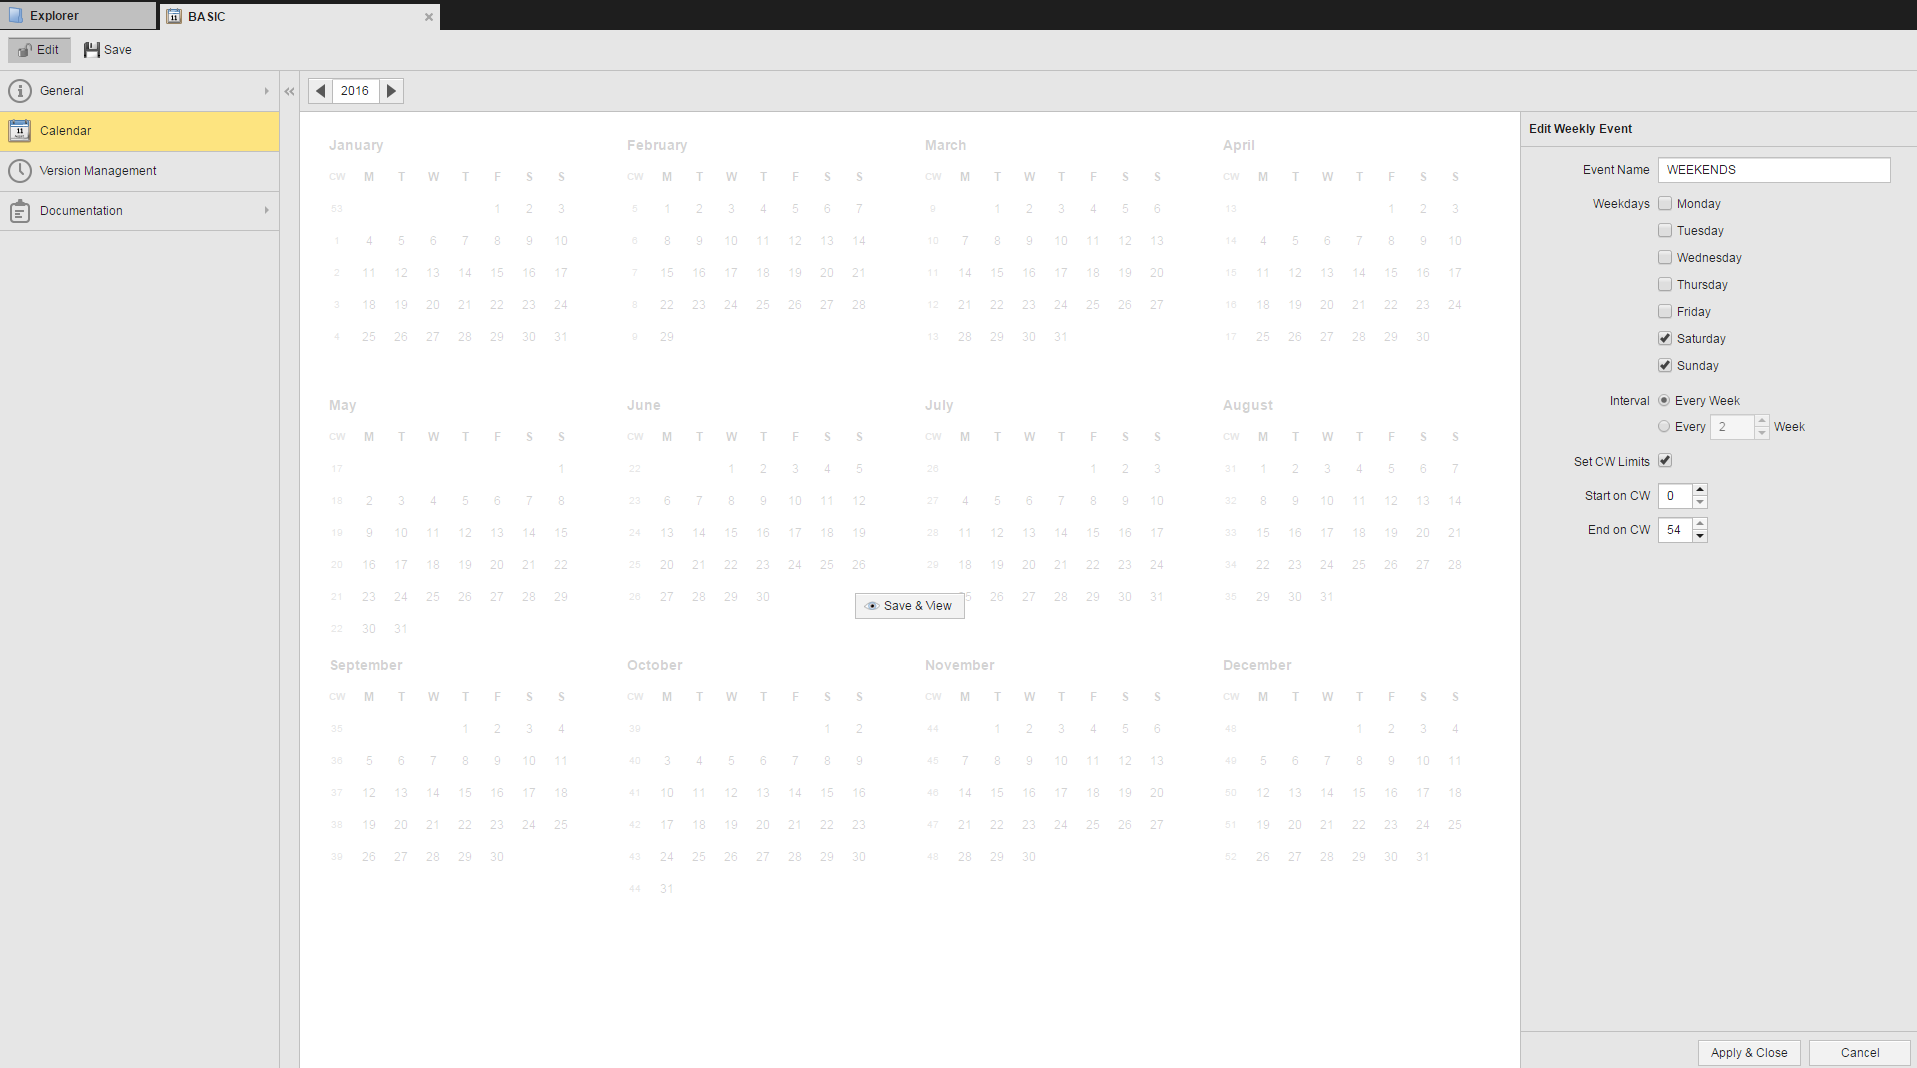
The Calendar view is now in the background and grayed out:
Click the  button in the middle of the page to save the settings and preview the results of the event:
- If you are satisfied with the results, click the Apply & Close button at the bottom right corner of the page to return to the Calendar Events pane.
- Create now the WEEKDAYS event (Monday to Friday) following the steps described above.
Your calendar is now ready. You can assign it to your executable objects or use it and its events as basis for defining more complex calendars.
You want to make sure that the execution of some of your tasks is carried out on working days to be able to monitor them and react quickly if something goes wrong. This means that they should run neither on weekends nor on national holidays.
For this purpose you create a Calendar object containing the following Calendar events:
-
WEEKDAYS
You have already created this Calendar event in our previous example, so you will be able to reuse it here.
-
NATIONAL_HOLIDAYS
Yearly Calendar Event that selects all national holidays in the year.
Automic products are supplied with standard Calendar Events for national holidays in most of the countries. You can use and edit them, if necessary, or create your own ones.
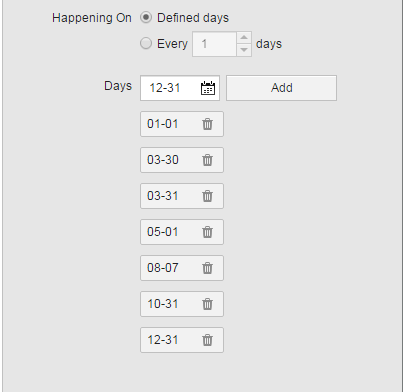
For this example, we will create a new calendar specifying the following dates as national holidays:
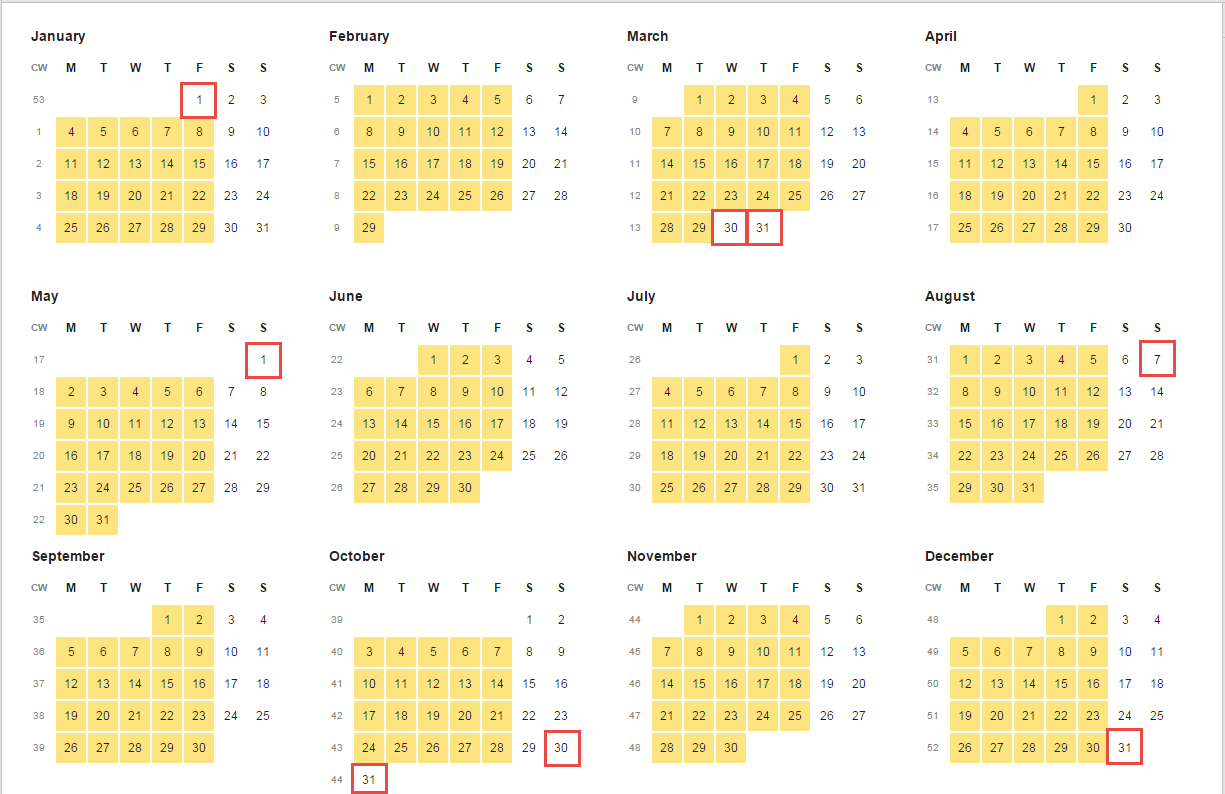
1st of January, 30th and 31st of March, 1st of May, 7th of August, 31st of October, 31st of December.
-
WORKING_DAYS
Group Calendar Event that combines the previous two Calendar Events, subtracting the national holidays from the weekdays.
To Define a WORKDAYS Calendar
- Create a Calendar object called WORKDAYS.
-
Create a yearly event called NATIONAL_HOLIDAYS:
The options in the Edit Yearly Event pane are as follows:
| Option |
Description |
| Event Name |
Name of the event, which must be unique.
Make sure that you use names that you can easily recognize, as you'll probably want to use them later on with other calendars.
For this example, the event is called NATIONAL_HOLIDAYS.
|
| Start Year |
Specifies the year as of which the calendar event will be effective. |
| Interval |
Specifies the interval in years in which the calendar event will be effective.
|
| Happening on |
Specifies the days of the year that will be selected by this event. The options are:
-
Defined days
This is the case for this example:
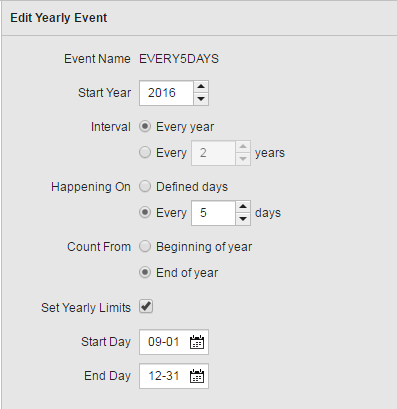
- Every x days
This allows you to specify a recurrence throughout the year. You must specify whether it starts at the beginning or at the end of the year.
Optionally you can activate the Set Yearly Limits checkbox and define the first and the last day of the year in which the event will be effective.
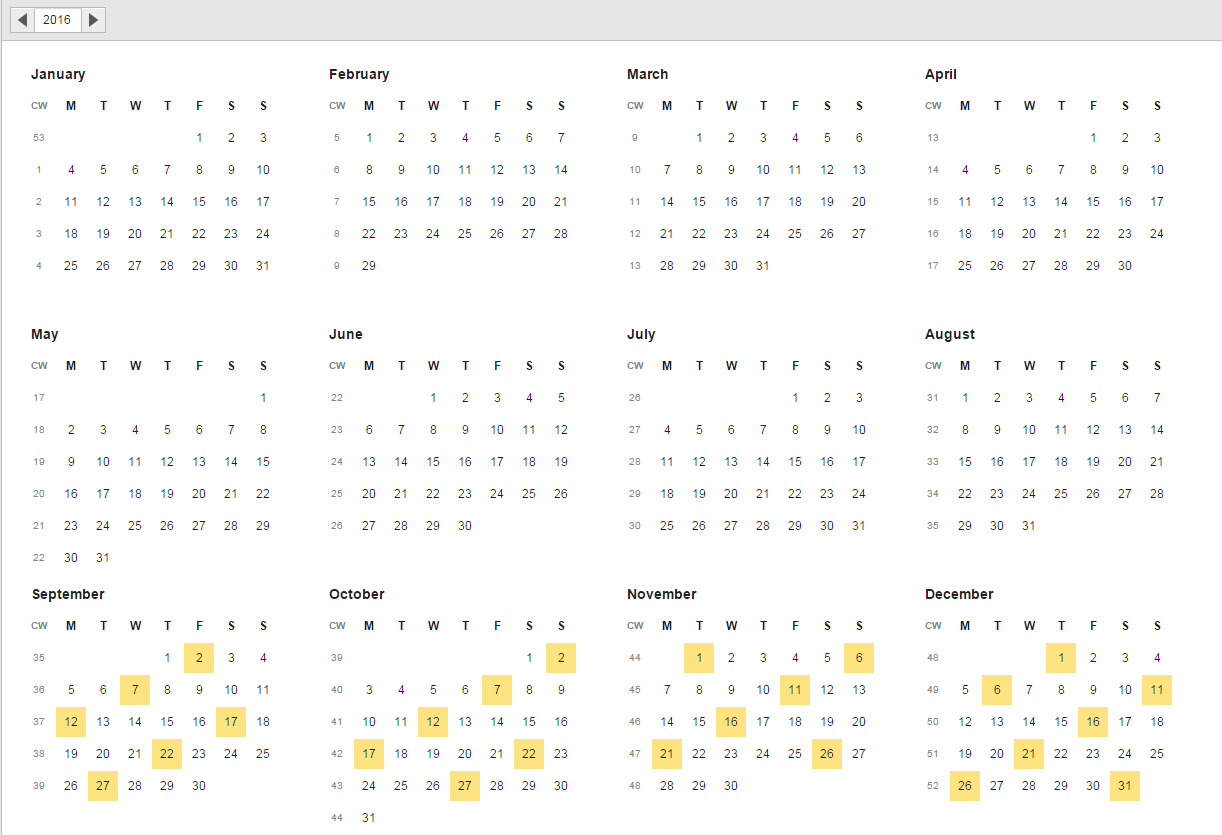
For example, if you want the event to select every 5 days beginning with the 31st of December and backwards until the 1st of September, you would specify the following:
And this would be the result:
|
-
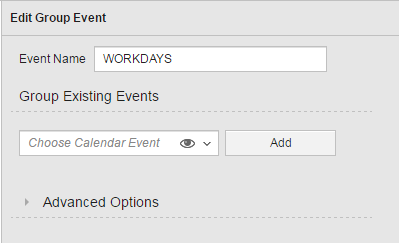
Create the WORKDAYS Group event:
-
In Group Existing Events select WEEKDAYS; this is the event you want to combine with the NATIONAL_HOLIDAYS one.
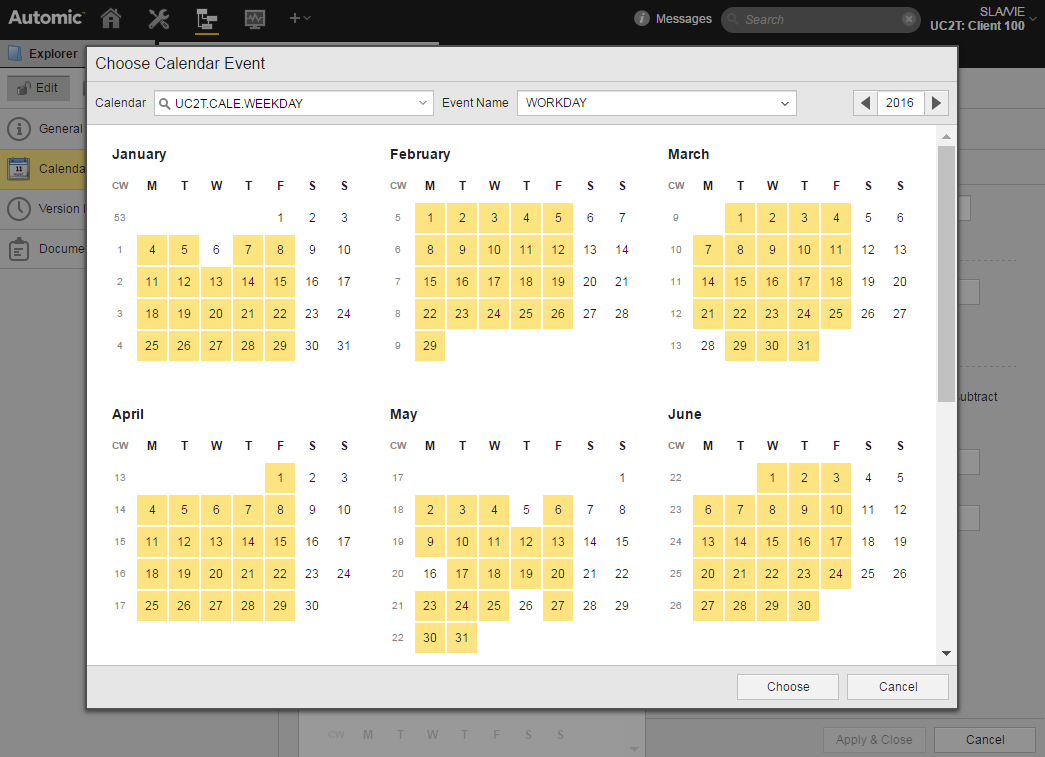
You can either open the dropdown list and select it or you can click the eye icon to open the Choose Calendar Event. The latter might be the best choice if you have many calendars and events and you want to display a preview of the one you choose to make sure that it is the correct one:
- Click Add.
-
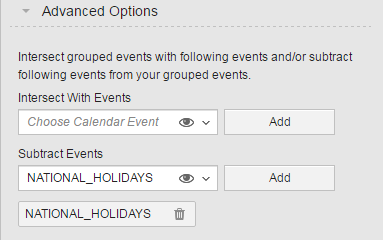
Expand the Advanced Options section.
Here you select the event(s) to combine and define the nature of the relationship between the events.
For our example this is Subtract Events. Select NATIONAL_HOLIDAYS here and click Add.:
Intersect with Events means that the resulting calendar would select the dates that are common to all the events applied to the Group event.
-
Click the button.
As a result, the indicated dates are extracted from the resulting calendar:
This example builds the situation described on Offset Calendar Events.
A number of tasks in your company must be processed at the end of the month, no matter whether the last day is a working or a non-working day. You have already defined a calendar event that selects all last days of the month in your calendar; in this example, it is called LAST_DAY_OF_MONTH. This will be the existing event in the Offset event.
However, for other tasks you want to make sure that they are executed on a working day, that is, on the last working day of the month. You have already defined a calendar event that selects all working days throughout the year; in this example, it is called WORKDAYS. This will be the target event in the Offset event.
To make it a bit more complex, in this example you will exclude all Fridays. Should the resulting day be a Friday, you define to advance by one day. You have already defined a calendar event that selects all Fridays of the year; it is called FRIDAYS.
To Define a Last Working Day of Month Calendar
- Create a new calendar or open an existing one to create the Offset event.
- Since the adjustment to the LAST_DAY_OF_MONTH event depends on another event, namely WORKDAYS, you must define an offset event of type Matching.
-
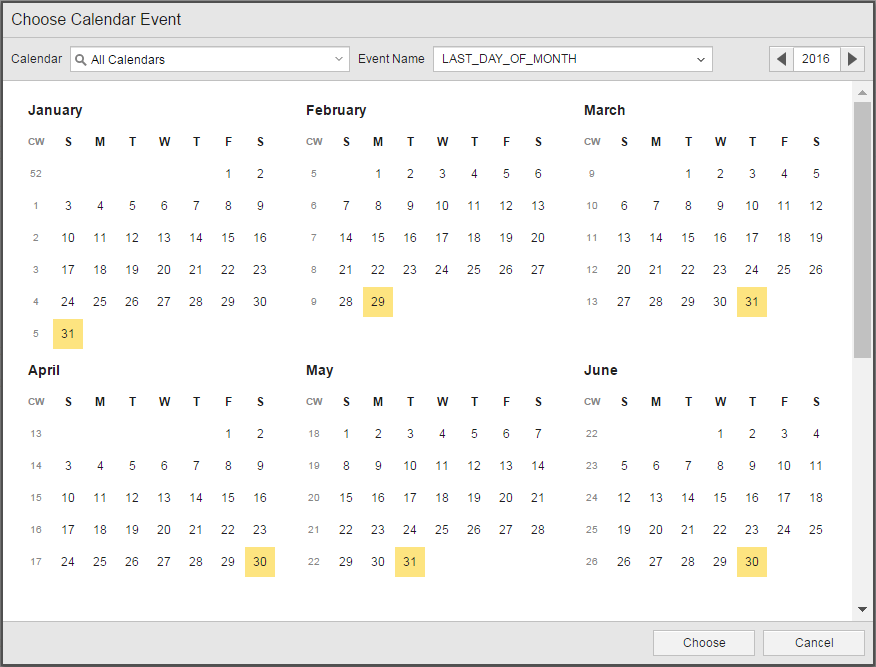
Select LAST_DAY_OF_MONTH in Existing Event.
The result of this event is as follows:
-
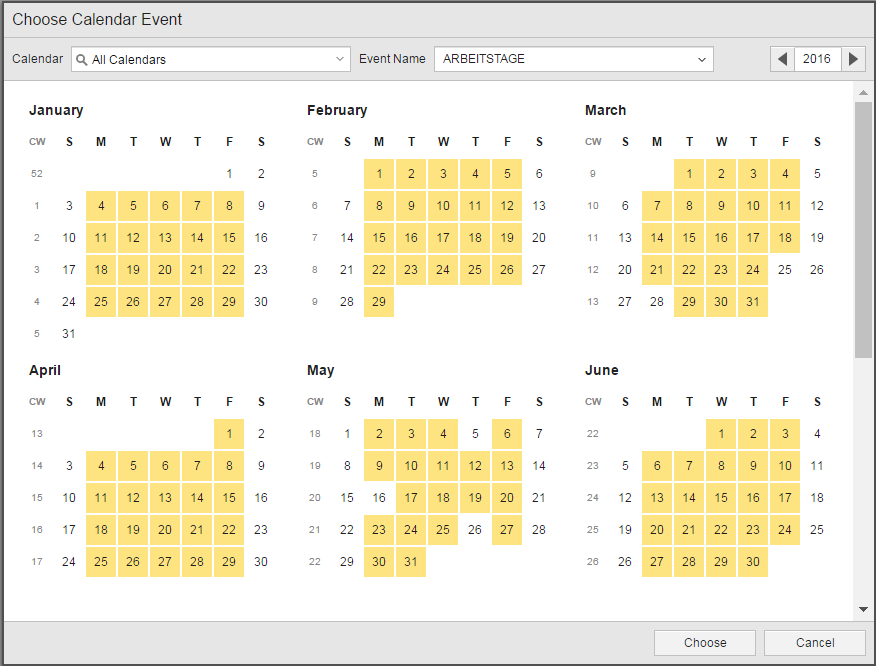
Select WORKDAYS in Target Event.
The result of this event is as follows:
-
Define the relationship between both event. In this case, as you want the tasks that use this event to be processed within the month, select Match to nearest target date: before or on LAST_DAY_OF_MONTH.
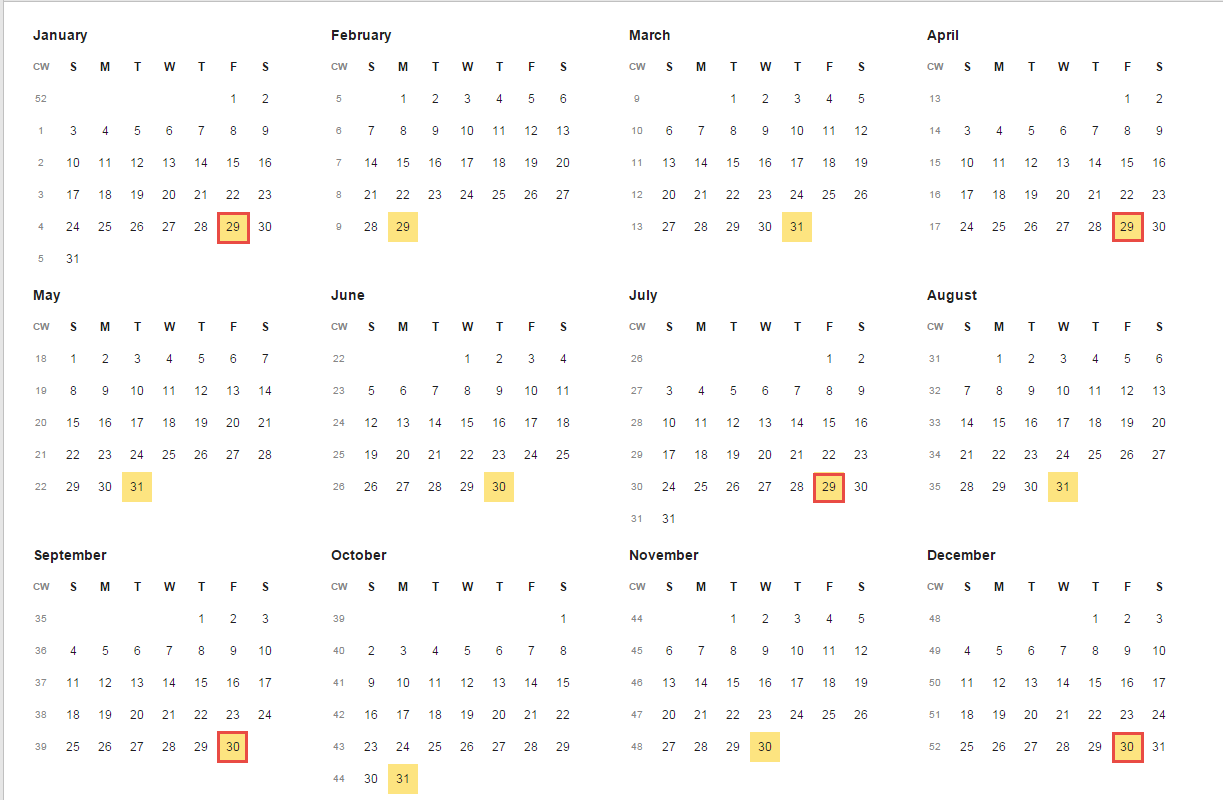
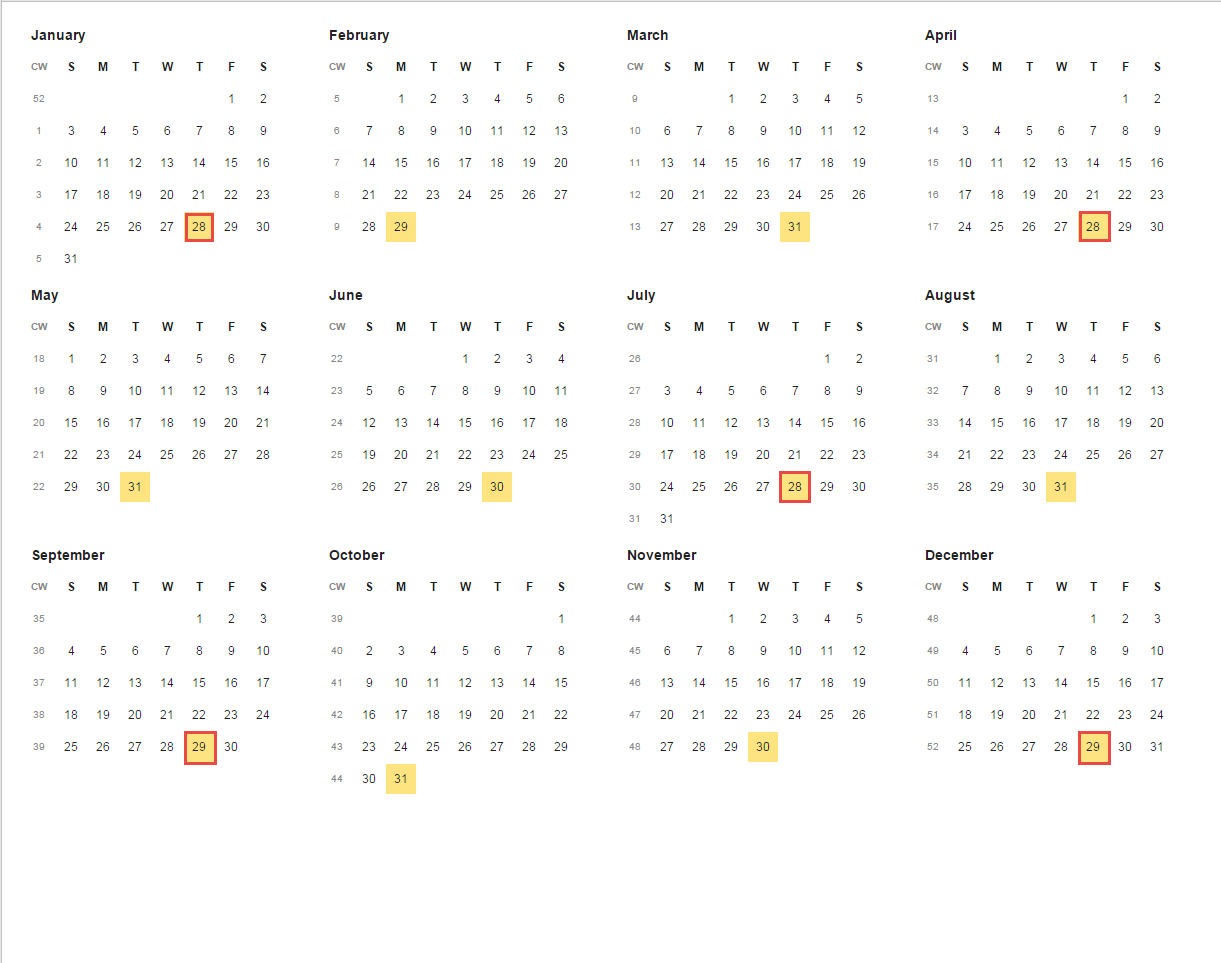
If you now have a look at the results, this is how it looks like:
In January, April, July, September and December the last working day is a Friday. To avoid tasks to be processed on Fridays you define an exception.
-
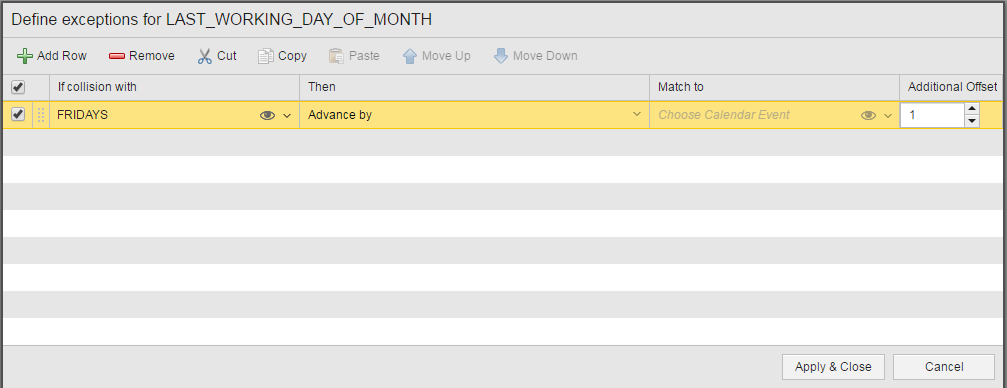
Click  to open the Edit exception for event dialog and define the exception:
- Select the FRIDAYS event in If collision with.
- Select Advance by in Then.
-
Select 1 in Additional Offset.
This will jump one day back in the calendar if the result is Friday.
-
The result of applying the exception is as follows:
In January, April, July, September and December the selected day is now Thursday instead of Friday.
See also:
Calendar Object (CALE)