This type is helpful if you want to use the settings of already existing events but you want to adjust them.
For example, you have defined a monthly calendar event that selects all last days of the month. You need a calendar event that makes sure that certain jobs run at month's end on a working day; this means that if the last day of a month is on a weekend or non-working day, you need to adapt it. You use an Offset calendar event for this.
In addition, Offset events allow you to define exceptions to the resulting dates and to specify alternative dates in case of collisions.
There are two sub-types of Offset events:
-
Simple
They reuse an event and simply define a deviation in days, either backwards or forwards.
-
Matching
They reuse an event and define a deviation considering a different event as reference (the target event).
For either sub-type you can define exceptions
To Create an Offset Calendar Event
-
In the Process Assembly perspective, click Add Object and select Calendar.
Define the general settings as described here: Defining Objects
- On the Calendar page the days of the year that lie in the past are grayed out. This is a mere visual help; any Calendar event that you define here will affect the dates within the validity period as defined in the NOW_MINUS and NOW_PLUS keys in the UC_CLIENT_SETTINGS variable. See UC_CLIENT_SETTINGS - Various Client Settings.
- Click the
 button.
 - From the drop-down menu select Offset.
-
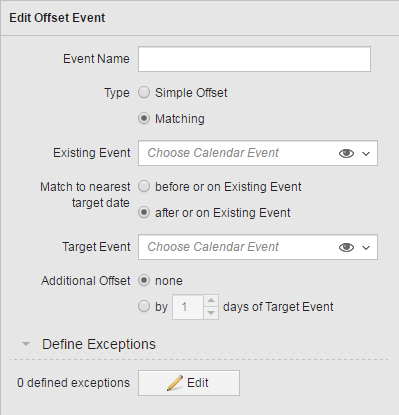
The Edit Offset Event pane is displayed:

In Edit Offset Event you select the existing event you want to manipulate to create a new one. The fields displayed here depend on the type of event you want to create.
In Define Exceptions you indicate alternative dates in case those resulting from this event collide with other important dates.
- In Event Name enter the name of the Offset event you are creating.
-
Select the event Type. The input fields vary depending on your choice here. Click on the option you need to expand the step-by-step instructions:
-
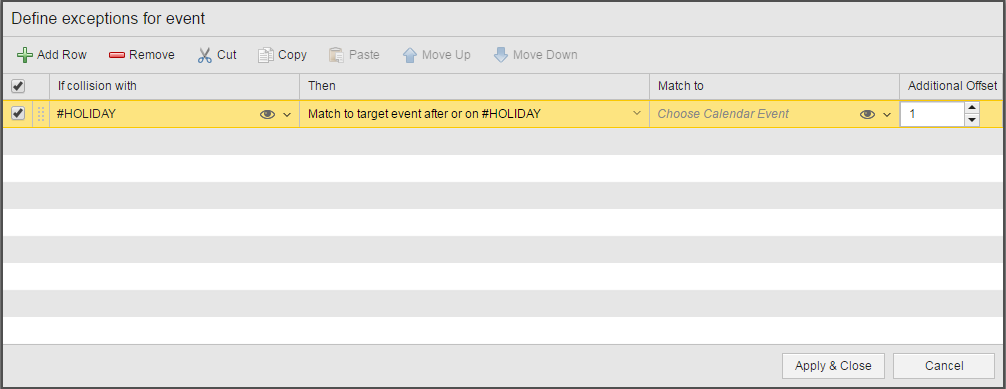
If necessary, you can also define exceptions to the resulting dates and alternative dates to those exceptions. Basically, what you do here is to define which event must not overlap with the one you are creating:
-
Click
 to open the Edit exception for event dialog.
- Click anywhere on the first row to activate it.
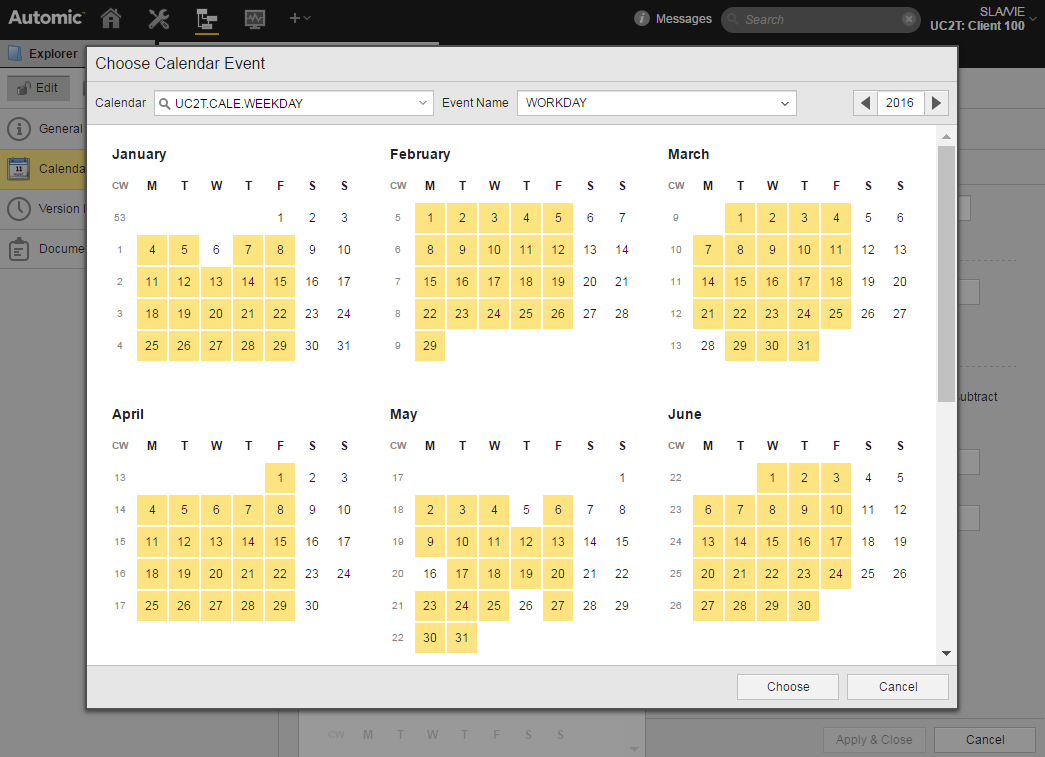
- In If collision with you select the events that will be exceptions to the rule defined by the offset event. Select an event from this dropdown list or click the eye icon to open the Choose Calendar Event.
-
Open the dropdown list in the Then column to display the options you can apply to the exception:
-
Skip
In case of a collision, the resulting date will be skipped.
-
Advance/Postpone by
In case of a collision, the event will be advanced or postponed by the number of days you select in the Additional Offset column in this dialog.
-
Match to target event before/after or on collision event
If you select this option, you must also define a target event in the Match to column.
In case of a collision, the target event will be considered to find matching days before/after the resulting date.
Define the Additional Offset; this is the number of days you move the resulting date backwards or forwards (depending on your previous choice) in relation to the target event you have just selected. If you leave 0 here the resulting date is not moved.
Add as many exceptions as you need. For details on how to work with the table, see Working With Tables in Pages.
-
- Click Apply & Close to preview the results.
- If you are satisfied with the results, click the save button on the toolbar or the Apply & Close button at the bottom right corner of the page to return to the Calendar Events pane.
-
See also: