Weekly Calendar Events
When defining weekly events you can specify not only the days of the week but also intervals and date limits.
Calendar Events have a validity period that the system administrator can specify in the NOW_MINUS and NOW_PLUS keys (see UC_CLIENT_SETTINGS - Various Client Settings).
Creating a Weekly Calendar Event
-
In the Process Assembly perspective, click Add Object and select Calendar.
Define the general settings as described here: Adding Objects
- On the Calendar page the days of the year that lie in the past are grayed out. This is a mere visual help; any Calendar event that you define here will also affect past dates.
- Click the
 button.
 - From the drop-down menu select Weekly.
-
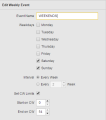
The Edit Weekly Event pane is displayed:
- In Event Name enter a unique name that you can easily recognize, as you may want to use it later on with other calendars.
- In Weekdays activate the days of the week that this event will select.
- Define the Interval in which this weekly event should be effective, which can be either Every Week or Every [x] Weeks.
-
Optionally, activate the Set CW Limits checkbox (CW stands for Calendar Week).
This can be useful if, for example, your financial year does not start on the 1st of January and you want this event to consider this. You can then specify the start and end of this calendar event.
-
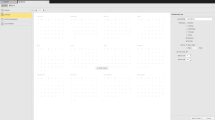
The Calendar view is now in the background and grayed out:
- Click the Save & View button in the middle of the page to preview the results of the event.
-
If you are satisfied with the results, click the Apply & Close button at the bottom right corner of the page to return to the Calendar Events pane. The event is now inserted in the event list.
Click the pencil icon if you want to modify it or the recycle bin to delete it.
See also:

