Example: Creating an SAP ABAP Job from within the AE
An Automic Automation user wants to create an SAP job (JOBS) to run an ABAP Program in batch and execute it from within the Automation Engine without having to switch to the SAP client.
This page includes the following:
What Will You Learn?
- How to configure an SAP Agent so that it communicates with your SAP system via Login and Connection objects.
- How to configure the rights of the Agent.
- How to create and execute an SAP job.
- How to check the reports resulting from the Job execution.
What Does this Example Cover?
This example describes the objects, object settings and steps you need to carry out to be able to create an SAP job, execute it on the SAP client and access the details of its execution without leaving the Automation Engine.
Overview
To execute SAP jobs successfully , you must carry out the following steps:
- the Agent binaries must be installed and the INI file must be configured to connect to the Automation Engine
- the SAP Agent must be defined
- at least a Connection (CONN) object must be defined that connects the agent to the SAP application server
- a Login (LOGIN) object must be defined that provides the necessary credentials for the job to be executed
- the SAP ABAP Job
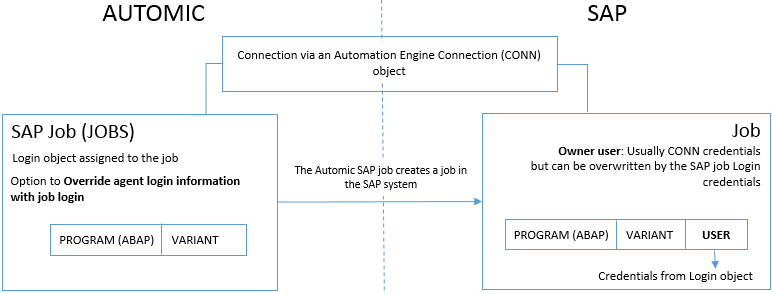
Why Is a Login Object Necessary?
When executing an SAP job in the Automation Engine, a job is created remotely in the target SAP system. The connection between both systems is provided by the credentials entered in the Connection object (this is explained in more detail below) that is assigned to the Agent.
The job in the SAP system has two users:
- The job owner user whose credentials are usually taken from the Connection object.
- The user under which the ABAP Program is executed and whose credentials are always those defined in the Login object.
The SAP job (JOBS) in the Automation Engine, on the other hand, contains the credentials defined in the Login object assigned to it. The option to Override agent login information with job login that you can select when defining the job attributes results in the Connection credentials being overwritten by those specified in the Login object. This facilitates identifying and tracking processes, troubleshooting, etc.
The graphic below illustrates this:
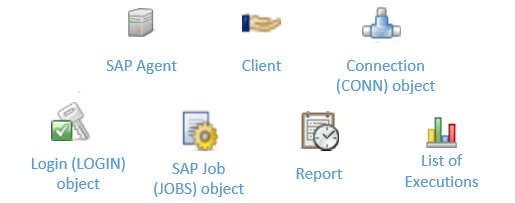
Objects Used in this Example
Define an SAP Job to run an ABAP Program in Batch and Execute It
Install and Configure the Agent Binaries
Make sure that the Agent binaries are installed and the INI file is configured to connect to the Automation Engine.
Your system administrator has probably already taken care of the proper installation of the agent and of its configuration, but this is an outline of the steps required to establish the connection between the Automation Engine and the SAP system:
- Install the Agent binaries in the recommended folder structure.
- Adapt the configuration file to allow the Agent to connect to the Automation Engine.
- Download the SAP Java Connector (JCO) version 3 from the SAP download pages and install it in the same directory as the Agent binaries.
- Install the Service Manager or extend its definition to be able to start/stop the Agent remotely.
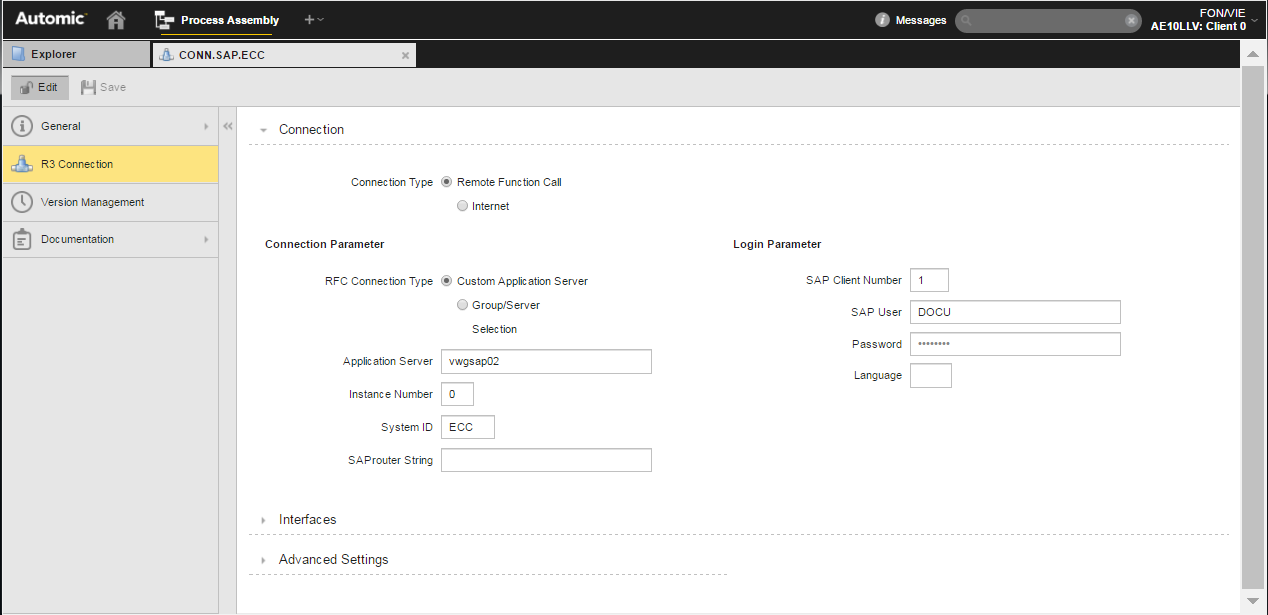
Create or Update an SAP Agent
Once the Agent binaries have been installed, the Automation Engine creates the Agent object automatically if it does not exist yet. Of course, it is also possible to create the Agent object first and then install the binaries. The SAP Agent interprets and transforms the commands sent by the Automation Engine client so that SAP understands them
-
Login to client 0 in your Automation Engine system. Agents can be created in client 0 only.
-
Go to the Process Assembly perspective and select the Add Object button on the toolbar or right-click anywhere in the list and select Add > Add Object.
-
The Add Object dialog is displayed. Templates for creating Agents are available for all target systems to which the Automation Engine can connect. To select the SAP template do one of the following:
- Expand the Agent (AGENT) dropdown list and scroll down to select R3 Agent or search for it.
- Enter R3 in the Search field at the top of the dialog and select R3 Agent from the hit list below.
Example: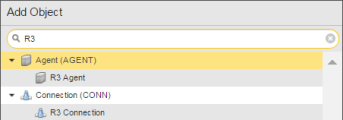
-
Click the Add button. The new object is created immediately in the database. The Automation Engine gives it a unique name that is comprised of a prefix indicating the type of object followed by NEW and a number.
-
The Object Name dialog opens up displaying the suggested name. You can leave it as it is or change it to meet the naming requirements in your company. When you are done, click the OK button.
-
The Agent definition pages are displayed. Some of the pages are common to all types of objects. For our example it is not necessary to enter any data on these pages but you can read more about them here: General Page, Authorizations Page and Documentation Page.
Grant the Agent Rights
Grant the Agent you have just created the necessary rights in the Client that is going to execute the job.
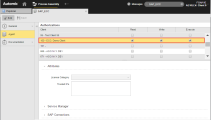
After renaming the object, the Agent opens with the focus on the main definition page, Agent. The upper half of the page displays the list of clients that are available in your system. Here you grant the new agent the rights you deem appropriate for the client where it will execute the jobs. For this example, we will use Client 100.
-
Activate the Read, Write and Execute checkboxes:
-
Save your changes.

Note: The Agent is now active. Switch to the Administration perspective, where you can check and edit the Agent:
Create a Connection (CONN) object in Client 0
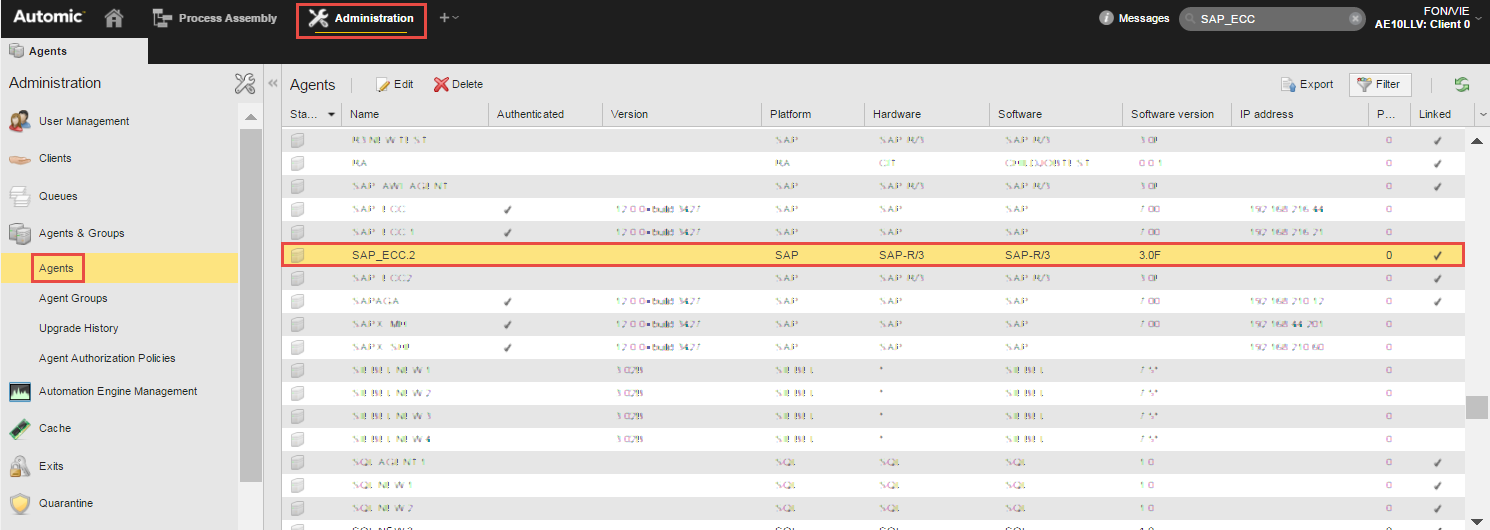
This object provides the connection data to the SAP application server as well as the SAP Login parameters (SAP client, user and password). The Connection object lets the Agent to log in into the SAP system at startup.
Since we are setting up everything we need to work with SAP ABAP jobs, the type of connection we need is R3/Remote Function Call:
-
Switch to the Process Assembly perspective and add a Connection object of type R3.
-
The R3 Connection definition comprises various pages. For our example it is not necessary to enter data on the common pages but you can read information about them here: General Page, Authorizations Page, Version Management Page and Documentation Page.
-
On the R3 Connection page enter the data to connect to the SAP application Server in the Connection Parameter section.
-
Enter the Login data (client, SAP user and password) in the Login Parameter section.
-
Save your changes.
This is all you need to be able to establish the connection, all other fields are optional.
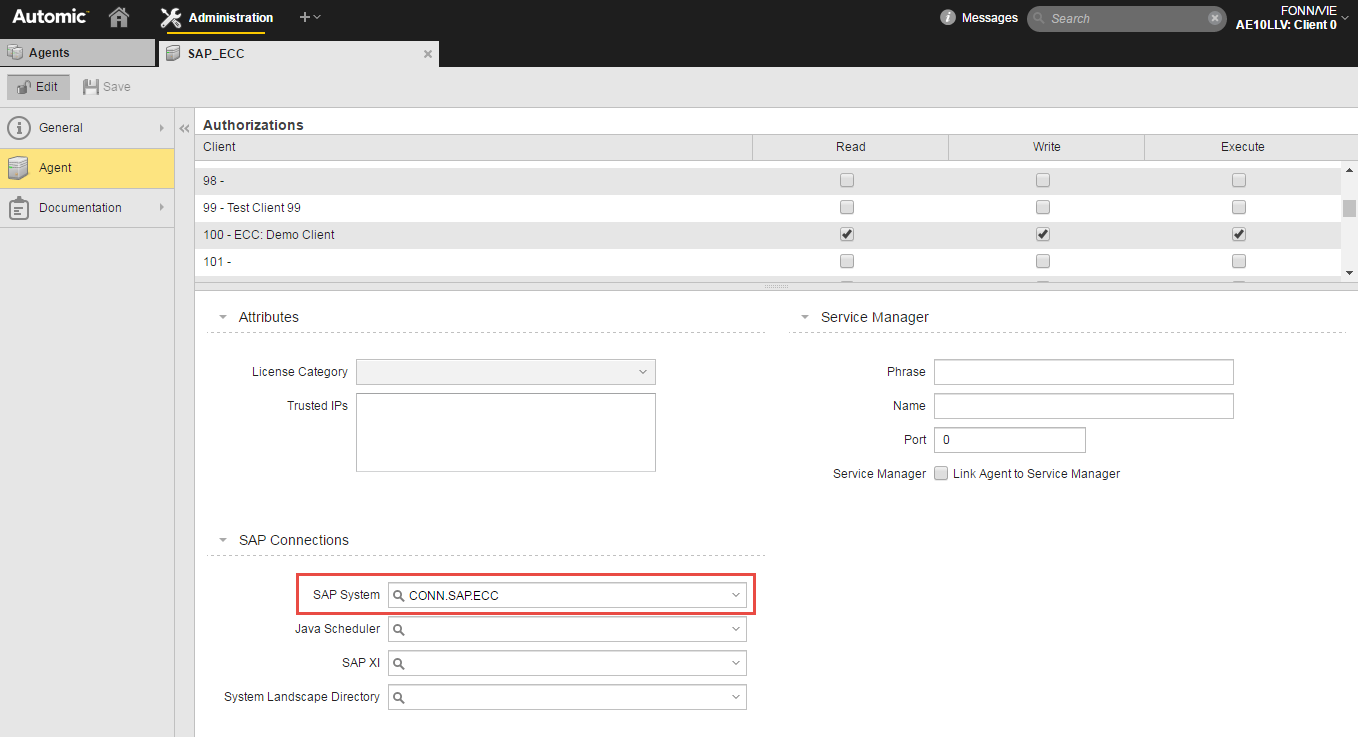
Assign the Connection object to the SAP Agent
Now that both the Connection and the Agent are defined, you can connect them. Switch to the Administration perspective and open the Agent you have previously defined. On the bottom half of the page you assign it the Connection object you have just created:
Save your changes.
Note: The Agent is now connected to your SAP client.
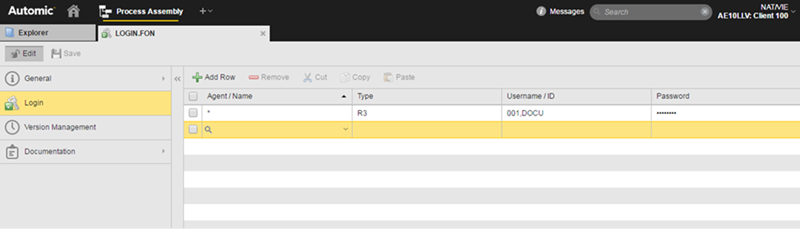
Create the Login object
The job you create in the Automation Engine and that you want to execute in the SAP client will need a Login object that contains the credentials of the SAP user under which it will be executed in the SAP system.
You create the Login object that contains this data in the client in which you also create the job. In this case, in client 100; this is where we granted the Agent the rights it needs to execute jobs.
Remember! Later on, when you define the SAP job, you can activate the Override agent login information with job login option to use the credentials defined here to log on into the SAP system instead of the agent login.
-
Switch to the Process Assembly perspective and add a Login object. The main Login definition page looks like this:
-
Click Add row on the toolbar to add a new row.
-
In the Agent/Name cell enter the name of the agent to which this login information will apply. Do one of the following:
-
Select an existing agent from the dropdown list.
The adjacent Type cell automatically displays the platform of the agent.
-
Enter the name of the agent (or a part of it).
If it is already available, the "find as you type" function lists the hits right away.
-
Enter "*" to apply this login to all agents of this type.
-
-
From the Type dropdown list select the agent platform, in this case R3.
-
In Username/ID and in Password enter the credentials defined in the SAP system with which the job will be executed. The SAP client and user name are separated by a comma.
-
Save your changes.
Create an SAP ABAP Job
Create the job. We are not going to go into any details regarding the multiple parameters you can define for an SAP Job object; for our example, we will concentrate on the basic settings that necessary to process it in your SAP system from within the Automation Engine.
-
In the Process Assembly perspective click Add > Add Object. In the dialog scroll down to expand the Job (JOBS) list and select the SAP_ABAP Job template.
-
Enter a name and click Add.
-
The SAP Job definition pages open up displaying the SAP one. Decide whether you want to use the Login credentials for the Agent to log into the SAP system and execute the job.
-
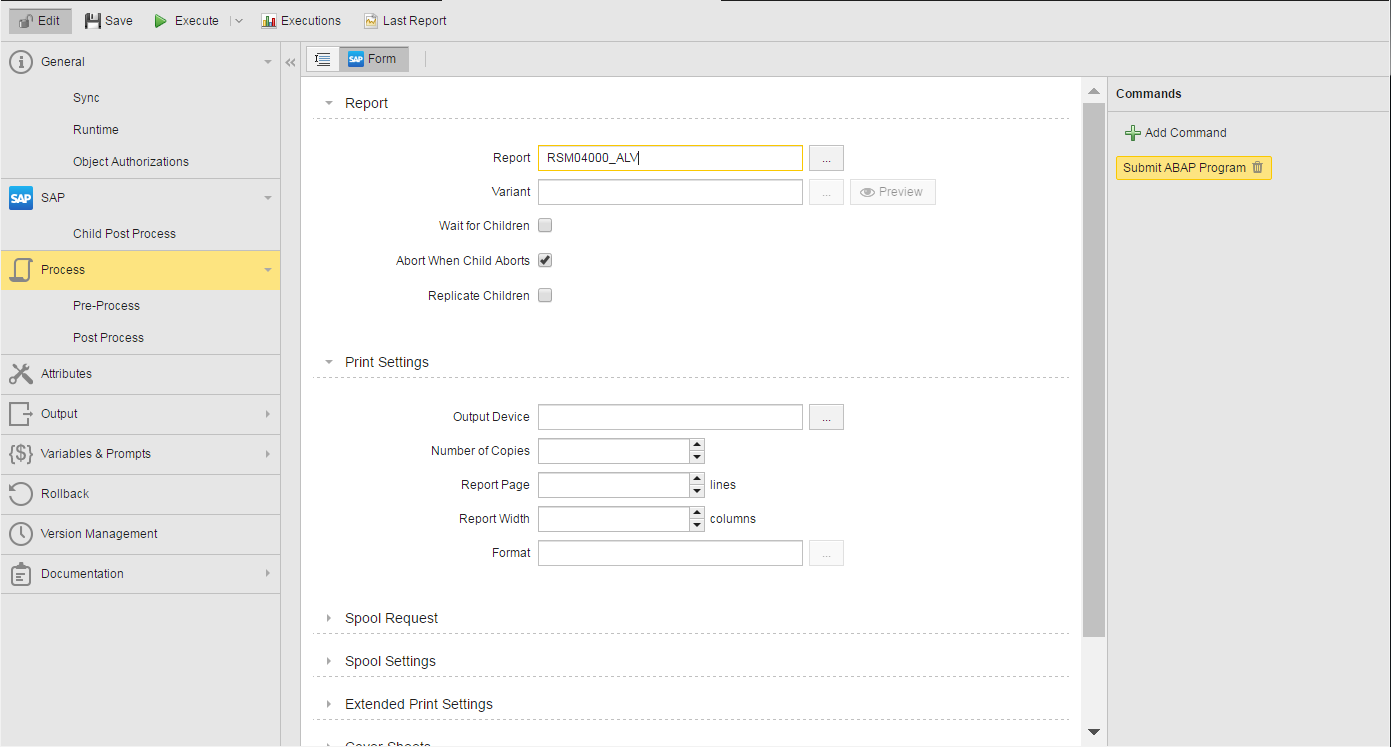
Switch to the Process page and enter your script here. You can use either the script editor or the Form view. For example:
-
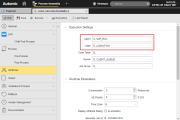
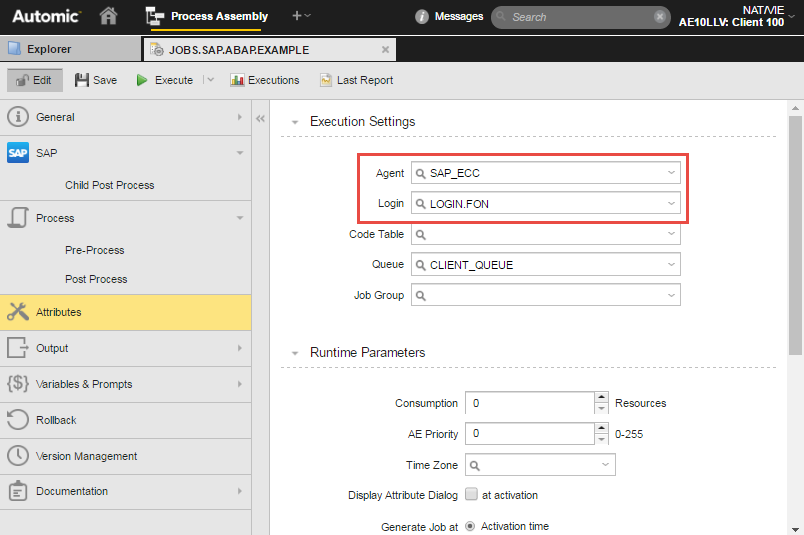
Switch to the Attributes page.
-
Specify the Execution Settings. This is where you establish the relationship between the job, the agent that will connect to the appropriate SAP client and the Login object that contains the SAP credentials:
You can check the settings of your job before executing it:
- Open the Explorer list in the Process Assembly perspective.
- Select the job and click the Details button on the toolbar.
- The key data on the job is displayed.
Note: You are now ready to execute the job!
Execute the Job
-
Save your changes and switch to the Explorer list in the Process Assembly perspective.
-
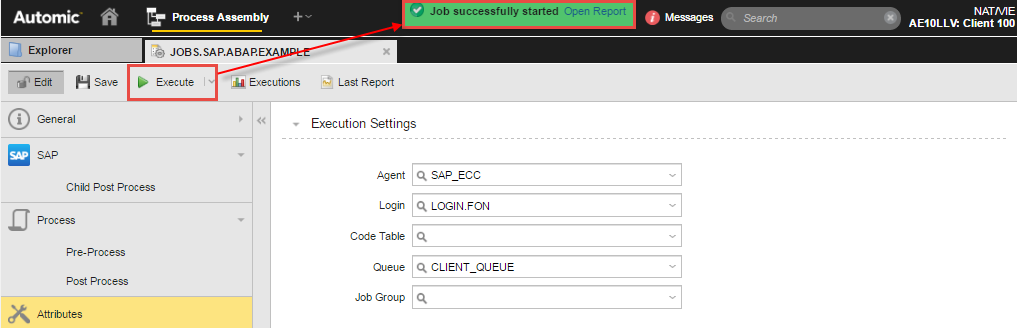
Select the job you have just created and either right-click to select Execution Options > Execute. Alternatively, use the toolbar button:

-
A pop-up message at the top of your screen indicates whether the job started successfully or not. If it did, it provides a link to the report on the job.
-
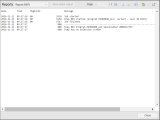
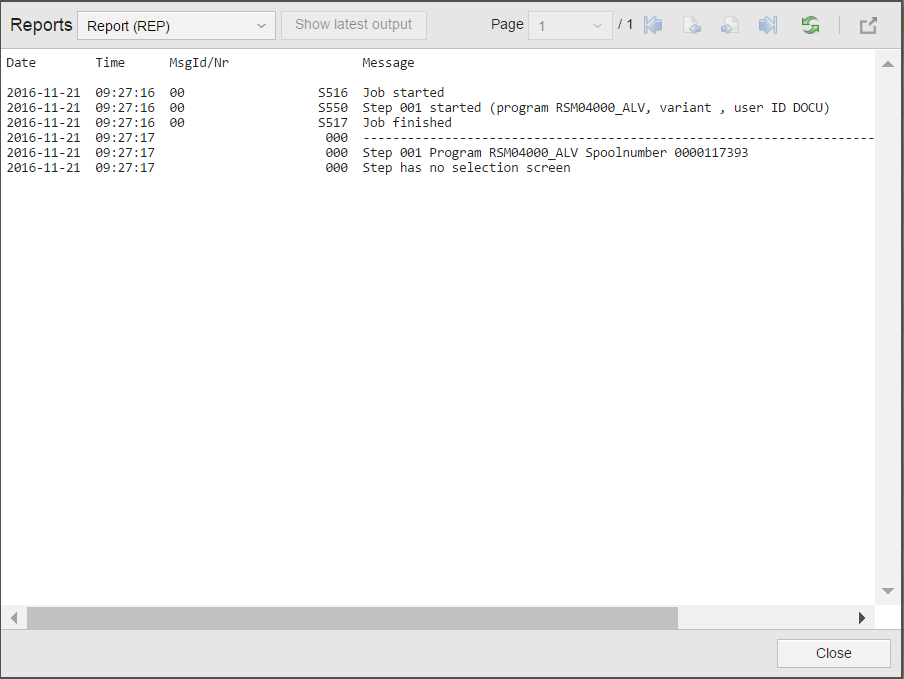
Click Open Report. From the Reports window you can access all the reports created for the job. By default, the job report (REP) is displayed:
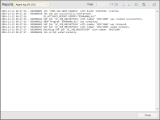
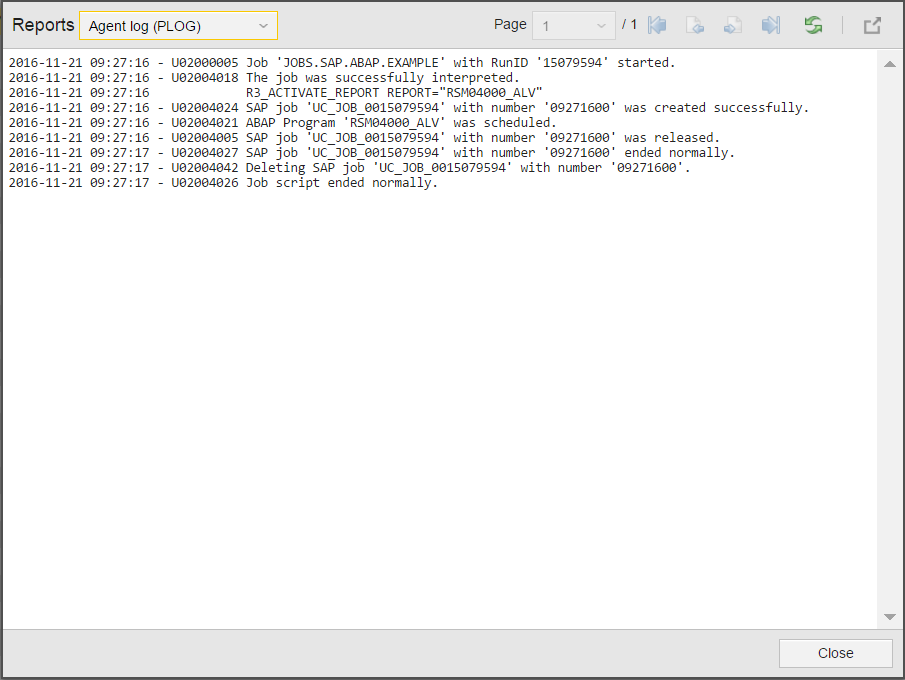
Additional reports are available, such as the Agent log (PLOG), which provides the details of the execution:
Note: The Automic Web Interface provides the following additional possibilities to check the details on the executed job:
-
The list of Executions
As soon as an object is activated, the Automation Engine starts recording the data on its execution and ends when the execution is completed. Every run is recorded and stored in the form of historical data presented in the Executions lists. They centralize the access to the key information on the tasks
You can access the list from both the Process Assembly and the Process Monitoring perspectives.
Select the job and either click the Executions button on the toolbar or right-click to select Monitoring > Executions from the context menu.
-
The details on the executed job in Tasks list (Process Monitoring).
- Switch to the Process Monitoring perspective and open the Filter pane to search for the task. You can, for example, copy the RunID number available in the Executions list and paste it on the Task RunID field.
-
Select the task and click the Details button on the toolbar.
The key data on the execution of the job is displayed.
Useful Links
This example contains references to a number of functions that you might want to know a bit more about.
- Installing
-
Objects
- Executing Objects
- Finding the Details of Objects and Tasks
-
Reports
- Setting the Report Parameters in Objects
- Working with the Reports View
- Special Reports for SAP Jobs
- Live Preview of Job Reports (REP)
- Execution Historical Data