The Business View editor allows you to create a new object or add an existing object.
Existing objects (Uprocs, Resources, Sessions and Template Tasks) can be selected from the corresponding list located in the bottom of the document (if an object is not stored locally, it is not visible in the list).
You can also create a new object.
Uproc
Create Uproc
Opens the standard Uproc creation document (refer to section: Uproc Details). Once you have saved and closed the Uproc, it is inserted in the current Business View.
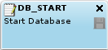
The Uproc is represented by an icon, its name: DB_START in the example above, and its label ("Start Database").
If you zoom out, the comment may not be displayed. To display the comment, move the cursor over the Uproc.
The icon represents the type of Uproc:
|
Icon |
Uproc Type |
Description |
Used by Dollar Universe Manager for… |
|---|---|---|---|
|
|
CMD |
Command line |
|
|
|
CL_INT |
Internal CL |
|
|
|
CL_EXT |
External CL |
|
|
|
FTP Get |
File transfer GET |
|
|
|
FTP Put |
File transfer PUT |
|
|
|
EJB |
Enterprise Java Beans |
Java |
|
|
JMS_SEND |
JMS |
Java |
|
|
MSSQL |
Microsoft SQL Server |
Microsoft SQL Server |
|
|
MSSQL_REF |
Microsoft SQL Reference |
Microsoft SQL Server |
|
|
SAP_XBP2 |
SAP |
SAP Solutions |
|
|
SAP_IPACK |
SAP Info Package |
SAP Solutions |
|
|
SAP_PCHAIN |
SAP Process Chain |
SAP Solutions |
|
|
OAPP_PGM |
Concurrent program |
Oracle Applications |
|
|
OAPP_SET |
Request set |
Oracle Applications |
|
|
ODB_JOB |
Job in Oracle Database |
Oracle Database |
|
|
ODB_TPL |
Copy of an existing job in Oracle Database |
Oracle Database |
|
|
WS_REST |
Invokes a REST Web Service |
Web Services |
|
|
WS_SOAP |
Invokes a SOAP Web Service |
Web Services |
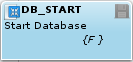
A Uproc included in a Session potentially displays the Management Unit code or the HDP (usually the MU is inherited from the Task). The example above shows an HDP: {F }.
The  flag means that the Uproc in question contains conditions which are not visible.
The  flag means that the object was modified and needs to be saved (if not, it is grayed out).
If you zoom out, these flags may be hidden.
Resource
Create Resource
Opens the standard resource creation document (refer to section: "Resource Details"). Once you have saved and closed the resource, it is inserted in the current Business View.
The resource is represented by its reference and an icon. The icon represents the type of resource:
|
Icon |
Resource Type |
Used by Dollar Universe Manager for… |
|---|---|---|
|
|
File, SP Monitor or System |
|
|
|
Logical |
|
|
|
Script |
|
|
|
SAP Event |
SAP Solutions |
|
|
SAP Job |
SAP Solutions |
|
|
JMS |
Java |
|
|
REST |
Web Services |
|
|
SOAP |
Web Services |
Conditions
Create Condition
You can graphically create dependency, non simultaneity or resource conditions without updating the Uproc. To create new conditions follow the steps below:
Click Create Condition to activate the function; the pointer changes to a cross "+".
Click and hold on the condition (a Uproc or a resource) and drag the cursor to the conditioned Uproc to create a link between the two. Then release the mouse button.
Click Create Condition again to turn the condition creation mode off.
To modify the condition itself, click on the arrow to select it and right click on Condition properties in the menu to open the condition detail.
To modify the launch formula of the conditioned Uproc, select the conditioned Uproc and right click on Update in the menu to open the Uproc launch formula. This is useful for changing an “AND” condition to an “OR” condition, for example.
Conditions are always traced between Uprocs displayed in the view. If the same Uproc is included several times, the condition will be displayed the same number of times.
Two conditions linked by a logical AND: shown by default as a solid line: 
Two conditions linked by a logical OR: shown by default as a broken line: 
The color of the line provides more information about the condition. By default:
The lines showing conditions are thinner than the lines showing the session links.
Session
Create Session
Opens the standard session creation document (refer to section: Session Details). In the dialog box enter:
Name
Session name
Version
If the actual Area is Production, the version number is 000 and the field is inaccessible. For the other Areas, the version number can be enter (default value = 001).
Label
Description of the Session
Click on OK to insert the new Session into the current Business View.
To save the Session, it must contain at least one Uproc. If it contains several Uprocs they must be connected by execution paths (normal or error) from a single Uproc header.
To graphically update this Session in order to add or delete Uprocs:
To create links between two Uprocs in the Session:
Click:
The pointer will take the form of a cross (+).
Click on the parent Uproc and hold the mouse button down. Drag the cursor to the Uproc child to create a link between the two. Then release the mouse button.
Click once again Create OK Session Link, Create NOK Session Link or Create RC Session Link to deactivate the link creation.
Create a New Session from Uproc(s)
Select one or more Uprocs in the view then choose the Create Session from Uproc(s) action to group them together within a session. Refer to the paragraph above entitled “Create Session.”
Create Session Link …
You can graphically create links between Uprocs in the Session without updating the session. To create a new link between two Uprocs, follow the steps below:
To modify the child Uproc properties (execution context / return code), use the buttons Assign MU / Update Return Code described below.
A Session is shown as a frame containing a header and one or more Uprocs. The header contains the name of the Session, its label (depending on the zoom) and its version.
The Uprocs in the Session are displayed inside the frame. To display or to hide the relationships between Uprocs in the Session; refer to the Visibility section > "Session Hierarchy".
The lines showing the session links are bigger than the lines showing conditions.
A Session can be expanded / collapsed. When a Session is collapsed / expanded, the editor tries to smartly rearrange the boxes around.
To intervene directly on the Session, select the Session and choose the type of action from the pop-up menu.
Click  to change the color of the frame.
Task
Create Task
Opens the standard Task creation document (refer to section: "Task Details"). Once you have saved and closed the Task, it is inserted in the current Business View.
However, this is a template Task, which will only become executable as a Job Chain when the Business View is deployed / distributed. If the user has entered a MU in the template name, then the deployment / distribution destination will automatically be set with this MU.
You can also schedule a Uproc or a Session to create a Task. Refer to the Scheduleaction.
Viewing
A Task is shown within a frame containing a header and one or more Uprocs. The header contains two fields:
A Task can be expanded / collapsed. When a Session is collapsed / expanded, the editor will optimize the presentation of the boxes.
To intervene directly on the Task, select the Task and choose the type of action from the pop-up menu.
Click to change the color of the frame.


