 User Groups (USRG)
The UserGroups page of the Administration Perspective lists all user groups of a client and allows you to group users in as many groups as desired to assign them identical authorizations and privileges, thus, helping to simplify administrative tasks. Right-clicking a user group opens a context-menu which provides all functions available such as adding, deleting, renaming user groups, etc.
Object Definition
Object class: System object
Object type/Short name: USRG

For privacy reasons, we have blurred some of the texts on this screenshot. It shows both default columns, but if the list has been modified, some columns might be hidden or the order of the columns might be different. See Working with Tables.
This topic provides information on the following:
- Overview
- Defining User Group Objects
-
Working with User Groups
-
Opens the UserGroup object for editing. You can select just one or multiple user groups. In the latter case, a tab per selected user group opens, where you can edit the object settings.
-
Show in Folder
It shows the location of the user group in the Process Assembly Explorer.
-
Opens the list of objects in which the selected user group is being used.
- Searching for User Groups
-
Refreshing the list
This function allows you to refresh the current view. To use it click
 on the top right-hand corner of your environment.
 -
Exporting the contents of the list
This function allows you to export the currently visible data into a .csv file. To use it click
 at the top right-hand corner of your environment.
Depending on the browser you are using, you will either be prompt to define the location of the file or you will find it at the bottom of your browser.
- Duplicating a User Group
- Renaming a User Group
- Moving a User Group
- Transporting a User Group
- Deleting a User Group
-
You can add as many user groups as desired. Assigning users to one or several user groups simplifies administrative work. You can define user assignments, folder assignments, access rights, authorizations and privileges with the user group object.
User group names are limited to a maximum of 200 characters.
- Open the Users sub page: here you assign Users to this User Group. This way, you grant them authorizations to objects and privileges in addition to those you give them via the Automation Engine sub pages. See Assigning the User to User Groups.
- User Groups are also objects, therefore on the Object Authorizations sub page you can limit their access rights at object level and complements the company policy defined in the Authorization system.
- Expand the Automation Engine group and open the Authorizations page. Here you grant or deny rights to access and/or work with Automation Engine objects, files, execution data, reports, etc. See Granting Users/User Groups Authorizations to Folders/Objects.
- Switch to the Privileges pages, where you grant rights to functions. See Granting Users/User Groups Privileges to Functions.
- Save your changes.

Working with User Groups
Once you have defined a User Group object, it is available on the User Groups list. The following functions are available when you select and right-click it and via the toolbar buttons:
The Search UserGroup box is an additional search field that is displayed only in the UserGroups page and allows you to search for a specific UserGroup. To do so, type the text or part of the text you are looking for and all the users that meet your search criteria will be displayed in the UserGroups list.
Please note that you can search on both, the UserGroups Name and the Title columns.
This function allows you to duplicate an existing user group which is particularly useful when creating groups with the same authorizations and privileges.
To Duplicate a User Group
-
Select a user group and do the following:
- Right-click and select Duplicate or
- Click
 on the toolbar.
-
On the Duplicate UserGroup dialog, define a new Name:
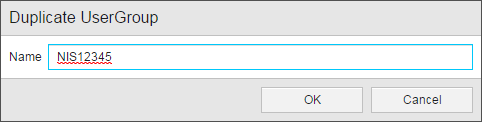
User group names are limited to a maximum of 200 characters.
-
Click OK.
The new user group is now available on the UserGroups list and has the same setup and rights assigned to the original group.
This function allows you to edit the name of an existing user group.
To Rename a User Group
-
Select a user group and do the following:
- Right-click and select Rename or
- Click
 on the toolbar.
-
On the Rename UserGroup dialog, define a new Name:
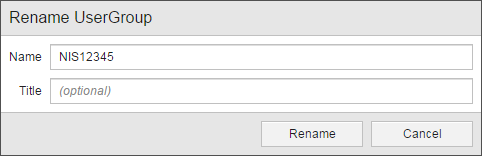
User group names are limited to a maximum of 200 characters.
Optionally, enter a Title for the user group.
-
Click Rename.
The renamed user group is now available on the UserGroups list.
This function allows you to move user groups from one folder of the Process Assembly to another.
To Move a User Group
- Select one or more user groups to right-click and select Move.
-
The Move dialog is displayed:

If you have selected more than one user group, this is indicated in the Name field.
- In Folder click the arrow to open the folder tree structure in your client and select the destination.
- Click Move.
This function allows you to send user groups to the Transport Case of the Process Assembly.
To Transport a User Group
- Select and right-click one or more user groups.
-
Select Transport. You will receive a notification at the top of the page.
For example:

The user group(s) moved are now listed on the transport case of the Process Assembly and is/are ready to be exchanged among Automation Engine systems or individual clients within the same Automation Engine system.
This function allows you to delete user groups.
To Delete User Groups
- Select one or more user groups and do one of the following:
- Right-click and select Delete or
- Click
 on the toolbar.
- Before actually deleting the object you must confirm your action.
- If you have selected more than one user group, the dialog indicates the number of groups you are about to delete.
- if you have selected only one, the dialog displays the name of the user group you are about to delete.
For example:

- Click Delete.
See also: