
|
Calendar Conditions |

Getting Started Guide |
Information through Notification |

|
Aim:
- Creating a Workflow object
- Using the Workflow Monitor
This lesson serves to introduce you to the object type Workflow. It comprises objects that run in sequence, which is very useful for maintaining the AE databaseA database is an organized collection of data including relevant data structures..
Archiving and reorganization is required in order to maintain the database. These maintenance processes must run in succession which is best organized by using Workflow objects. As a matter of principle, Automic strongly recommends handling your processes using workflows and schedules in order make use of the full benefits of AE's object orientation.
The job and the two existing file transfers will now be integrated in a workflow.
 button in the toolbar.
 The objects are displayed as boxes which can be moved and positioned as you like. The lens symbols shown in the toolbar can be used to zoom into or out of the workflow.
 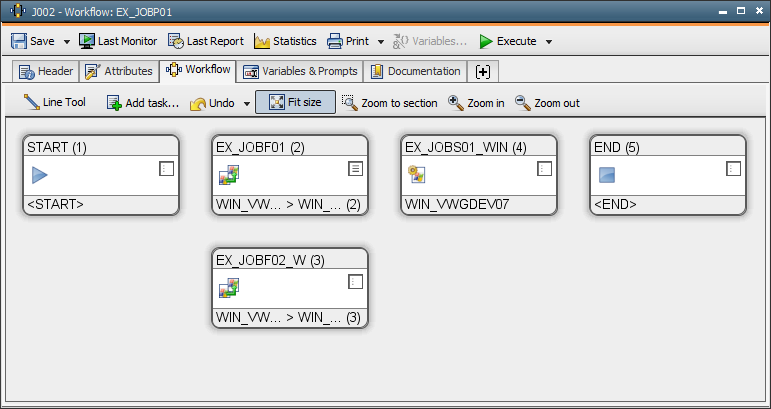 Structuring the objects provides a clear overview. Automic recommends using several workflows when there are a lot of objects or including other Workflow objects - called sub-workflows - in a workflow.
  An object within a workflow will only be activated when all its predecessors have ended. Therefore, the job in our example will only start when the files of the two file transfers have already been transferred.
  button in the toolbar and close the Workflow object.
The next step is to execute the workflow:
 button in the toolbar.
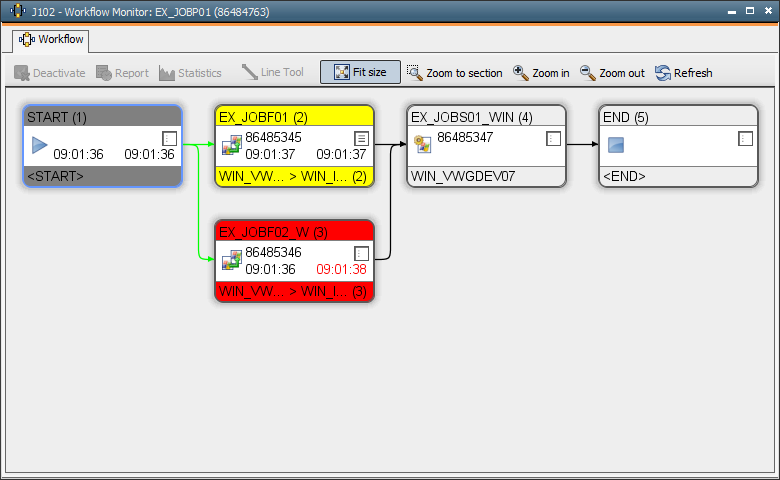 The default setting is that the workflow will automatically be removed from the Activity Window as soon is has ended. The Workflow Monitor will also be closed. These settings can be changed in the Attributes tab of the Workflow object.
Delete the lines between the boxes (right-click with the mouse to highlight the particular line and then click Remove dependency using the left mouse button to delete it). Arrange the three objects one after the other. Then draw new connecting lines. When watching the execution of this workflow, you will notice that the workflow starts with the first object, and then the second object is processed and so on. Each object waits until its predecessor is finished.
Finally re-arrange the objects as shown in the above illustration.