
|
General Information |

Filter |
Applying Filters |

|
The Filter Management window of Process Analytics can be used to create, remove, edit, combine and group filters.
The toolbar that displays on top of the window includes buttons that can be used to add, remove and edit filter conditions.

You can call the following functions via the toolbar:
Add Composite Filter:
Opens the creation dialog for a new composite filter which can include several single filters.
In addition to the toolbar, the Filter Management window also includes the following context menus:
General Context Menu:
This context menu is available in the Filter Management window's main directory. It includes the same commands as the dropdown menu of the Add button (toolbar).
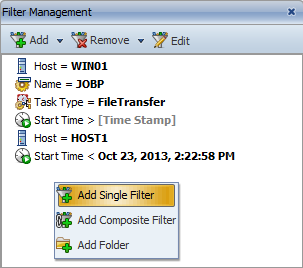
Filter context menu:
Context menu for single or composite filters.
Folder context menu:
The following popup-menu commands are available in folders:

Users can create folders in the Filter Management window in order to group and arrange defined filters. Doing so changes the view but it does not affect the filter function.
To create a new folder, you can either use the context menu or the toolbar (see above). A dialog opens when you create or rename a folder. You can determine the folder name in it.
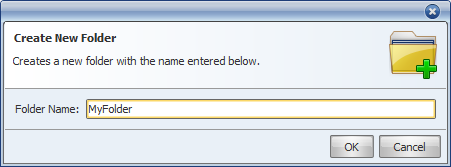
Enter a name for the folder that should be created or renamed and click to complete this process. Clicking aborts the procedure and closes the dialog.
You can also use the drag & drop function to move existing folders and filters to different folders.
The Add command can be used to create a new single filter via the context menu or the toolbar. The following dialog displays:
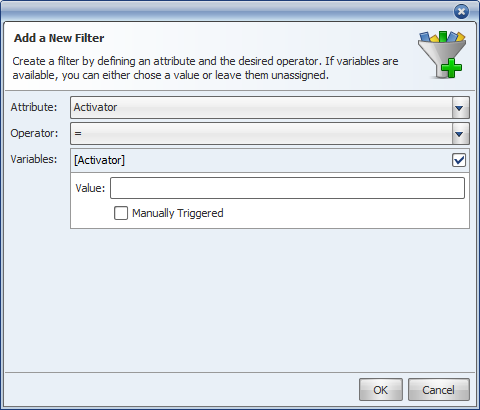
This dialog is used to create a new single filter which includes a condition for an object attribute or a runtime parameter. The following three parameters must be specified:
Attribute selection field:
Attribute or runtime parameter that is used for the filter.
Operator selection field:
Operator who links the attributes with the specified value.
The following table lists all attributes that can be selected, their operators and possible values:
| Attribute / Runtime Parameter | Operator | Possible values | Description |
|---|---|---|---|
| Activator | =, ≠, like, not like | User-defined string, option: manually activation |
Object or user who has started one or several tasks. |
| Host (Agent) | =, ≠, like, not like | User-defined string | Object attribute. The agent on which particular jobs run, for example. |
| Client | =, ≠ | Number | Number of the AE client. |
| Start Time | <,<=, >, >=, Between [x] and [y], in the last [x] |
Timestamp | Time at which the task has been started. |
| End Time | <, <=, >, >=, Between [x] and [y], in the last [x] |
Timestamp | Time at which the task has ended or will probably end. |
| Name | =, ≠, like, not like | User-defined string | Name of the tasks or objects. |
| Task Type | =, ≠ | Task Type | Object type (not the short form). |
| Status | =, ≠ | Status group | Current condition or end status of tasks. |
| Cost Location | =, ≠, like, not like | User-defined string | Attribute cost location. |
| Archive Key 1 Archive Key 2 |
=, ≠, like, not like | User-defined string | Attribute archive key 1 or 2. |
| Modified at Runtime | = | Yes / No | Tasks that have been modified at runtime. |
| Time Condition Set | = | Yes / No |
Tasks that must not start before or after a particular point in time (schedule or workflow tasks), whose runtime must not be above or below a particular value or tasks that depend on calendar conditions (workflow, schedule tasks). |
Filter attributes and available operators
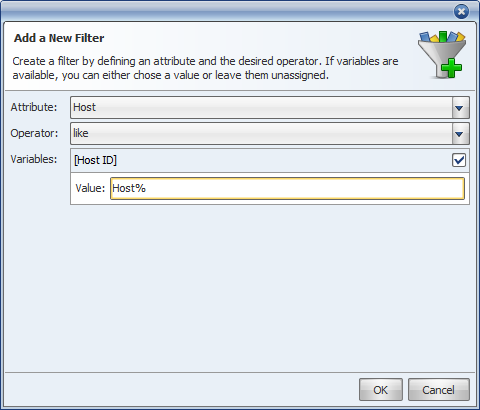
In addition to the self-explanatory operators "=" (equal) and "≠" (not equal), some attributes also include the operators "like" and "not like". These operators correspond to the "like" and "not like" clauses of SQL commands.
This means that you can use these operators to search for attributes that include a particular string (like) or not (not like). The "%" and "_" characters can be used as wildcards. "%" stands for any number of characters (including no character) and "_" for exactly one character. The following illustration shows a filter definition that returns all tasks whose agents start with a "Host" ID (Host%).
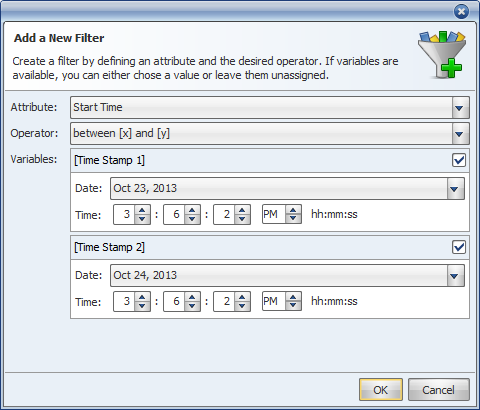
The runtime parameters "Start Time" and "End Time" include the comparison operators <, <= and >=, and also the operators "between x] and [y]" and "in past [x]".
You can use "between [x] and [y]" in order to define a time frame during which tasks have started or ended.
The following illustration displays an example in which tasks have been filtered that have started after October 1st, and before November 1st, 2008.
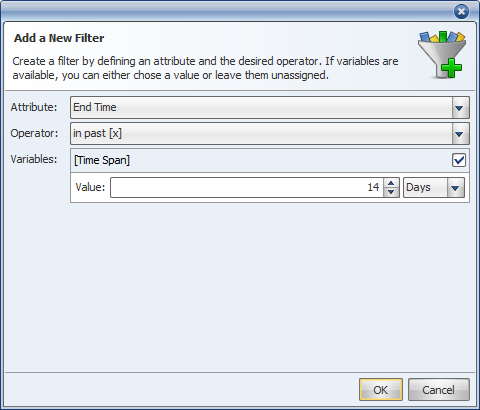
"In past [x]" is an additional operator that is only available for time attributes. It also specifies an interval but it dates back from the current time to the past. The number of past seconds, minutes, days, months or years is specified which include the start and end times of tasks.
The following example shows a filter definition that highlights the tasks that have ended in the past 14 days.
If you open a single filter for editing purposes, a dialog opens that is similar to the Add dialog.
In filters, you can subsequently only change the value. The Attribute and Operator fields are deactivated.
Composite filters combine several single filters.
To create a new composite filter, open the corresponding command in the toolbar or the context menu.
A dialog displays in which you can add single filters or edit and remove existing ones. The left section lists all single filters that have been assigned to the composite filter.
As opposed to single filters, you can subsequently modify composite filters as you like (edit).
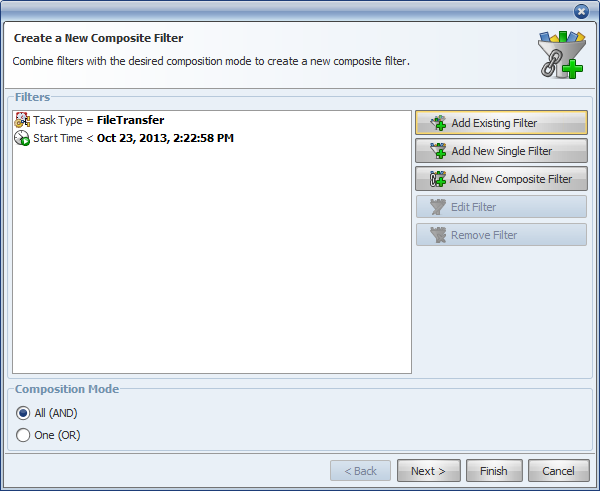
The dialog that displays when you create and edit composite filters includes the following buttons and options:
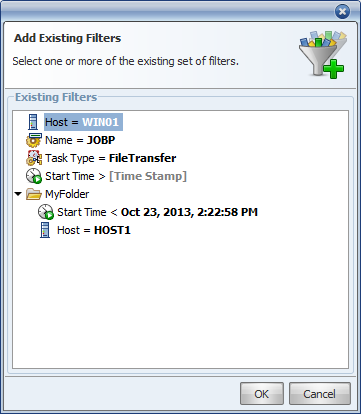
Add Existing Filter:
Clicking this button opens a dialog that includes a list of all existing filters (Filter Management window). Select the required single or composite filter and click . The selected filter is assigned to the composite filter but it remains in the Filter Management window. You can assign and use the same filter as often as you like.
Click to close the dialog if you do not want to add a filter.
Add New Single Filter:
Opens the creation dialog for a new single filter. Having completed this procedure, the created filter is added to the composite filter but it is not available in the Filter Management window.
Add New Composite Filter:
Opens a creation dialog for a composite filter. This filter is added to the composite filter but it is not available in the Filter Management window.
Edit Filter:
Edits the selected filter.
Remove Filter:
Removes the selected filter from the composite filter.
Composition Mode:
Method that allows to combine all filters in the composite filter. AND applies all filters, OR only the filters that return results.
Click in the dialog to advance to the next step.
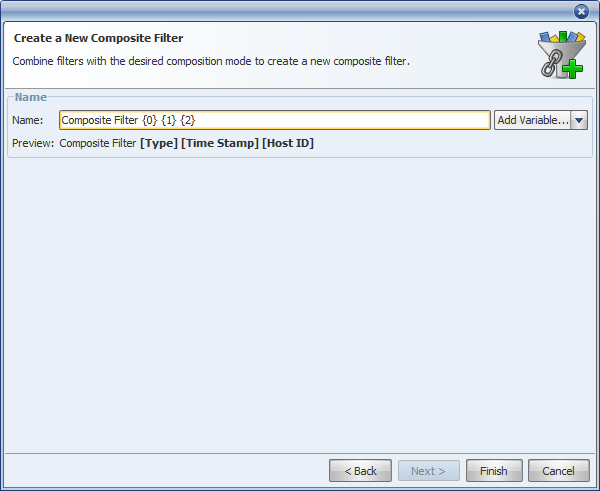
Name:
Input field for the name of the composite filter.
Add Variable:
In this selection field, you can select a variable whose value should be inserted in the filter name. You can use the values of the individual filters that are provided in the composite filter as variables.
Preview:
Shows the name in accordance with the selected settings. The name of the filter attributes is displayed (not the actual filter values).
Click Finish to create the composite filter or assume your modifications. closes the dialog and the settings that you have made are discarded.