Defining Schedule Objects
The steps for defining Schedules (JSCH) are the same as for any other Automic object. This section describes the settings that are specific to only Schedule objects. For general information about the purpose of a Schedule object, see Schedule Objects (JSCH).
A Schedule definition is made up of the following pages:
- Standard pages that are always available, no matter what type of object you are defining:
- Additional pages that are always available for executable objects:
- The object-specific page described here.
To Define a Schedule Object
Designing schedule objects takes place at two levels:
- Define the Schedule object parameters in the Attributes page.
There you specify its period duration and turnaround time. These parameters determine the periodicity with which the tasks in the schedule will be executed and their start times
- Add tasks to it and define their specific time parameters on this page
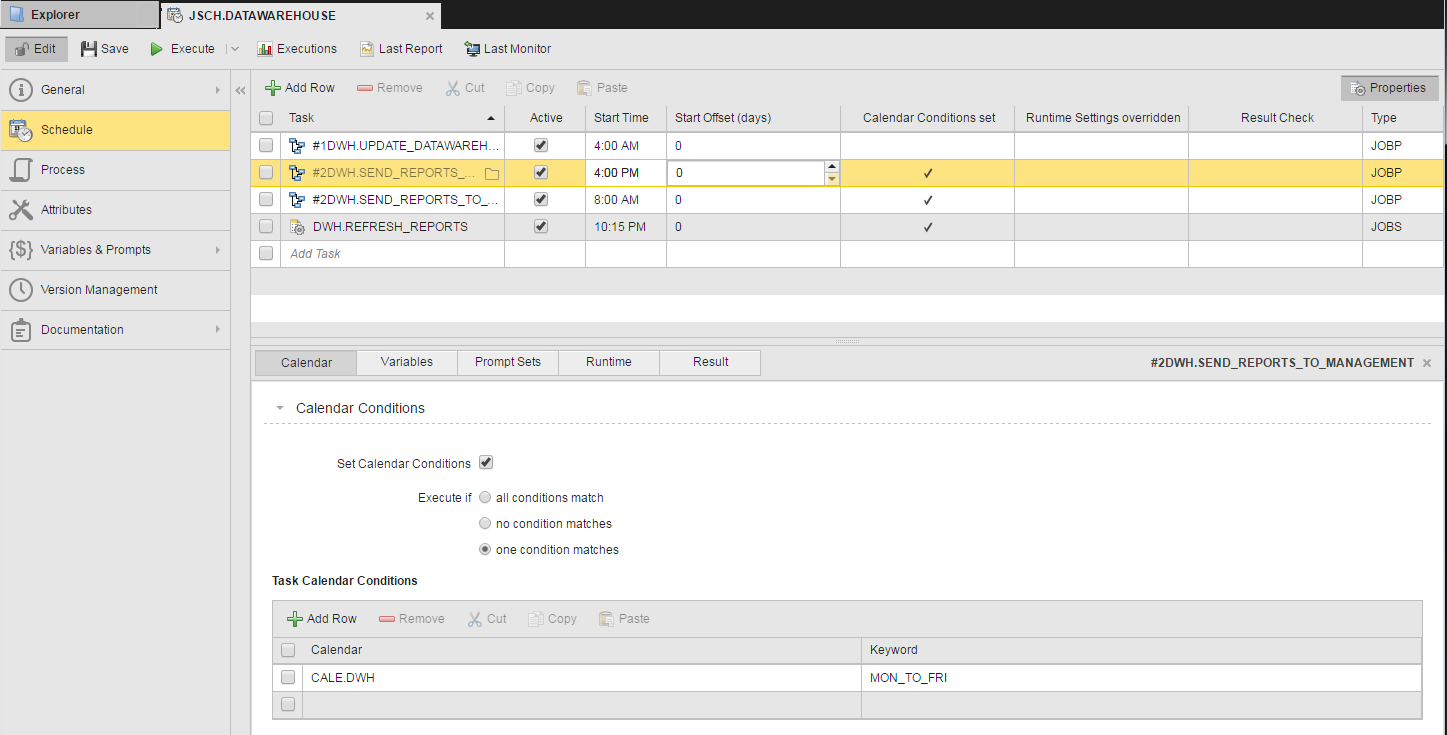
The Schedule window is divided in two panels; in the upper one you assemble the tasks and set the time definitions that will govern their execution. In the lower pane you can assign a calendar to the schedule and/or modify some of the properties of the tasks you added. Click the  button on the upper right corner of the window to toggle on/off the lower pane.
To Add Tasks and Define their Properties
-
Click the Add Row button to activate the row and click again the folder icon on the right.

-
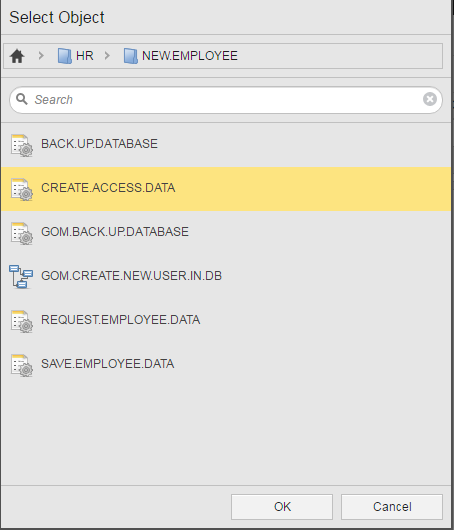
The Select Object dialog is displayed, where you select the task you want to include:
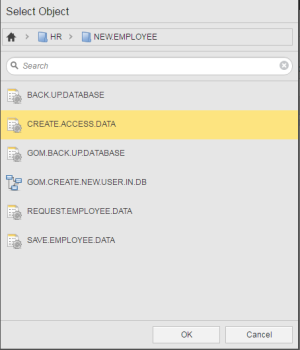
- Click OK to insert it in the table.
-
Define the task-specific settings. The table below provides descriptions of all the available options:
Section Setting Descriptions Active This checkbox is activated by default. This means that this task will be executed according to the settings you are about to define.
If you deactivate it, the task remains as part of the schedule object but will not be executed with it. It obtains the ENDED_INACTIVE status.
Start Time The time at which this task will be executed. The default value is the time that you have defined in the Period Turnaround Time field on the schedule's Attributes page.
You can specify here a different start time for every task in the schedule but take into account that the task start time must always be after the period turnaround time.
Start Offset (days) You use this field in combination with the period duration and turnaround time. Enter here the number of days that should elapse between the beginning of a period and the activation of the selected task.
The Logical Date specifies the period's start.
Calendar Conditions set It can happen that the period duration and the task start offset parameters you have defined cause tasks to be executed on dates you'd rather avoid because they are non-working days, for example. Or maybe you want the task to be executed only in some of the days that result from those settings. You can solve these situations assigning calendars to the tasks.
If a task is not executed due to the defined calendar conditions, it obtains the ENDED_INACTIVE status.
When you add tasks to the schedule they might already have calendars attached to them. You can remove them, attach a different one or add an additional calendar here. Remember, these changes apply to this task only when it is executed from within this schedule object.
A tick indicates that the task has a calendar assigned to it.
To assign a calendar to the task
- If the properties panel is not visible, click the button on the upper right corner of this page.
- Switch to the Calendar tab.
- Activate the Set Calendar Conditions checkbox.
- In the Task Calendar Conditions section add a calendar:
- Activate the first row by clicking on it or click Add Row to add a new one.
Select a calendar from the list.
Alternatively, start typing the name of the calendar to activate the "select as you type" function.
- Optionally, select a calendar event.
- Specify when you want the task to be executed taking the calendar definitions into account:
- Execute if all conditions match
The task is processed if the date complies with all conditions specified in the calendar.
- Execute if no conditions matches
The task is processed if the date does not comply with any condition specified in the calendar.
- Execute if one condition matches
The task is processed if the date complies with one of the conditions specified in the calendar.
- Execute if all conditions match
For detailed information on calendars please click here.
For details on how to work with tables please click here.
Runtime Settings overridden On the Runtime Page you define the parameters to calculate the maximum and minimum runtimes of tasks and, in case of deviations, you specify what should happen.
You can override these definitions for this task's executions within the schedule object.
The task runtime can be monitored during its execution. This allows you to react quickly to runtimes that exceed the maximum defined by canceling or ending the task or executing another one. Likewise, when the execution has ended, you can check whether it was processed in at least the minimum runtime defined and, if not, you can react accordingly.
To Modify the Task Runtime Parameters
- If the properties panel is not visible, click the button on the upper right corner of this page.
- Switch to the Runtime tab.
- Activate the Activate Runtime Settings checkbox.
A tick indicates that the task has specific runtime definitions for this schedule.
Result Check You specify here what should happen with the task depending on the status it obtained after its execution.
For tasks with the ENDED_INACTIVE status, this setting is ignored.
To Define the Result Check and Follow-Up Actions
- If the properties panel is not visible, click the button on the upper right corner of this page.
- Switch to the Result tab.
- Activate the Result Check checkbox.
- In the OK Status dropdown list select the status expect this task to have when the execution is finished.
- In the ELSE section you define what should happen if the task ends with a different status. The available actions are:
- Repeat task if it ends with another status
Click this checkbox if you want to repeat the execution of the task. Specify how often it should be repeated and the frequency with which the repetitions should be started.
- Execute another object if the task ends with another status
Click this checkbox to select the object and to define when it should be executed.
- Repeat task if it ends with another status
Variables If the task has variables defined for it, they are displayed here. You can override the suggested values here for its execution within the schedule object.
Prompt Sets Prompt sets in the object definition determine whether tasks need user input to be executed.
Depending on the PromptSet definitions, the fields for the prompt parameters can be a text fields, checkboxes, dropdown lists and so on.
When you include a task containing prompt sets in a schedule, the input fields are displayed here. You can populate them with the values to be used when the schedule object executes it, so that no user input is required at runtime.
- If the properties panel is not visible, click the
- Add as many tasks as you need.
- Save your changes.
Next Steps
- Once you have defined the Schedule object you have to execute manually for the first time.
This activates the Schedule, which from now on will run automatically. For details please refer to Activating Schedule Objects.
- While the schedule is running, you can follow its progress either from the main page on the Process Monitoring perspective or from its Last Monitor page. You can also open the monitor of tasks that have one, such as workflows or groups. See Monitoring Schedules.
- You can modify Schedule objects and their tasks also at runtime, provided your user profile has been granted the necessary rights and privileges.
These changes apply to that specific execution. See Modifying the Properties of Tasks at Runtime.
- Depending on the status of the schedule and of its tasks, different functions are available. See Working with Tasks.