Working with the Workflow Editor
The Workflow page provides tools to build relationships between tasks and define the logic of workflows.
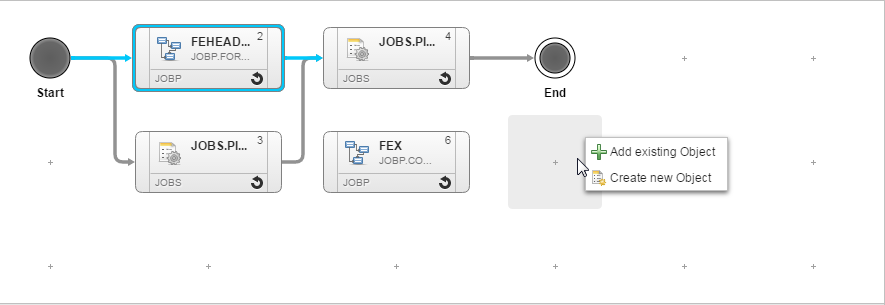
A workflow has a START and an END node and, between these nodes, any number of executable objects that are linked to each other. You can arrange the tasks to be executed simultaneously or sequentially.
Please note that IF workflows are the only ones that do not have a START and END objects.
This topic describes the elements of the workflow editor, namely:

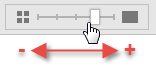
It contains the functions you need to drag and drop tasks into the editor, search for tasks and change the view.
| Field/Element/Function | Description |
|---|---|
| Zoom |
This adjusts the magnification and the level of detail of the view. Zoom in and out of the workflow map by clicking and dragging the slider.
You can also zoom in and out with the mouse wheel. |
| Search |
Quick search for tasks within the workflow you are defining.
|
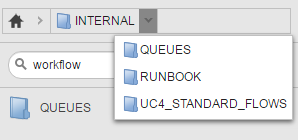
| Objects |
Click this button to display/hide the Objects pane on the right hand side of the editor, where you can select objects, drag and drop them into the right place in the workflow editor. |
| Properties |
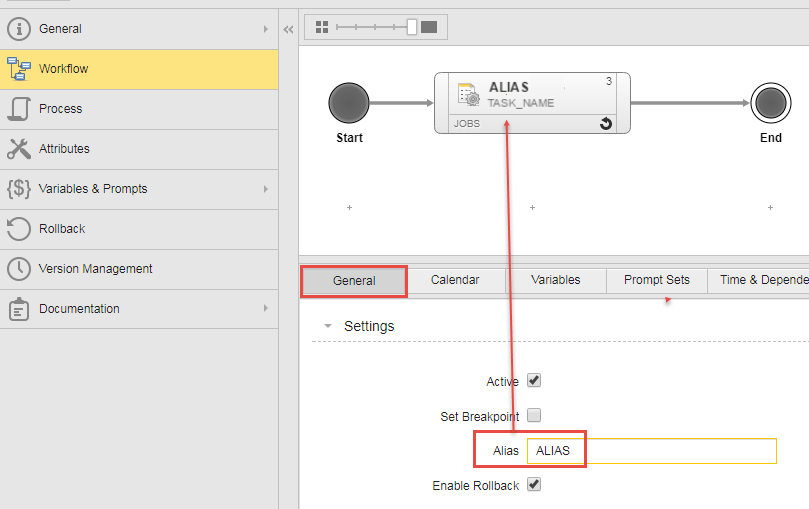
Select a task and click this button to display/hide the Properties pane on the lower half of the editor, where you modify the settings of the workflow tasks. |

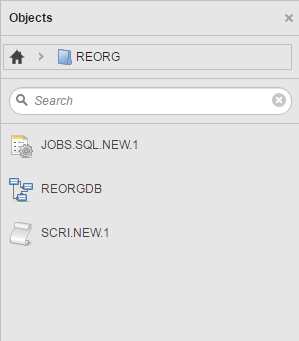
This pane lists all the executable objects available in the client you are logged into and that can be included in a workflow. You can search for them a follows:
| Element | Description |
|---|---|
| Folder menu bar |
|
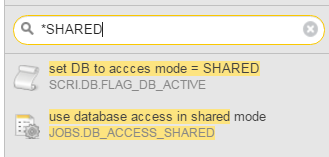
| Quick search field |
Enter a search string here to quickly find tasks in the hit list. You can use wildcard characters, * as placeholder for any number of characters and and ? as placeholder for exactly one character. |
If you are working with packs and actions this pane contains an additional tab called Actions from which you can select the predefined tasks you want to include in the workflow. To know more see Working with Actions.
The editor is the space that provides you all the functions you need to build workflows.
This table gives you an overview of what you can do and where to do it, and provides a link to the topic in this documentation that describes how to do it:
| Function | Where |
Click to open the help topic |
|---|---|---|
| Insert a task in a workflow |
Right-clicking on an empty space on the editor |
Inserting and Deleting Tasks |
| Create a workflow from within a workflow and insert it immediately | Right-clicking on an empty space on the editor | Inserting a Workflow within a Workflow |
| Remove a task from a workflow | Right-clicking on a task | Inserting and Deleting Tasks |
| Link tasks | Using line connectors | Linking Tasks |
| Rearrange the tasks in a workflow | Drag and drop | Rearranging Tasks |
| Copy, paste and replace tasks | Right-clicking on a task | Copying, Pasting and Replacing Tasks |
| Delete the connections between tasks | Using line connectors | Deleting Connections |
| Define the task properties | Right-clicking on a task | Defining Task Properties in Workflows |
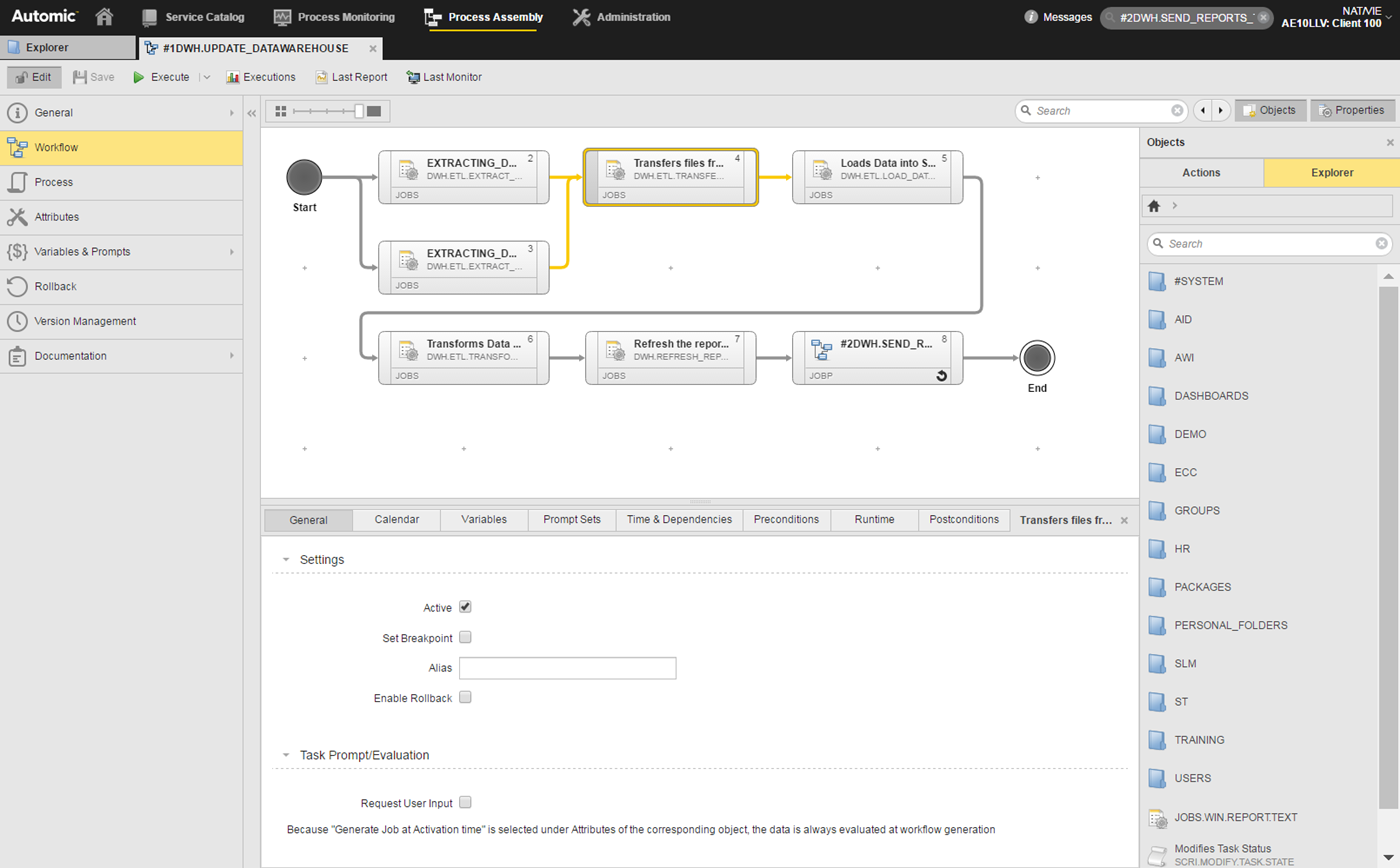
Once on the editor, the tasks turn into boxes that you can link to each other. Selected tasks are encircled by a thick line and display start and end arrows; these are the connector points from/to which you can link.
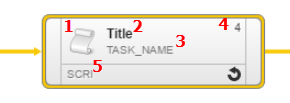
Basic information on the task is displayed on the box:
|
Task box element |
Example |
Meaning |
|---|---|---|
|
1 |

|
Object icon, which is different for each type |
| 2 |

|
Depending on what you have specified in the object definition this can be:
|
| 3 |

|
Either the name or the title of the object. By default this is the name of the object. However, if you'd rather have the title of the object displayed here instead, you or your system administrator can change the AWI configuration settings accordingly. See configuration.properties. |
| 4 |

|
Order of the task in the workflow sequence. |
| 5 |

|
Short name of the object type. |
Task Tooltips
Hover the mouse pointer over a task to display its tooltip. It provides more information on it, for example:

- Object icon, which is different for each type.
- Name of the object, if a title or an alias is defined. Otherwise, this is the first line.
- Order of the task in the workflow sequence.
- Name of the object.
- Whether conditions have been defined or not. The possible values are Preconditions set, Postconditions set or No conditions set.
- Whether the rollback function has been activated or not. You do this in the General tab of the task properties on the pane below.
See also: