Example: Scheduling Tasks with Time and Calendar Conditions
In this example, a Schedule automates the cyclical execution of three tasks, two Workflows (JOBP.X and JOBP.Y) and one Job (JOBS.AA), each with different time constraints.
What Will You Learn?
- How to create a Schedule object and define its basic settings.
- How to add tasks to a Schedule.
- How to define time and Calendar conditions to the tasks.
- How to activate the Schedule object and, if necessary, reset a task with TIMEOUT status.
What Does this Example Cover?
A Schedule object automates the execution of three tasks. Each task should start at a specific time. The following time constraints apply:
- JOBP.X should be executed every day at 7 am.
- JOBP.Y should be executed only on every first day of the month at 01:00 pm (13:00)
- JOBS.AA should be executed every Wednesday at 07.00 pm (19:00)
The Schedule should execute once a day, that is, its Period Duration is 1. A new period should start at 00:00 (Period Turnaround Time). This is the time at which completed tasks are removed from the Schedule and loaded anew to be executed again the next day.
Overview
The following list provides an overview of the steps you must carry out:
- Create and Define the Schedule Object
- Add Tasks to the Schedule
- Apply Time and Calendar Conditions to the Tasks
- Activate the Schedule Object
- ENDED_TIMEOUT Status - Resetting the Task
- What Happens Now?
Create and Define the Schedule Object
- Log in to your Client and open the Process Assembly perspective.
- Navigate to the folder in which you want to create the Schedule object.
- Click Add Object on the toolbar (alternatively, right-click anywhere on the list and select Add > Add Object).
- Select Schedule (JSCH) and click Add.
-
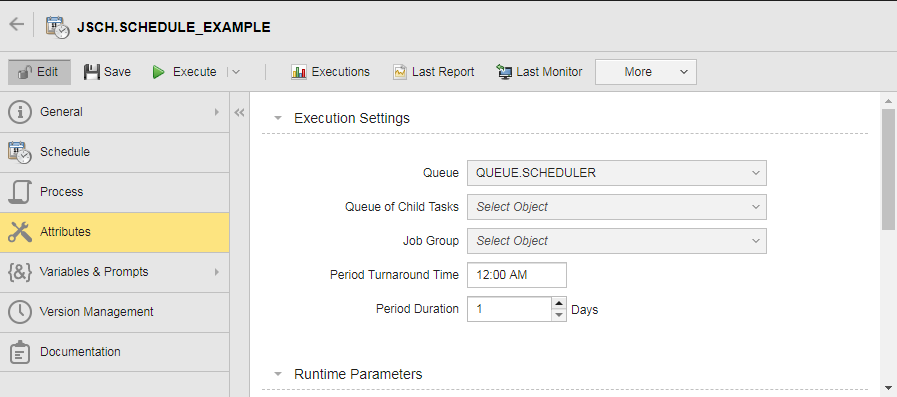
The Schedule definition pages open displaying the Schedule page. Switch to the Attributes page.
Here you define Schedule settings such as its periodicity (in our case one day) and the time at which a new period starts (00:00).

- Open the Schedule page.
- Activate the first row by clicking on it and click the folder icon. This opens the Select Object dialog.
- Search for and select the first task (JOBP.X) and click OK. It is inserted in the task list.
-
Click Add Row on the toolbar and add the second (JOBP.Y) and third (JOBS.AA) tasks to the Schedule.
By default, added tasks are set to Active. This means that they will be executed according to the Schedule and task settings you are about to define. If you deactivate this checkbox, the task remains in the Schedule but it is not executed.
Note: The Schedule now contains all the tasks that it will automate. Now you define the task start times and their calendar conditions.
Apply Time and Calendar Conditions to the Tasks
-
Select JOBP.X to activate it and type the time you want it to start its execution. In our case, this is 07:00.
JOBP.X needs no further time or calendar settings, so you can proceed with the next task.
- Select JOBP.Y to activate it and type 13:00 in Start Time.
- Click the Properties button on the toolbar. This opens a pane at the bottom half of the window that displays the task properties.
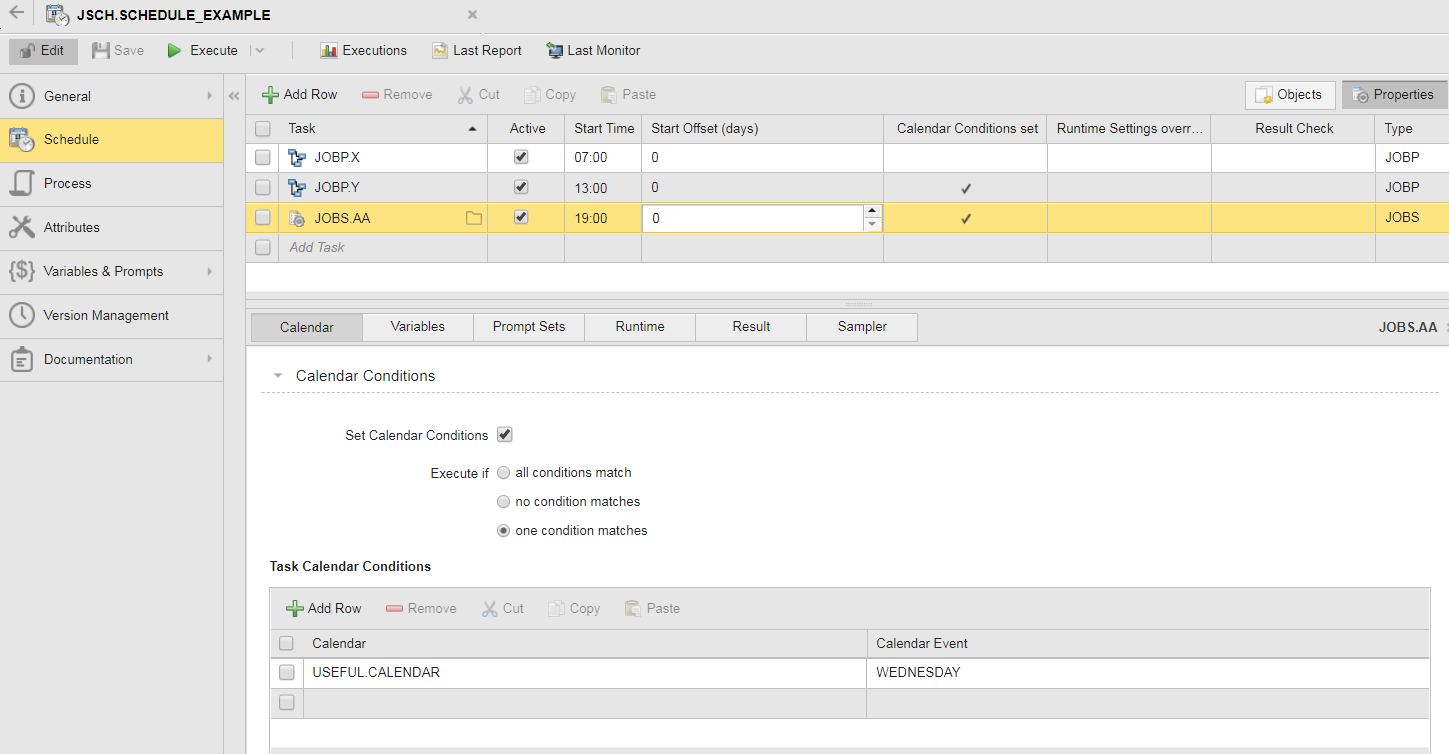
- On the Calendar tab activate the Set Calendar Conditions checkbox.
- Specify when you want the task to be executed taking the Calendar definitions into account. In our case, this is Execute if one condition matches.
-
Add a Calendar.
- Activate the first row by clicking on it or click Add Row to add a new one.
-
Select a Calendar from the list. In our case, it is called USEFUL.CALENDAR.
Alternatively, start typing the name of the Calendar to activate the "select as you type" function.
- Select a Calendar Event. In our case it is FIRST_OF_MONTH.
- Select JOBS.AA to activate it and type 19:00 in Start Time.
-
Assign it a Calendar and a Calendar Event as described above. In our case, this is again USEFUL.CALENDAR but the Calendar Event is WEDNESDAY.
Note: The Schedule object is ready. Now you must activate it.
Expand the Execute button on the toolbar and select Execute Once.The Schedule is started. A message is displayed at the top of the window that confirms it.

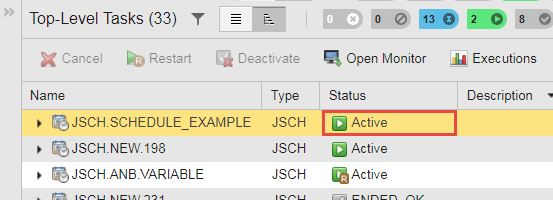
The Schedule is now in Active status, which means that it will execute the first task as soon as all the required conditions are met considering the Schedule Period Turnaround Time and Period Duration as well as the Start Time and Calendar Condition of each task.
You can open the Process Monitoring perspective and search for it in the list of tasks to check it.
To check the status of the tasks in the Schedule and follow their progress, modify its parameters, open the execution data and reports, etc., you need the Schedule Monitor. Click Last Monitor on the toolbar to open it.
ENDED_TIMEOUT Status - Resetting the Task
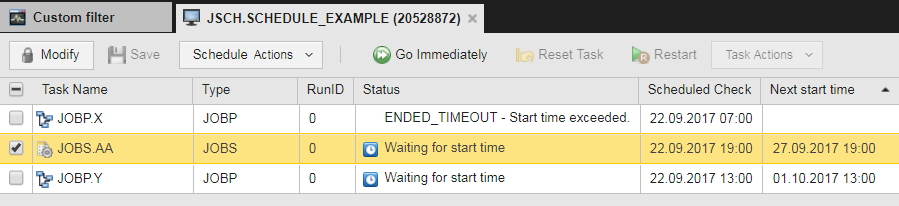
In our example, JOBP.X has a different status, namely ENDED_TIMEOUT - Start time exceeded. This is because its Start Time is set to 07:00 and we have defined the Schedule, added JOBP.X and defined its Start Time after 07:00 today. JOBP.X has no further date/time restrictions, it should execute everyday, that is, today the Schedule has missed an execution.
To activate this task and make sure that the Schedule processes it appropriately, select it and click Reset Task.
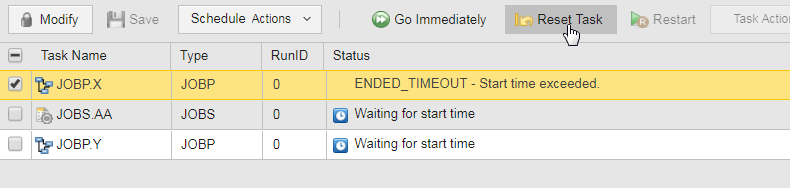
As a result, JOBP.X executes immediately.
-
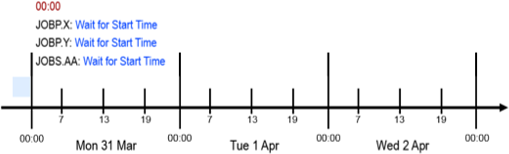
As soon as the Period Turnaround Time arrives, the tasks are Waiting for Start Time.
-
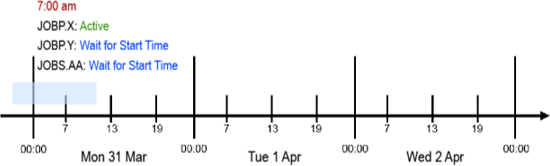
At 07.00 JOBP.X becomes Active; it is executing. The other two tasks are still in waiting status until 13:00 and 19:00 respectively:
-
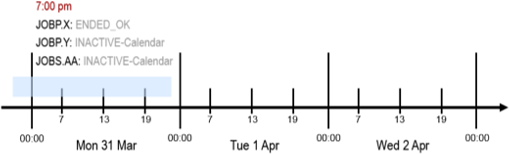
At the end of the day, JOBP.X ended OK whereas the other two tasks are inactive because the Calendar conditions did not allow them to execute. JOBP.Y should be executed on the first day of the month and JOBS.AA on Wednesdays only; neither of these conditions apply on Monday 31 March:
-
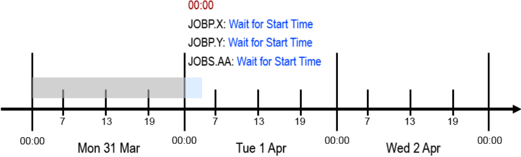
The next day the tasks are loaded again at midnight and are waiting for their Start Times:
-
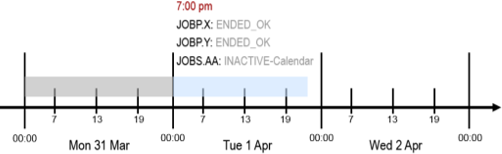
On Tuesday 1 April, JOBP.X executes at 07:00 and JOBP.Y at 13:00 (it is the first of the month so the Calendar conditions are met). JOBS.AA does not execute because it is not a Wednesday:
-
The next day, JOBP.X executes at 07:00 and JOBS.AA at 19:00 (it is a Wednesday). JOBP.Y does not execute because it is not the first of the month:

Useful Links
This example contains references to a number of functions that you might want to know a bit more about.