Open topic with navigation
Adding a Docker Stack Provider
Adding a new Stack Provider is the first step to provision a Deployment Target. After creating the entity, the connection properties to the Docker Remote API of the Docker engine as well as an agent and a login object must be set.
Please note that Docker can only be installed on Ubuntu.
To Add a Docker Provider
- Go to the Release Automation perspective.
- Click the Settings accordion tab.
- Click Stack Providers. Here you can model the Docker engine.
- Click the Create button. The Create Provider dialog is displayed.
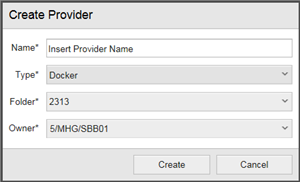
- Enter Docker in the Name field.
- Select the Docker type.
- From the Folder dropdown list, select a folder to store the new provider.
- Define an owner for the provider.
- Click Save.
- Unfold the General accordion tab and select Properties.
- Unfold the Connection Properties section. Here we'll set the connection properties to the Docker Remote API of the Docker engine.
- Enter the Docker Daemon URL (for example: http://123.45.67.89/).
The Docker Daemon URL must be reachable from the host where the deployment manager is running.
- Click Save.
- Check the connection by clicking Test Connection in the General section of the properties to make sure that the Docker engine is up and running.
- In the Default Agent section, click Assign Agent. The agent selected will be used to talk to the Docker engine's API.
- Select a login object.
The Docker provider has been added and contains all required configuration data: host, credentials, repo, etc. The configuration can also be validated from here.
Next steps:
- Creating Stack Templates
- Provisioning the Environment
- Successful Provisioning Checklist &Troubleshooting
Previous steps:
- Checking Folder Permissions and the Customer.config file
- Setting up HSTA
Open topic with navigation