Working with Blueprints
After creating Stack Providers and Stack Templates, as an Administrator, you create Blueprints that contain the required infrastructure to set up a new Environment.
Important! The actions that you can perform depend on your folder permissions. See: Assigning Release Automation Permissions.
This page includes the following:
A Blueprint is the prescription for the creation of a CDA Environment (which, in turn, contains multiple CDA Deployment Targets). A Blueprint consists of a Stack Template and the corresponding Deployment Target types needed to provision the Environment.
Note: A Blueprint can consist of multiple Stack Templates.
- Go to the Release Automation perspective.
- Click the Provisioning accordion tab.
- Select Blueprints.
Note: To see the list of Blueprints where a certain Stack Template is used, open the Stack Template and select the Blueprints tab.
Tip: For more information about how search for entities and narrow down the results, see Advanced Search.
- Go to the Release Automation perspective.
- Click the Provisioning accordion tab.
- Select Blueprints.
- Click the Create button in the toolbar. The Create Blueprint dialog is displayed.
- Enter a name for the Blueprint.
- From the Folder drop-down list, select a folder to store the new Blueprint. If no folder is selected, the Blueprint is stored in the default location.
- Define an owner for the provider. The current user is selected by default.
- Click Create.
-
The properties Properties view is shown. You can optionally add a description to better identify the Blueprint at a later point in time.
- If you want to assign a Stack Template to the Blueprint, click the Stack Templates tab and select one or more Stack Templates from the list.
What to do next:
Changing Properties of Blueprints
Properties can be changed:
- From the Blueprints sidebar displayed next to the table that lists the Blueprints.
- In the Properties section of a Blueprint.
You can change the following properties:
-
General
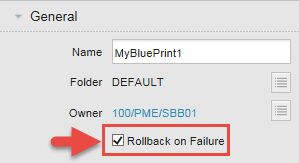
Basic attributes of the Blueprint. You can edit the Name, Folder and Owner.
-
Optionally, select the Rollback on Failure checkbox to remove all CDA entities (for example, Stacks, Deployment Targets) and physical resources (for example, virtual machines) created so far if the provisioning process fails. See: Rolling Back a Failed Provisioning Process.
-
-
Description
The description is limited to 2000 characters.
-
Actions
Actions are located in the toolbar. They can be also triggered from the context menu displayed after right-clicking the entity. You can trigger the following actions (depending on your permissions):
- Duplicate: duplicates the Blueprint
- Export: exports the Blueprint definition in JSON format.
- Delete: deletes the Blueprint.
-
Archive: archives the selected entity. If an entity is archived, Restore is available (see also: Archiving Entities)
Note: Archived Blueprints cannot be provisioned.
-
Errors and Warnings
This panel shows errors and warnings in the context of the current entity. If there are no errors or warnings, the panel is not displayed.
-
Custom Properties
The selected object may have more properties and property groups defined by the administrator. When defined, these properties are shown in the sidebar as separate panels and can be edited by you.
- Go to the Release Automation perspective.
- Click the Provisioning accordion tab.
- Select Blueprints.
- Open the Blueprint you want to export.
- Expand the Export accordion tab and click JSON. The Blueprint and the Stack Templates assigned (if any) are displayed in JSON format.
Note: You can copy the text to the clipboard to create another similar Blueprint via the REST API.
- Go to the Release Automation perspective.
- Click the Provisioning accordion tab.
- Select a Blueprint from the list.
- Click the Duplicate icon in the toolbar. The Duplicate Blueprint dialog is displayed.
- Enter a name for the duplicated Blueprint.
- Select a folder to store it.
- Click Create.
There are two starting points to provision Blueprints:
- From the Environments list.
- From the Blueprints list.
This section describes how to provision Blueprints from the Blueprints list.
Note: Archived Blueprints cannot be provisioned.
To Provision Blueprints
- Go to the Release Automation perspective.
- Click the Provisioning accordion tab.
- Select Blueprints.
- Click the Provision button in the toolbar. The Provision Environment from Blueprint dialog is displayed.
- Enter a name for the new Environment.
- From the Folder drop-down list, select the folder where you want to store your Environment.
- Define an owner. The current user is selected by default.
- Click Provision.
Now the deployment Workflow can be executed.
-
Right-click the entity and select Delete.
Note: You may only delete the entity when you have the appropriate permission on the containing folder (see Security Concept in CDA) and all of the listed conditions are met.
Conditions to delete entities of type Blueprints:
- Blueprints can be removed without restrictions.