Defining the User Settings
Here you define the users basic data, activate/deactivate it, define the password policy, assign a calendar, etc.
To Define a User Object - User Settings
-
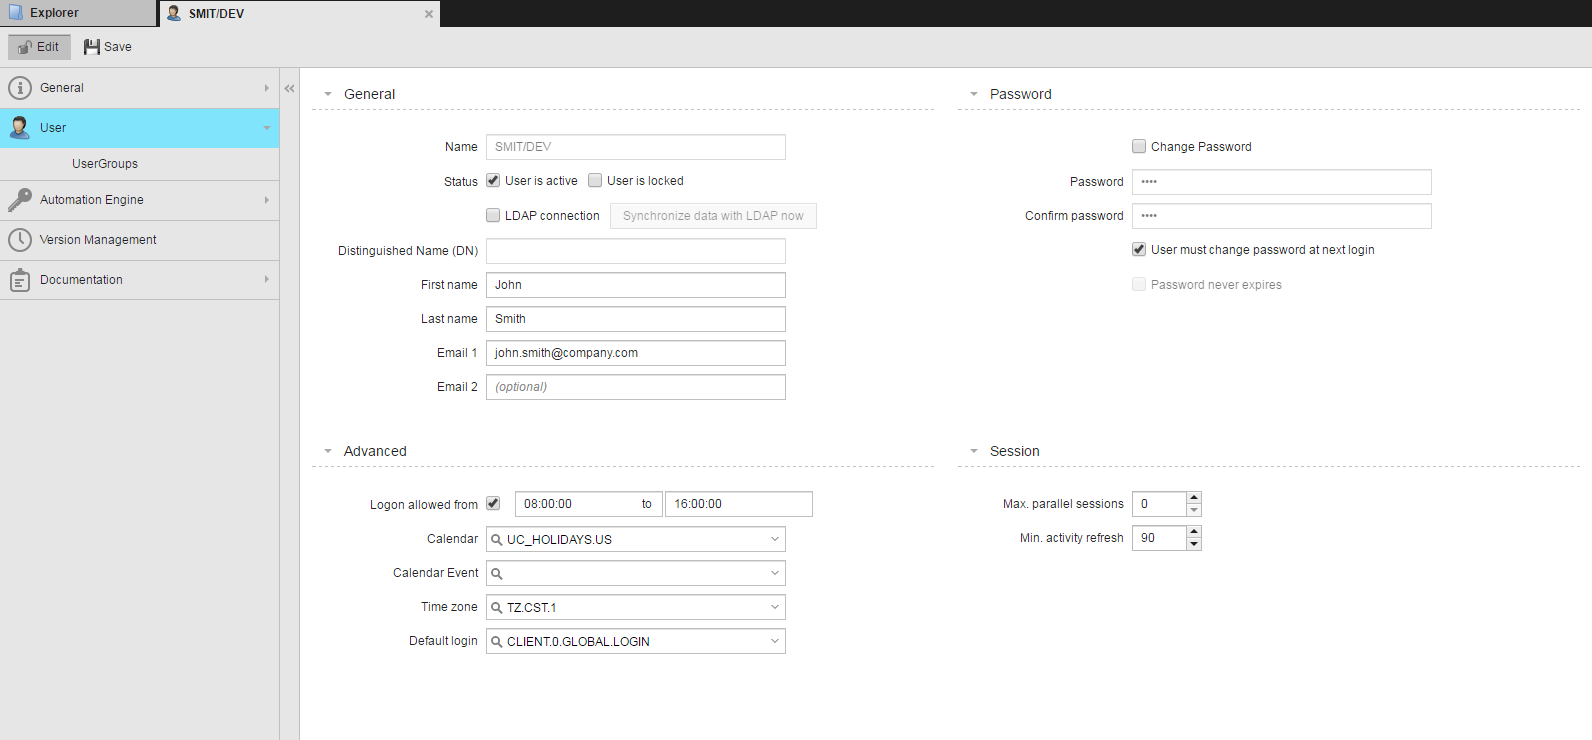
 Specify the General settings
- The Name field is populated with the entry you made upon adding the object. You can change it using the rename function. See Renaming Objects/Folders.
-
A new user is active by default. Activate User is locked to deactivate it.
Entering the wrong password multiple times can result in locking the user. Also if a user is deactivated, tasks associated to that user object continue running.
-
You can select the LDAP connection option only when LDAP is configured for the Automation Engine
This means that the user login will be authenticated by a directory service such as the Microsoft Active Directory, rather than by the system.
When you activate this option most of the fields on the page are disabled because data is retrieved from the user definition in the other directory service. The only ones that you can still specify here are the user Status options and Email 2.
Activating LDAP connection also activates the Synchronize data with LDAP now button. Click it to fill the fields with the user data from the directory service. The values that are retrieved from the LDAP settings will be grayed out and the fields disabled.
-
The Distinguished Name (DN) field is only available if the LDAP connection is activated.
For an Oracle Directory server as LDAP server you have to define at least one user in this field. Additional users may be synchronized.
The parameter VALUE in the UC_LDAP_EXAMPLE System variable will be ignored.
- The user First/Last Name are displayed in various areas of the User Interface.
- Optionally enter the E-Mail 1/E-Mail 2 addresses. The user can be alerted this way via an e-mail SNMP connection.
-
Assign this user a Password policy
By default, the password of new users is always pass. It must be changed either immediately or with the next logon of the user.
The administrator defines the password criteria in the UC_CLIENT_SETTINGS variable.
If users are in various international locations, special national language characters (umlauts (ä), accents (è), special letters (ß), etc.) should be avoided. Not all keyboards in all countries support such characters.
- Activate Change Password to assign the user a new password. This activates the password input fields.
- Enter the new password twice, once in Password and then again in Confirm password.
- Alternatively, activate User must change password at next login. The user will have to login first using the assigned password and change it after that.
- Activate Password never expires if your company's policy does not require regular password changes.
-
Specify the Advanced settings
- In Logon allowed from to specify the period of time in hours and minutes within which the user can logon to the system. Outside this time, any logon attempt will be denied.
- Select the Calendar and a Calendar Event that contains the dates on which the user will be able to logon to the system. Logon attempts outside these dates will be denied.
- Select the Time Zone that will be applied to this user. If you leave this option empty, the client's predefined Time Zone is used.
- Optionally, in Default Login select the Login object that contains the necessary information for the agent.
-
Select the user Session settings
-
In Max. parallel sessions select the maximum number of parallel logins you will allow for this user.
Selecting 0 enables unlimited parallel access.
-
In Min. activity refresh select the minimum time interval (in seconds) for refreshing the display.
If the user clicks the Refresh button between the defined intervals, the system will ignore the new refresh request and finish processing the previous one. This prevents the system from getting jammed up with multiple refresh requests in rapid succession.
- Switch to the User Group page, where you can assign the current user to one or more user groups. This will determine the user's rights to objects and privileges. See Assigning the User to User Groups.
See also: